Deploy a SingleInstance Database with a static NFS filesystem
Introduction
Static Persistence
In this lab we'll be using one of the Static Persistence options for our database, so we'll create manually a persistent volume and refer to it in our database configuration file.
You could use a block volume for this, but the result would be like in the first lab: this volume can only be mounted on a single node, so no failover options.
Therefore we'll be using an NFS volume, which can be mounted on all 3 nodes at once and allows us to demonstrate what happens when a node goes down.
Assumption : we assume you ran the first lab, so you have created the various secrets required to pull down and spin up a database container.
Estimated Time: 20 minutes
Objective
- Create a database running on Kubernetes, using an NFS volume as persistency store
Prerequisites
- You have executed Lab 2: Install the Oracle Database Kubernetes Operator
Task 1: Prepare your NFS persistent volume
On the OCI console, navigate to Storage, section File Storage, and select Mount Targets Create a new mount target using the Create Mount Target button.
- Make sure to select the Virtual Cloud Network that was created as part of the OKE Cluster creation - it will have a name starting with
oke-vcn-quick-... - Select the Subnet where the kubernetes nodes are located. This subnet has a name starting with
oke-nodesubnet-quick-... - Leave the other parameters on their default values
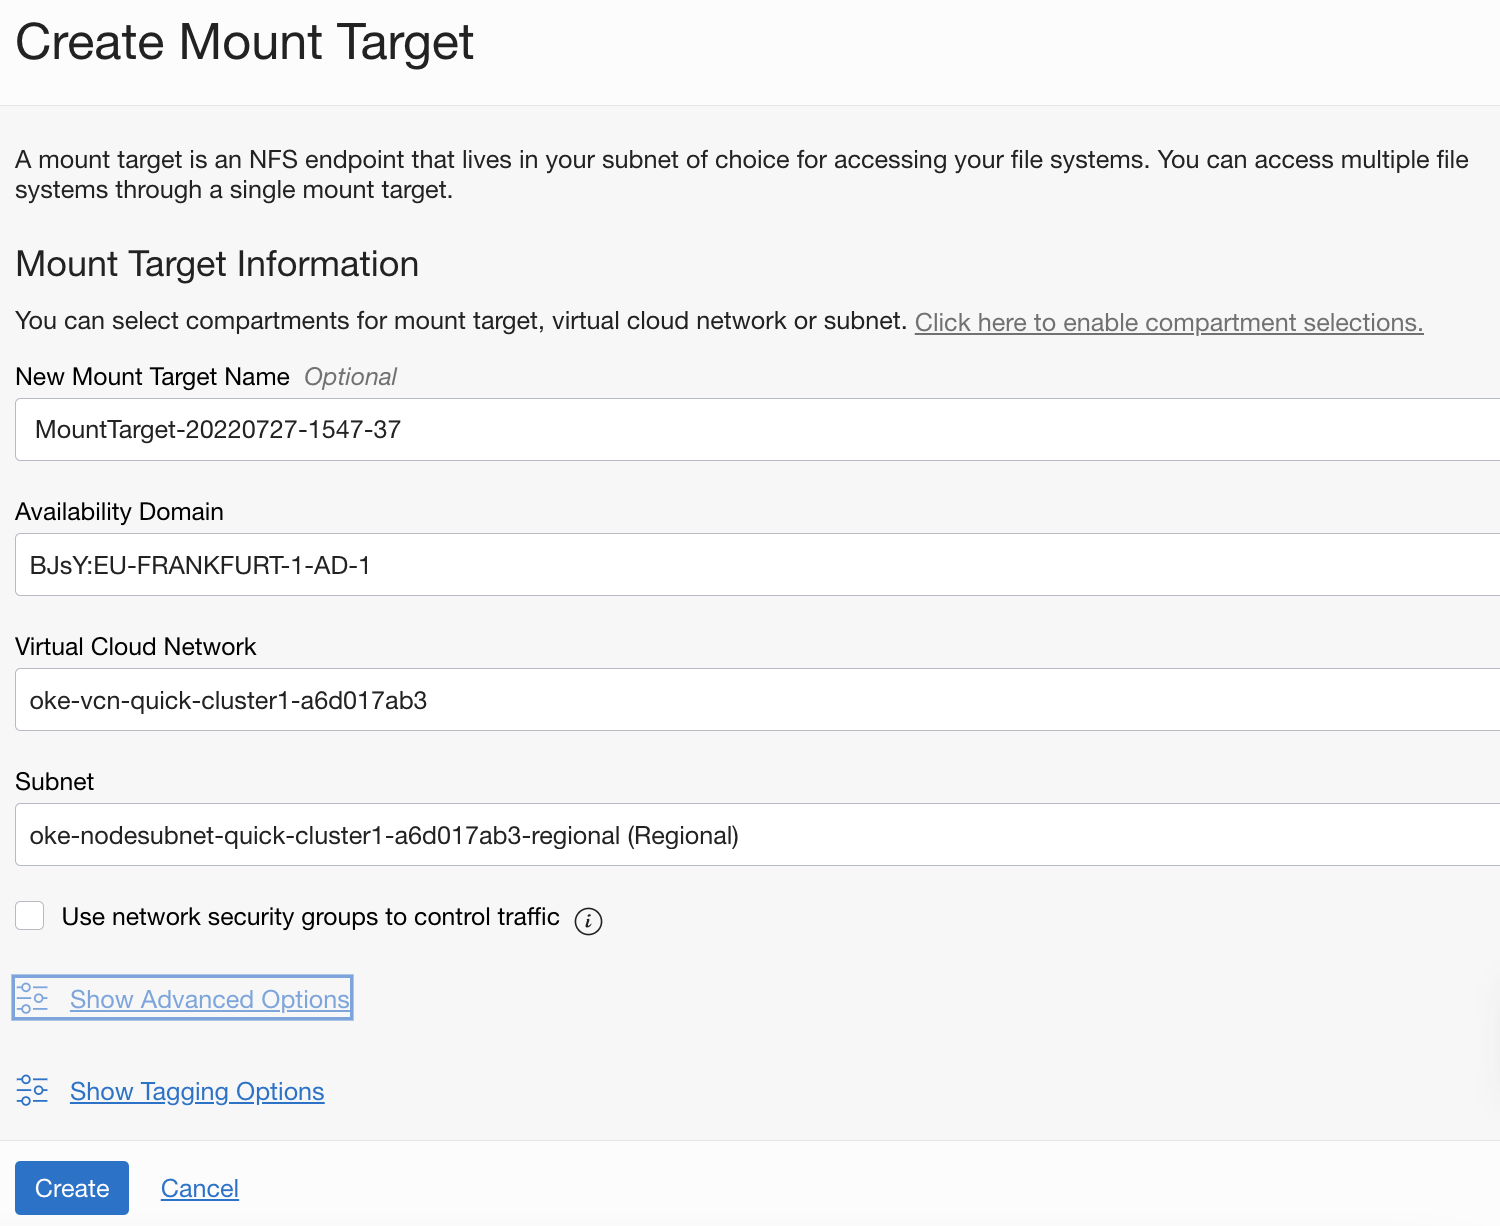
You can now hit the Create button.
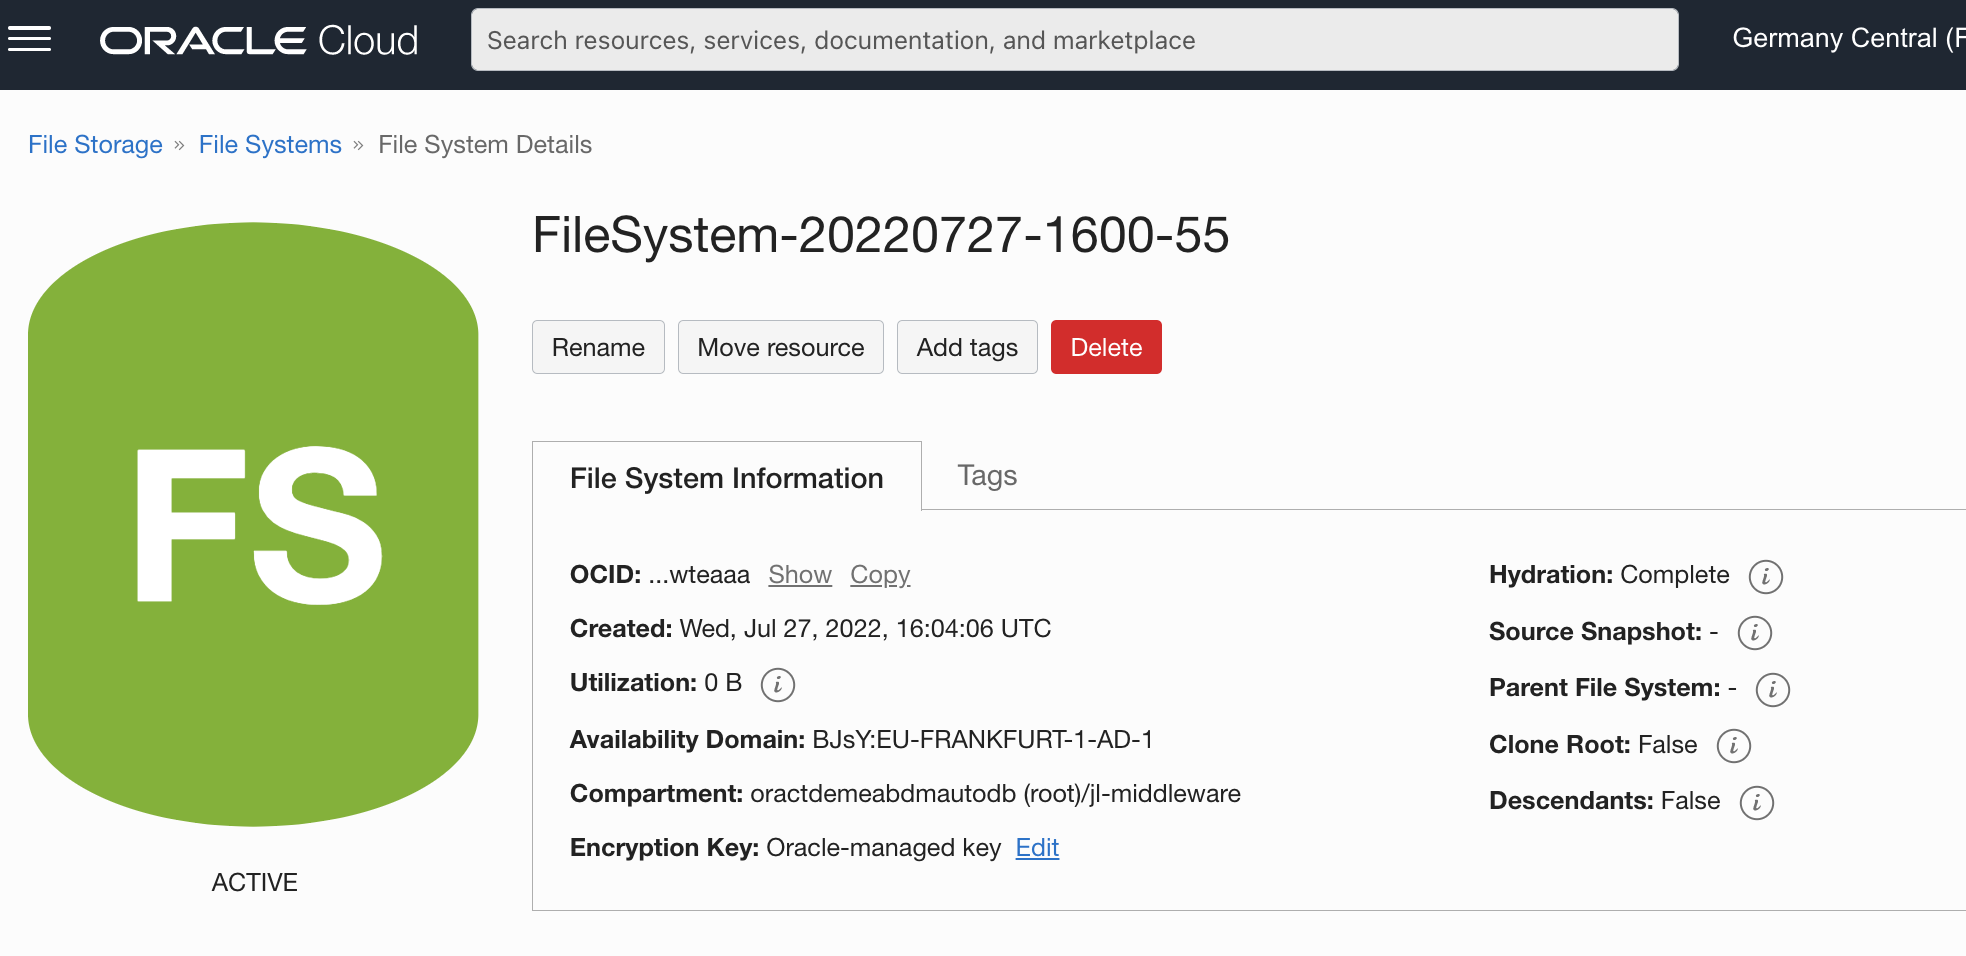
- After the creation you are redirected to the Details screen of the mount point.
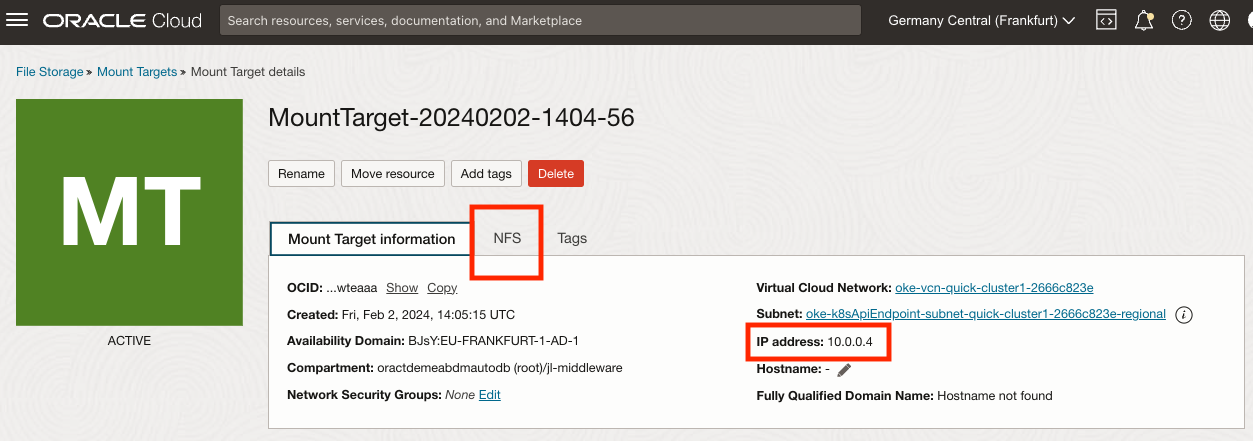
Note down the IP Address of the mount point, you will need this information later in the setup. In the example above, the address is 10.0.0.4
Before we move on, you need to change the Reported Size of the mount target. To do this, select the tab NFS to display the NFS parameters of the moint point:
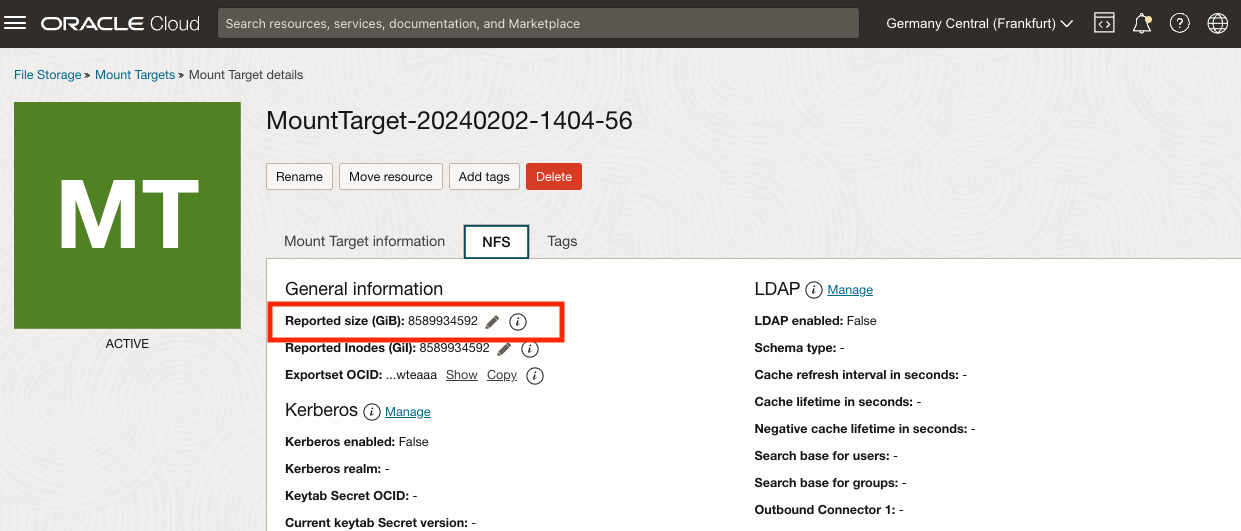
Now use the pencil icon on the side of the Reported Size parameter:
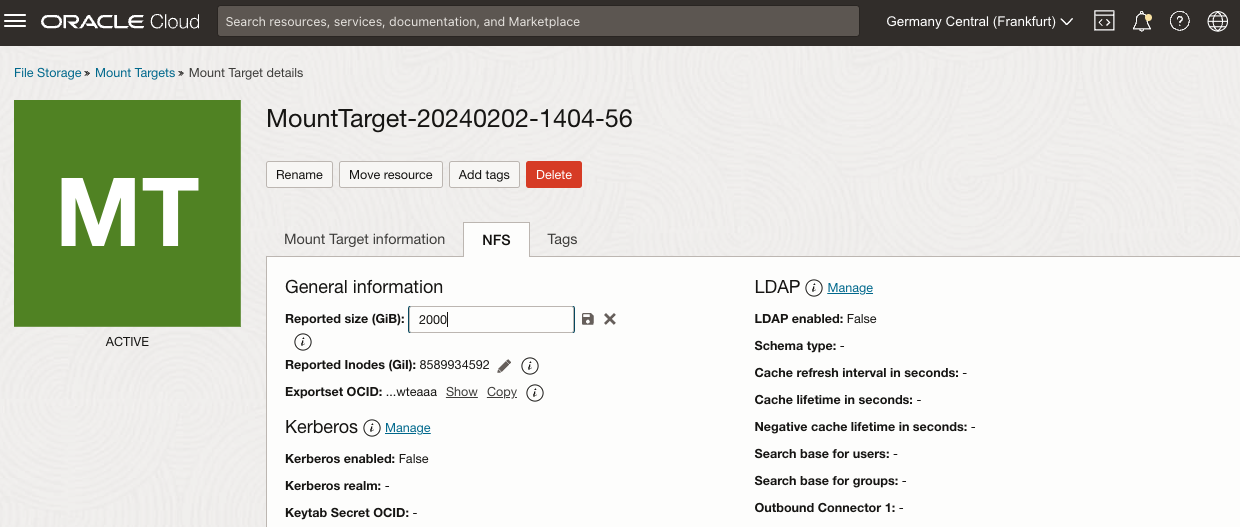
After clicking the pencil, enter a value of 2000 GiB in the edit box, and hit the Save icon
- Make sure to select the Virtual Cloud Network that was created as part of the OKE Cluster creation - it will have a name starting with
Now navigate to the File Storage, then File Systems menu, and click the Create File System button
Keep the default workflow: File System for NFS
All parameters are pre-filled, just validate the selected Mount Target is indeed the mount target you just created
Take note of the Export Path : you will need this information later in the database configuration file. In the below example the path is
/FileSystem-20220727-1600-55
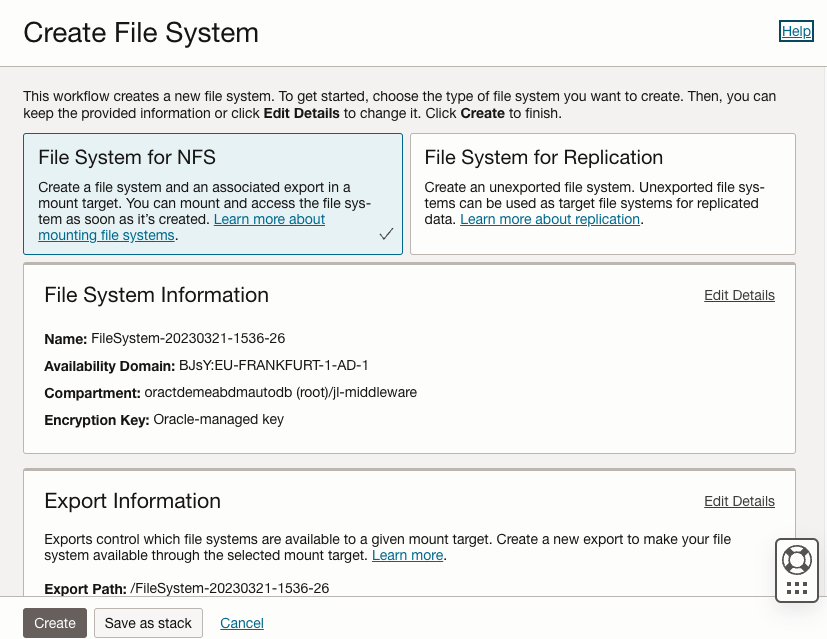
Click the Create button to finish the operation
The Utilization of the volume is currently 0 B: the volume has not yet been used. We'll see how this parameter will increase once the DB is created.
Copy and store the OCID of the filesystem (you can use the Copy button), you will need this info later.
To finalize the configuration of the volume we need to open the appropriate ports on the subnet used to allow the Kubernetes nodes and the NFS volume to communicate with each other :
Navigate to Networking, and select Virtual Cloud Networks
Select the VCN that was created for the Kubernetes cluster (name staring with
oke-vcn-quick-...)Select the Subnet used for the kubernetes nodes (name starting with
oke-nodesubnet-quick-...)Select the security list of the subnet, with a name starting with
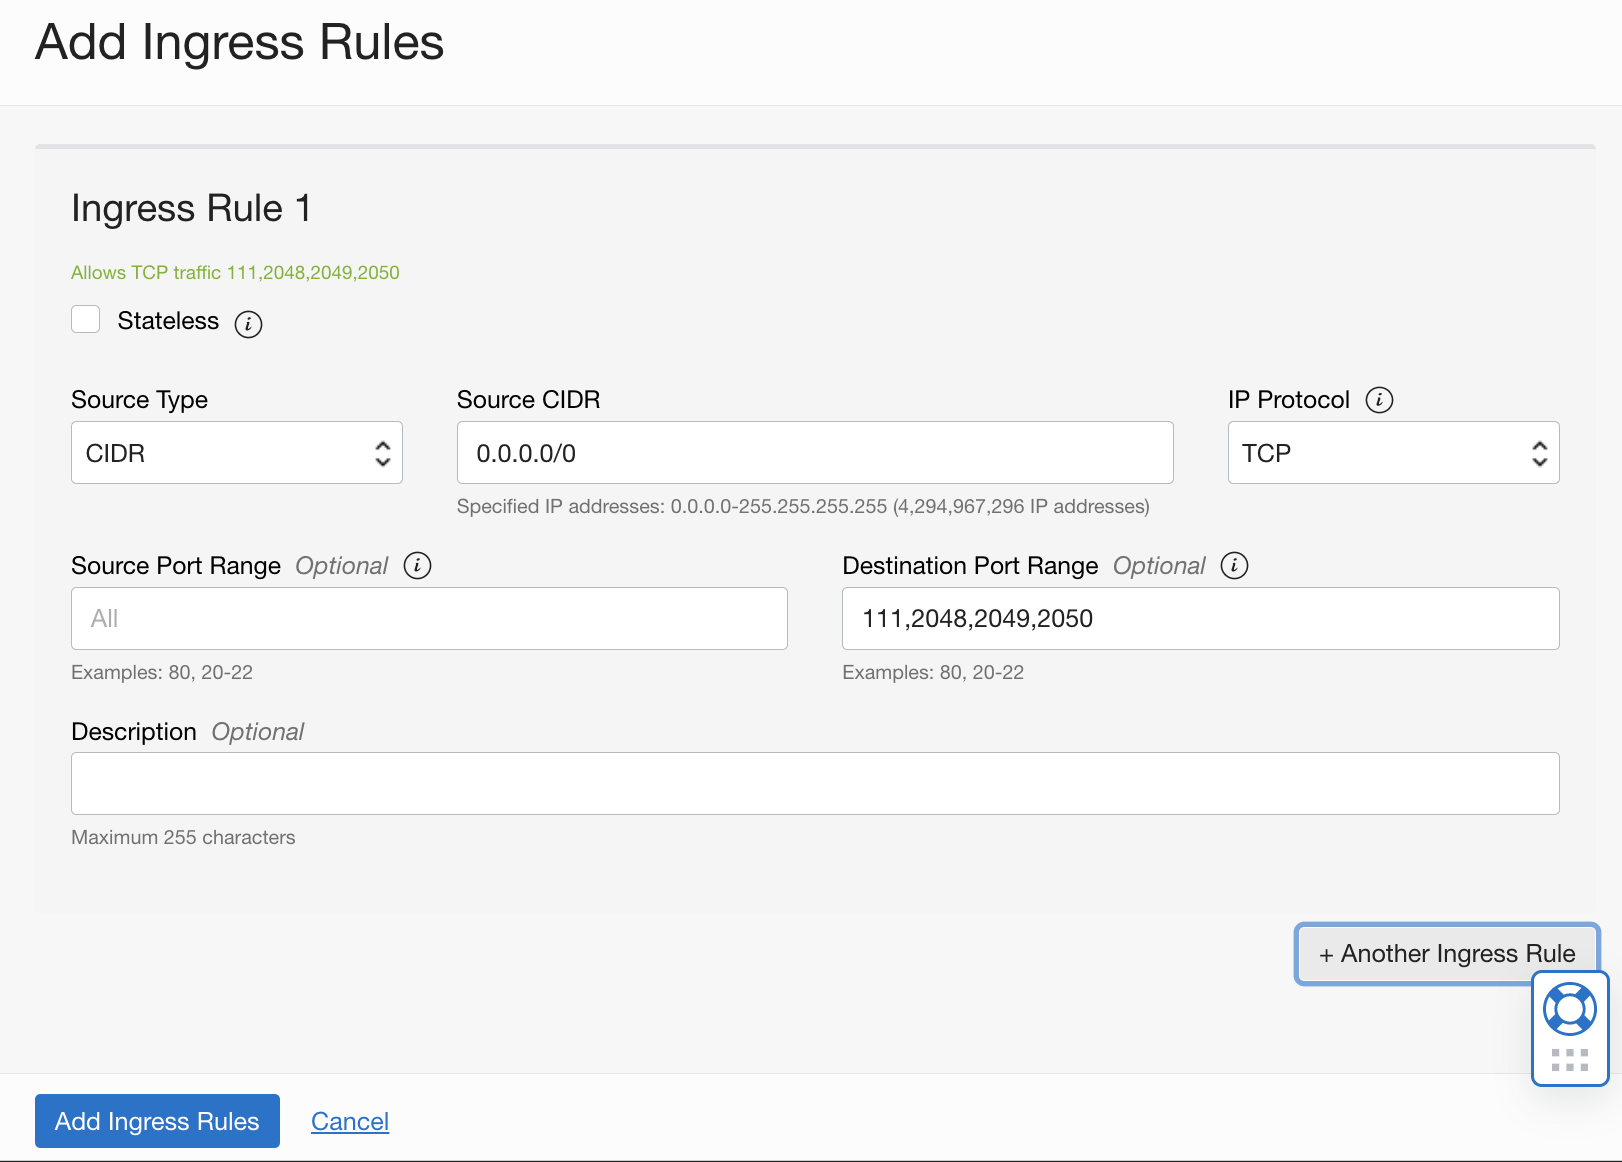
oke-nodeseclist-...Click the Add Ingress Rule button and create a Stateful ingress from ALL ports in source CIDR block to TCP ports 111, 2048, 2049, and 2050 :
- Source CIDR : 0.0.0.0/0
- IP Protocol: TCP
- Destination Port Range: 111,2048,2049,2050
Repeat the operation but this time specifying the UDP protocol to set a Stateful ingress from ALL ports in source CIDR block to UDP ports 111 and 2048:
- Source CIDR : 0.0.0.0/0
- IP Protocol: UDP
- Destination Port Range: 111,2048
Now select the Egress Rules resources on the left of the screen
Here click the Add Egress Rules to create a Stateful egress from TCP ALL ports to ports 111, 2048, 2049, and 2050 in destination CIDR block.
- Destination CIDR : 0.0.0.0/0
- IP Protocol: TCP
- Destination Port Range: 111,2048,2049,2050
Repeat the operation but this time specifying the UDP protocol to set a Stateful egress from UDP ALL ports to port 111 in destination CIDR block.
- Destination CIDR : 0.0.0.0/0
- IP Protocol: UDP
- Destination Port Range: 111
Next we need to create a kubernetes persistent volume that points to the configuration we just created. To do this, we'll use the OCI Cloud shell command interface
Edit a new file to contain the definition of the persistent volume, using the
viornanoeditorFile name : pv.yaml
Paste the below content into the file
apiVersion: v1
kind: PersistentVolume
metadata:
  name: nfs-vol-1
spec:
  storageClassName: oci-fss
  capacity:
    storage: 224Gi
  volumeMode: Filesystem
  accessModes:
   - ReadWriteMany
  persistentVolumeReclaimPolicy: Retain
  csi:
    driver: fss.csi.oraclecloud.com
    volumeHandle: "<OCID of the file system>:<Mount Target IP Address>:/<Export Path>"
Replace the placeholders for the parameter
volumeHandle:<OCID of the file system>: this is the OCID you noted down after the creation of the filesystem<Mount Target IP Address>: the IP address of the mount point you noted earlier<Export Path>: the export path you noted earlierExample
volumeHandle:
volumeHandle: "ocid1.filesystem.oc1.eu_frankfurt_1.aaaaaqe3bj...eaaa:10.0.10.156:/FileSystem-20220713-1036-02"Now apply the config using
kubectl:kubectl apply -f pv.yamlThis should show you :
persistentvolume/nfs-vol-1 created
Task 2: Creating the DB Config file for the Operator
To initiate the creation of the database by the Operator we'll have to create a config file describing the desired database setup. For this lab we'll use the file singleinstancedatabase_fss.yaml which contains a configuration ready to use for this part of the lab.
We'll be highlighting some of the sections of this file that differ from the first lab we ran:
In the top level section of the file, the parameter
namedefining the name of the configuration is now sidb-test2apiVersion: database.oracle.com/v1alpha1 kind: SingleInstanceDatabase metadata: name: sidb-test2 namespace: defaultThe section
persistencedefines the type of persistent storage to use. In this case we'll use the classoci-fss. The parameteraccessModeis now defined asReadWriteMany, as we'll be running multiple pods that all have access to the volume. Only one pod will hold the active database, the others are in stand-by. The parametervolumeNameis the link to the Persistent Volumenfs-vol-1we defined earlier.persistence: size: 224Gi storageClass: "oci-fss" accessMode: "ReadWriteMany" volumeName: "nfs-vol-1"And finally the parameter
replicasspecifies how many pods we want to have up and running. We'll be running a pod on each node of the cluster, so we'll set this parameter to 3.replicas: 3
Task 3: Launching and tracking the DB creation
Launching the creation of the database is done through the same single command as in the first lab, specifying the new configfile.
Apply the config file to initiate the DB creation :
kubectl apply -f https://c4u04.objectstorage.us-ashburn-1.oci.customer-oci.com/p/EcTjWk2IuZPZeNnD_fYMcgUhdNDIDA6rt9gaFj_WZMiL7VvxPBNMY60837hu5hga/n/c4u04/b/livelabsfiles/o/developer-library/singleinstancedatabase-fss.yamlYou can validate the process of creation of the database as in the previous lab, using the below set of commands :
kubectl get singleinstancedatabase sidb-test2 kubectl describe singleinstancedatabase sidb-test2 kubectl get pod kubectl describe pod sidb-test2Note you will see 3 pods, choose 1 to validate correct launch of the pods
Some extra commands that might be useful to debug any issues:
kubectl logs sidb-test2-<your_id> kubectl get pod -n oracle-database-operator-system kubectl logs -n oracle-database-operator-system oracle-database-operator-controller-manager-<your-id>Once the database is up and running, you can return to the OCI Console, navigate to the File System menu and verify that the the Utilization of the volume has increased, typically something like 4 GiB
Validate you can login with sqlplus :
- Get the connect string with the below command :
kubectl get singleinstancedatabase sidb-test2 -o "jsonpath={.status.pdbConnectString}" && echo -e "\n"- Use your string to compose a command looking like the below, replacing Your_Passwd with the one you specified:
sqlplus sys/Your_Passwd@132.145.249.43:1521/ORCLPDB1 as sysdba
Congratulations, your database is up and running, and you are able to connect to it through Enterprise Manager and Sqlplus !
You may now proceed to the next lab, where we'll look at what happens when the node running the DB goes down!
Acknowledgements
- Author - Jan Leemans, July 2022
- Last Updated By/Date - Jan Leemans, January 2024