Visualize Schools on a Map
Introduction
In this lab, you learn to create a Map region and display the schools as Points on the map. You also learn to customize and filter results on the map based on faceted search results.
Note: The screenshots in this workshop are taken using Dark Mode in APEX 24.2
Estimated Time: 10 minutes
Watch the video below for a quick walk-through of the lab.
Objectives
In this lab, you will:
- Create a Map region
- Link the Faceted Search region with the Map region
- Display Cards region and the Map region in two different tabs
- Filter Schools based on spatial distance
Task 1: Create a Map Region
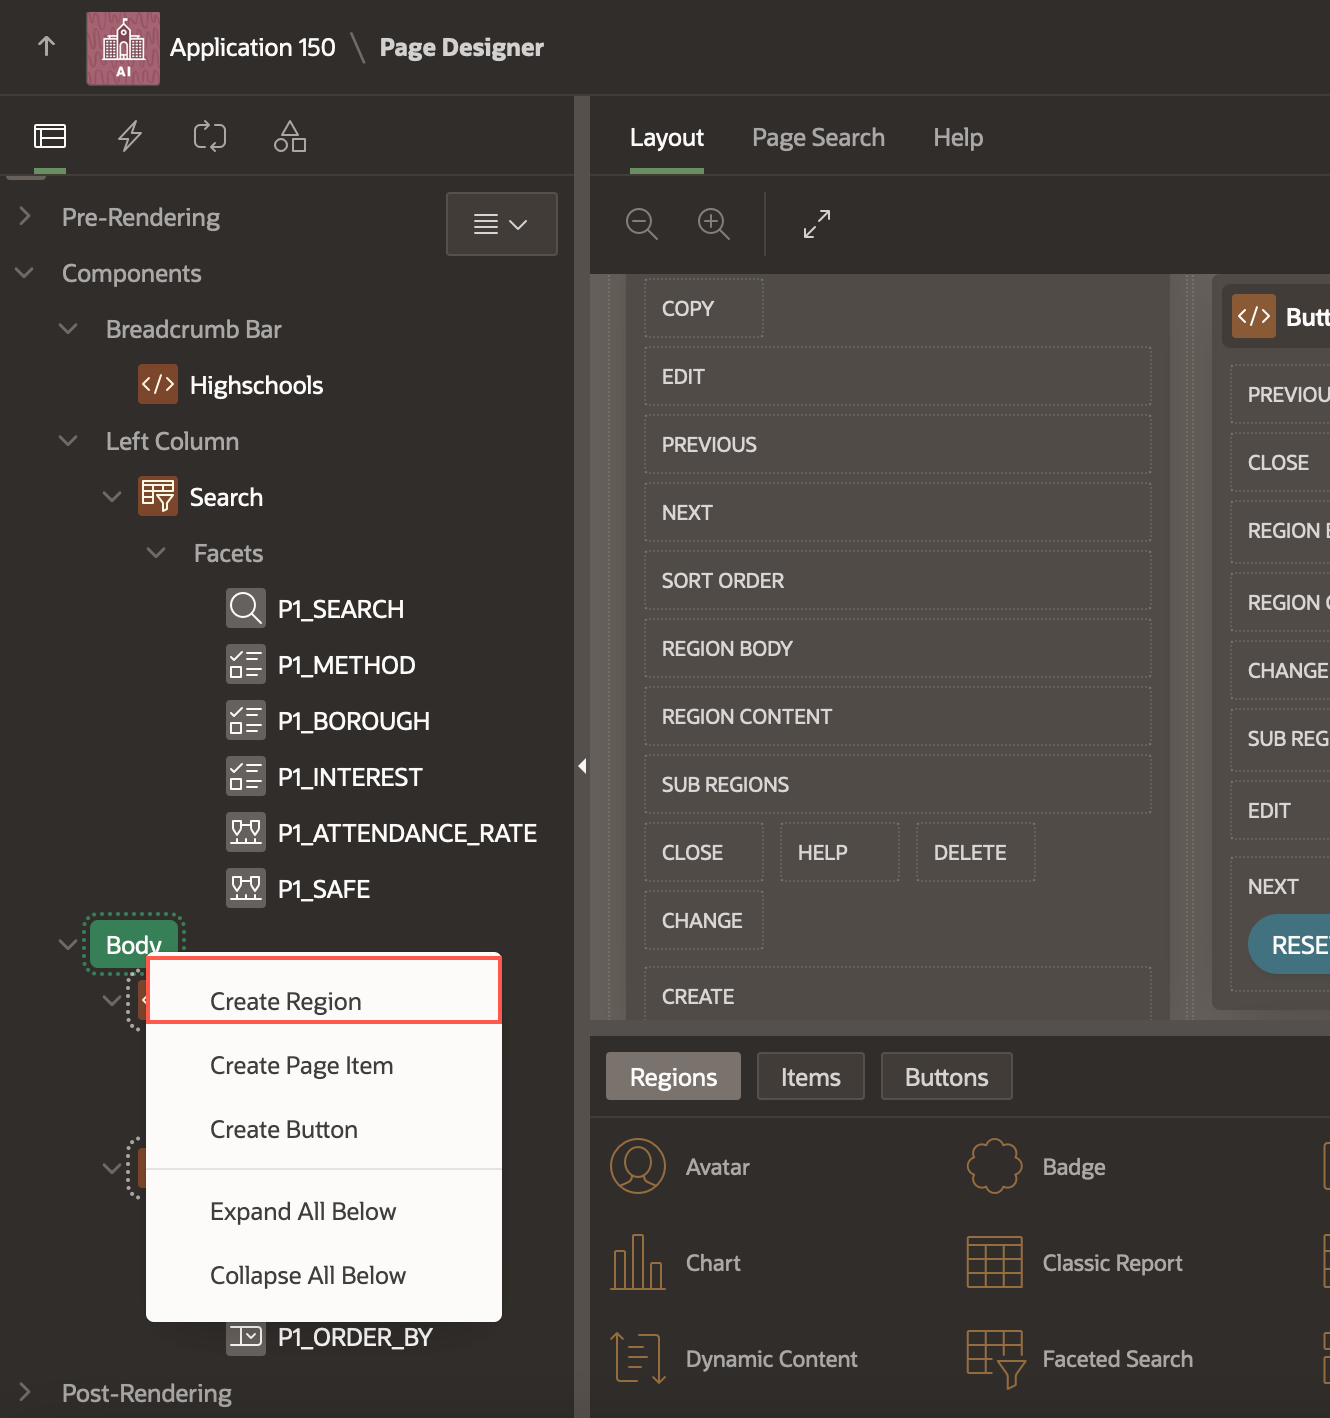
Navigate to Page 1 (Search and Apply) in the Page Designer. In the rendering tree, right-click Body and select Create Region.
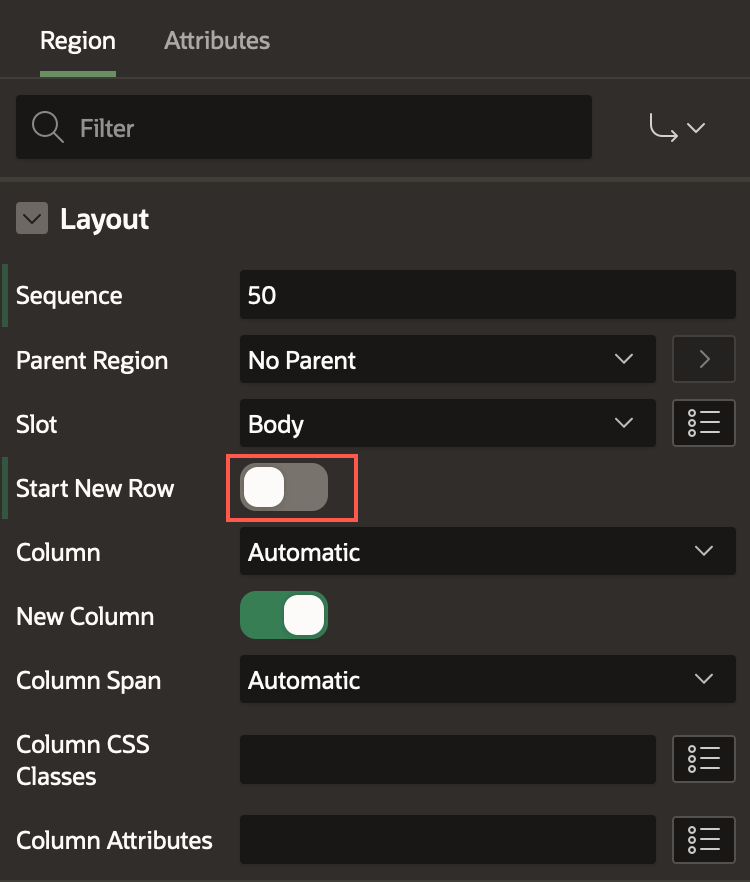
Enter/select the following in the property editor:
Under Identification:
- Name: Map
- Type: Map
Under Source:
- Location: Local Database
- Table Name: HIGHSCHOOLS
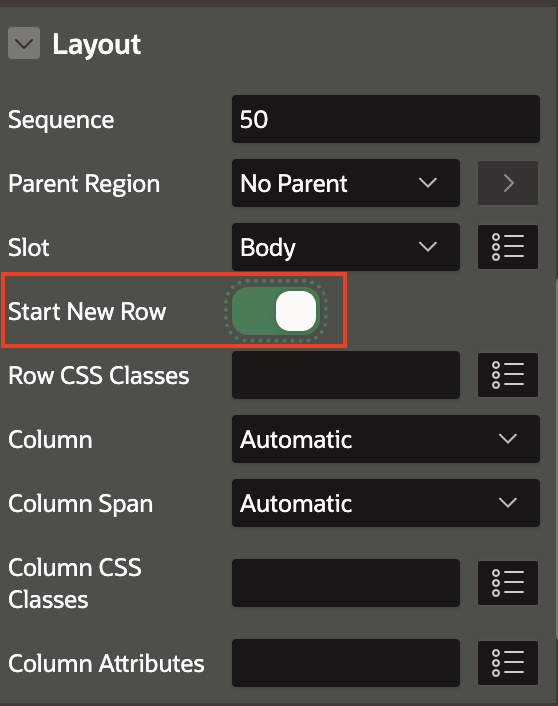
Layout > Start New Row: Toggle the button to turn it OFF

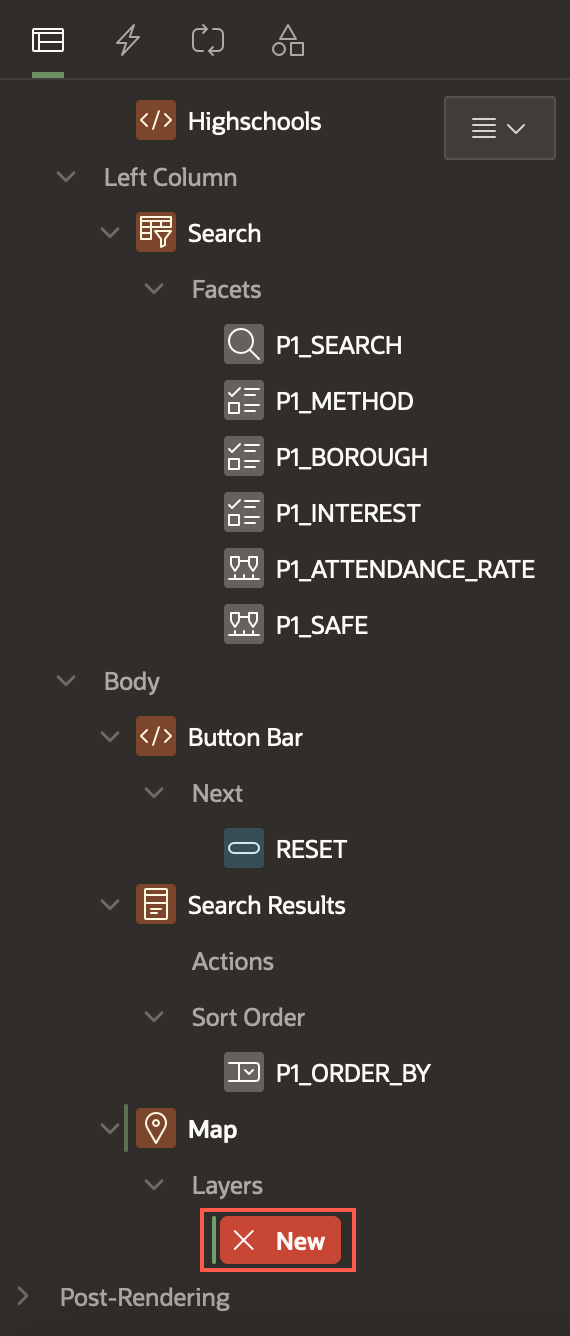
In the rendering tree, select the New layer created under Map.
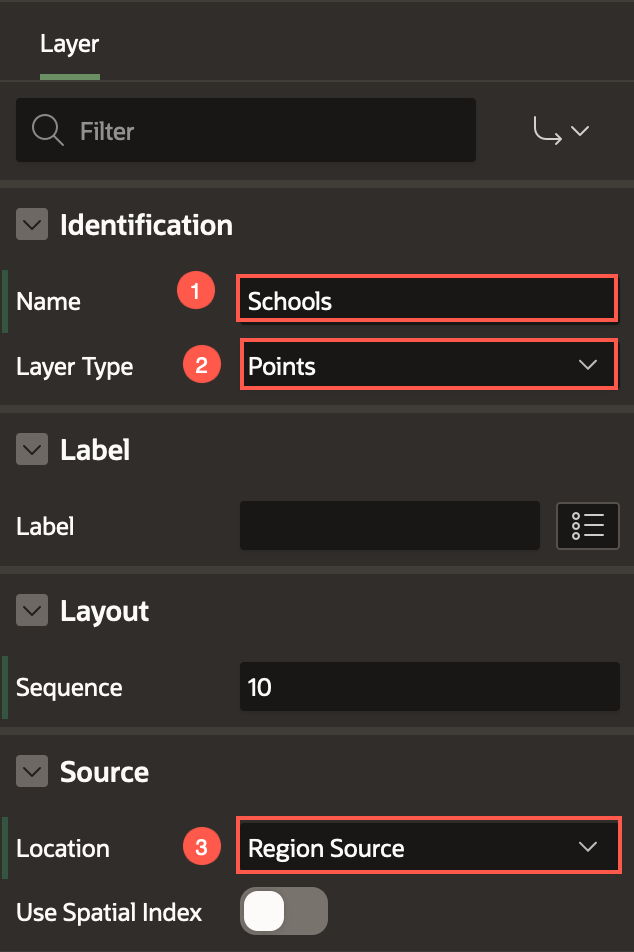
In the Property Editor, enter/select the following:
- Under Identification:
- Name: Schools
- Layer Type: Points
- Source > Location: Region Source
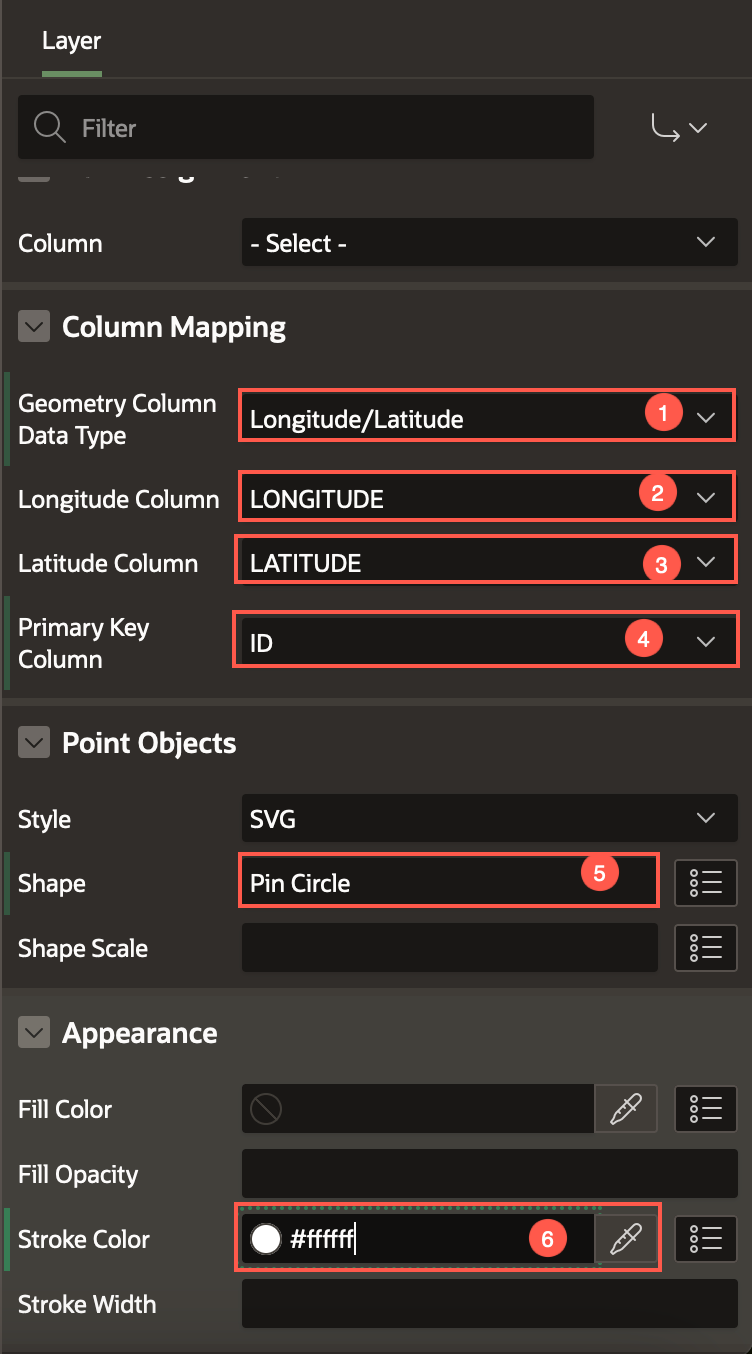
Under Column Mapping:
- Geometry Column Data Type: Longitude/Latitude
- Longitude Column: LONGITUDE
- Latitude Column: LATITUDE
- Primary Key Column: ID
Point Objects > Shape: Pin Circle
Appearance > Stroke Color: #ffffff
- Under Identification:
In the rendering tree, under Map, right-click Layers and select Create Layer.
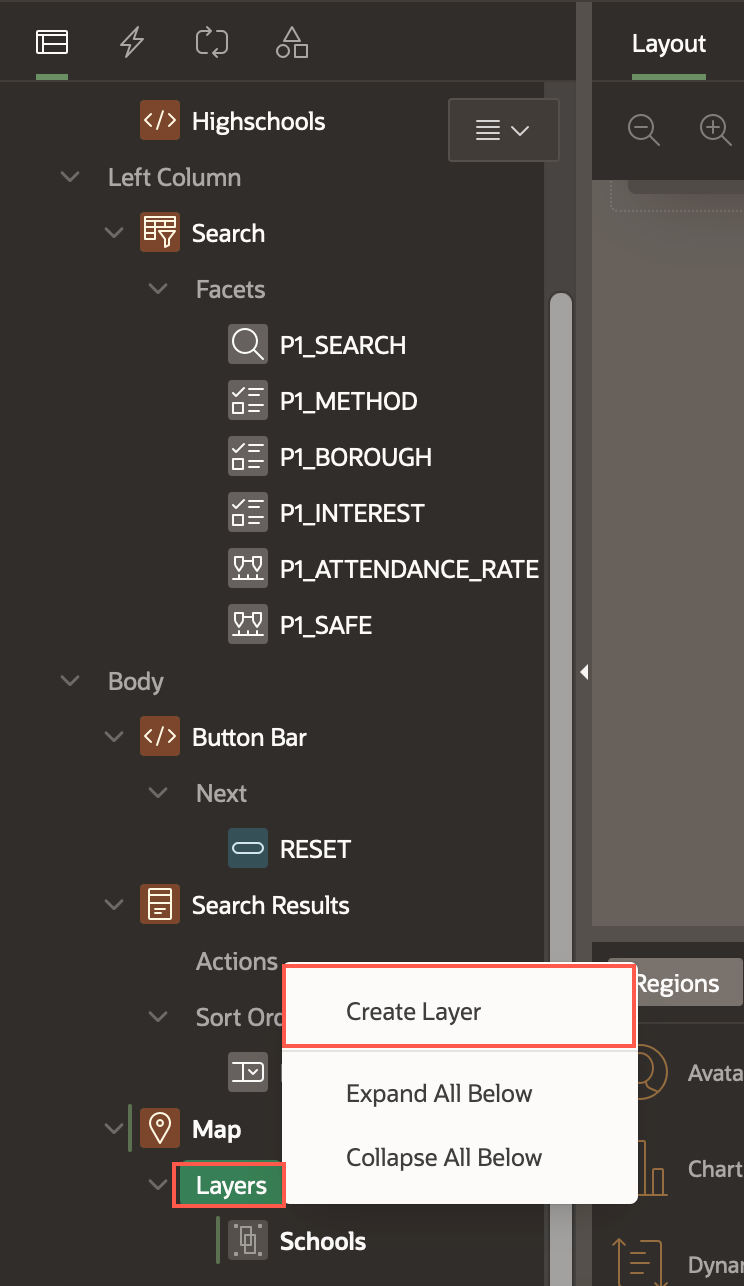
In the property editor, enter/select the following:
Identification > Name: Current Position
Under Source:
- Type: SQL Query
- SQL Query:
SELECT 40.748817 AS LATITUDE, -73.985428 AS LONGITUDE FROM DUAL;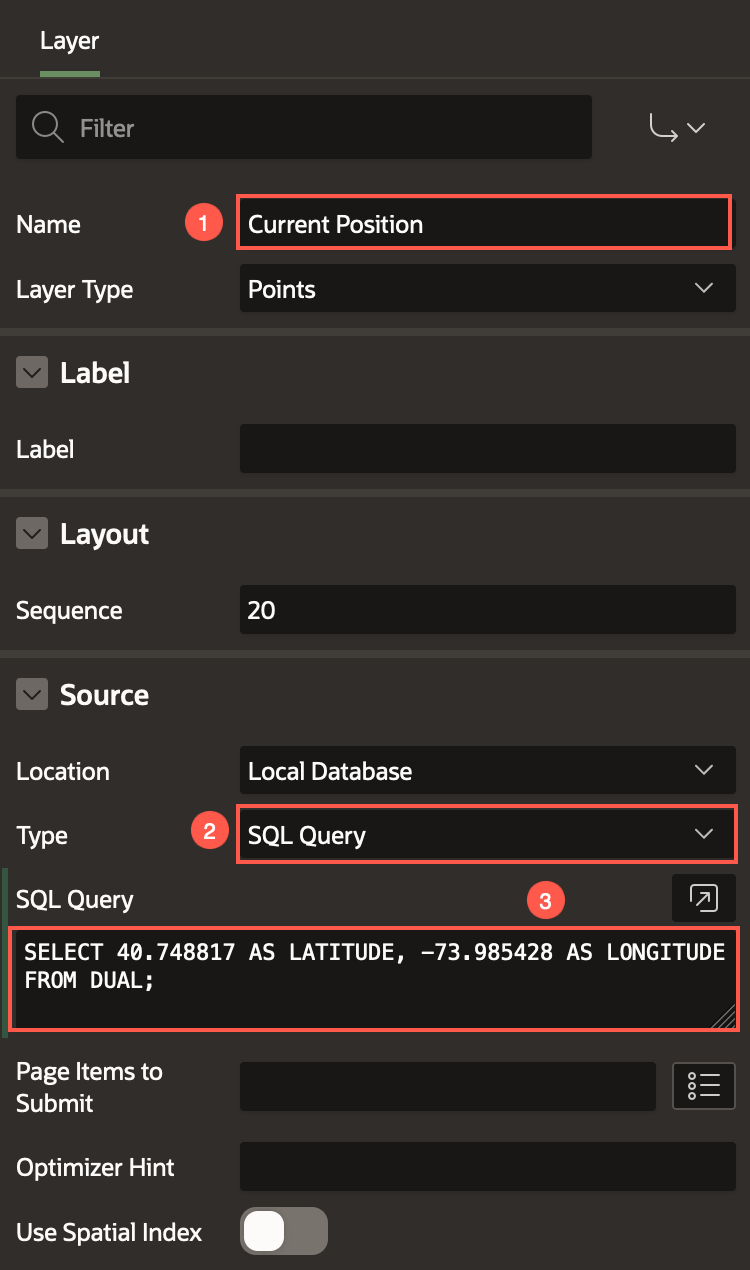 In this workshop, we use the following coordinates as the current Geo Loacation:
 - Latitude: 40.748817
- Longitude: -73.985428
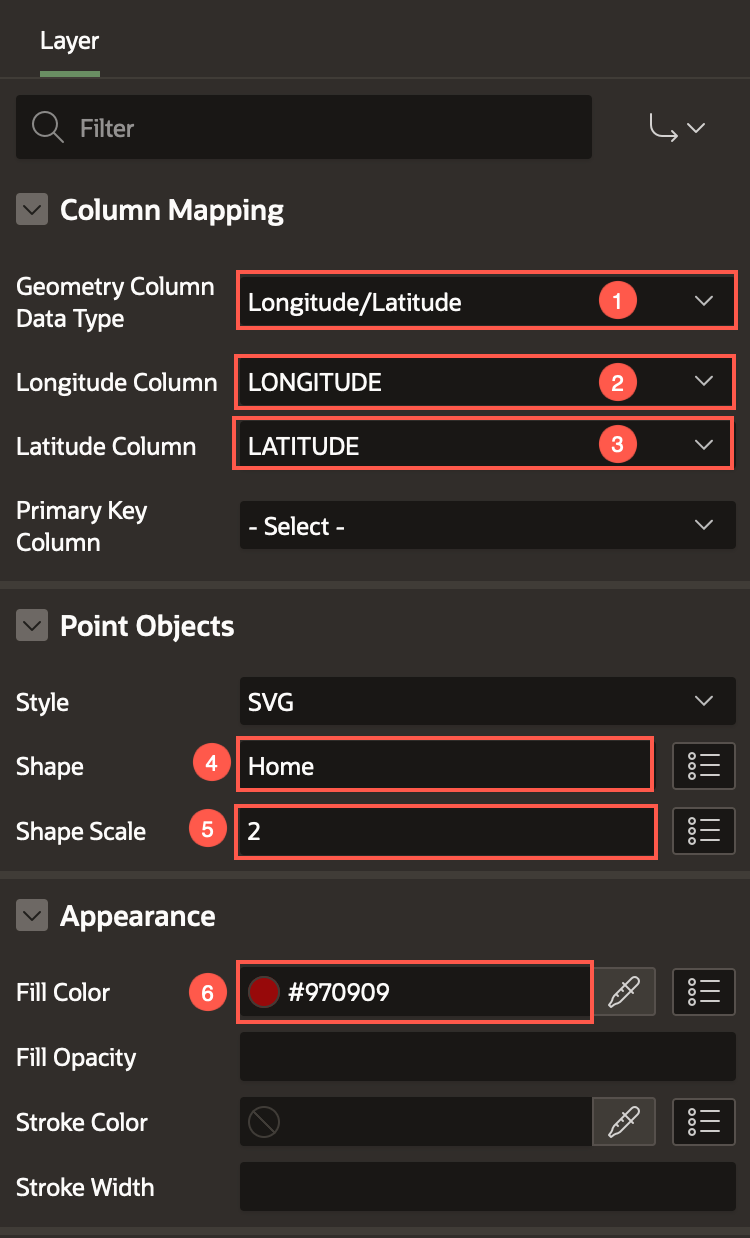
Under Column Mapping:
- Geometry Column data Type : Longitude/Latitude
- Longitude Column: LONGITUDE
- Latitude Column: LATITUDE
Under Point Objects:
- Shape: Home
- Shape Scale: 2
Appearance > Fill Color: #970909
Click Save and Run.

Task 2: Link Faceted Search to the Map Region
In this task, we use a Dynamic Action and custom PL/SQL code to fetch the Faceted Search region results and filter the Map region accordingly.
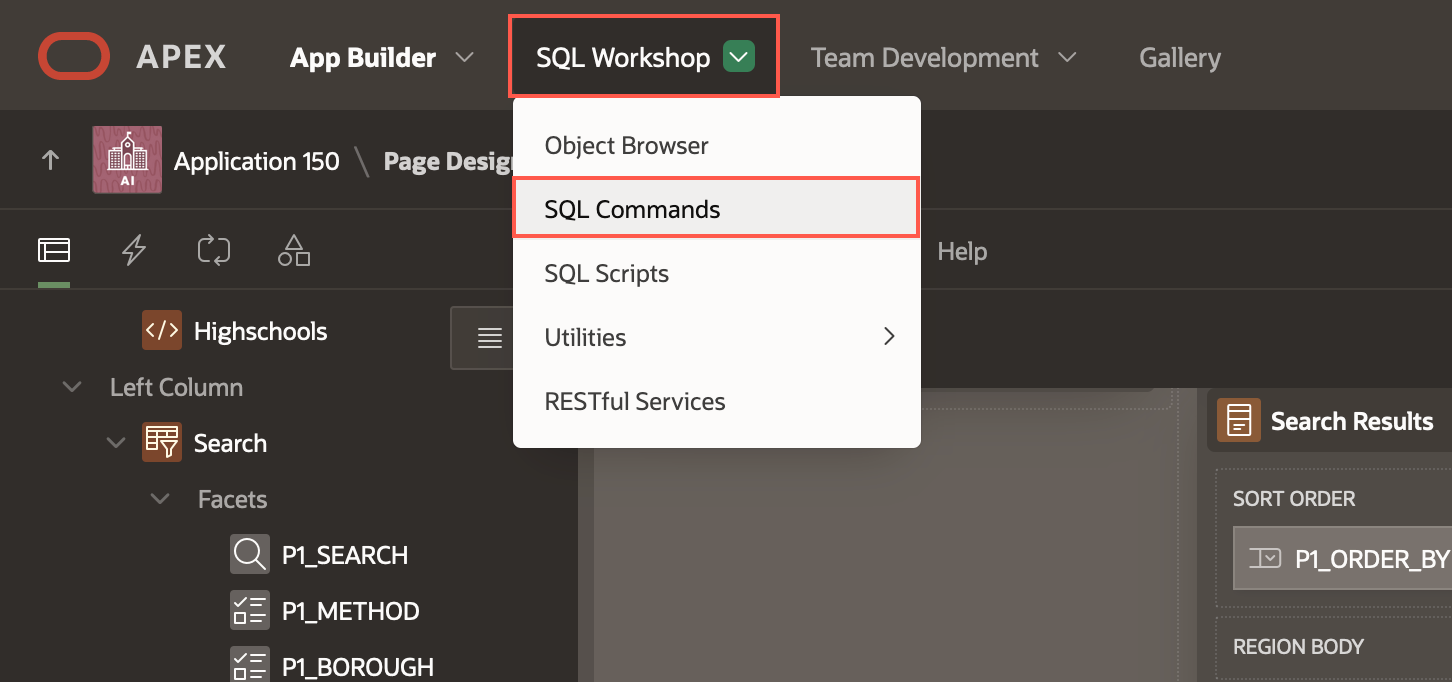
From your page designer, navigate to SQL Workshop > SQL Commands.
Copy and paste the below SQL command to create a Type. Click Run.
create or replace type t_pk_ids as table of number;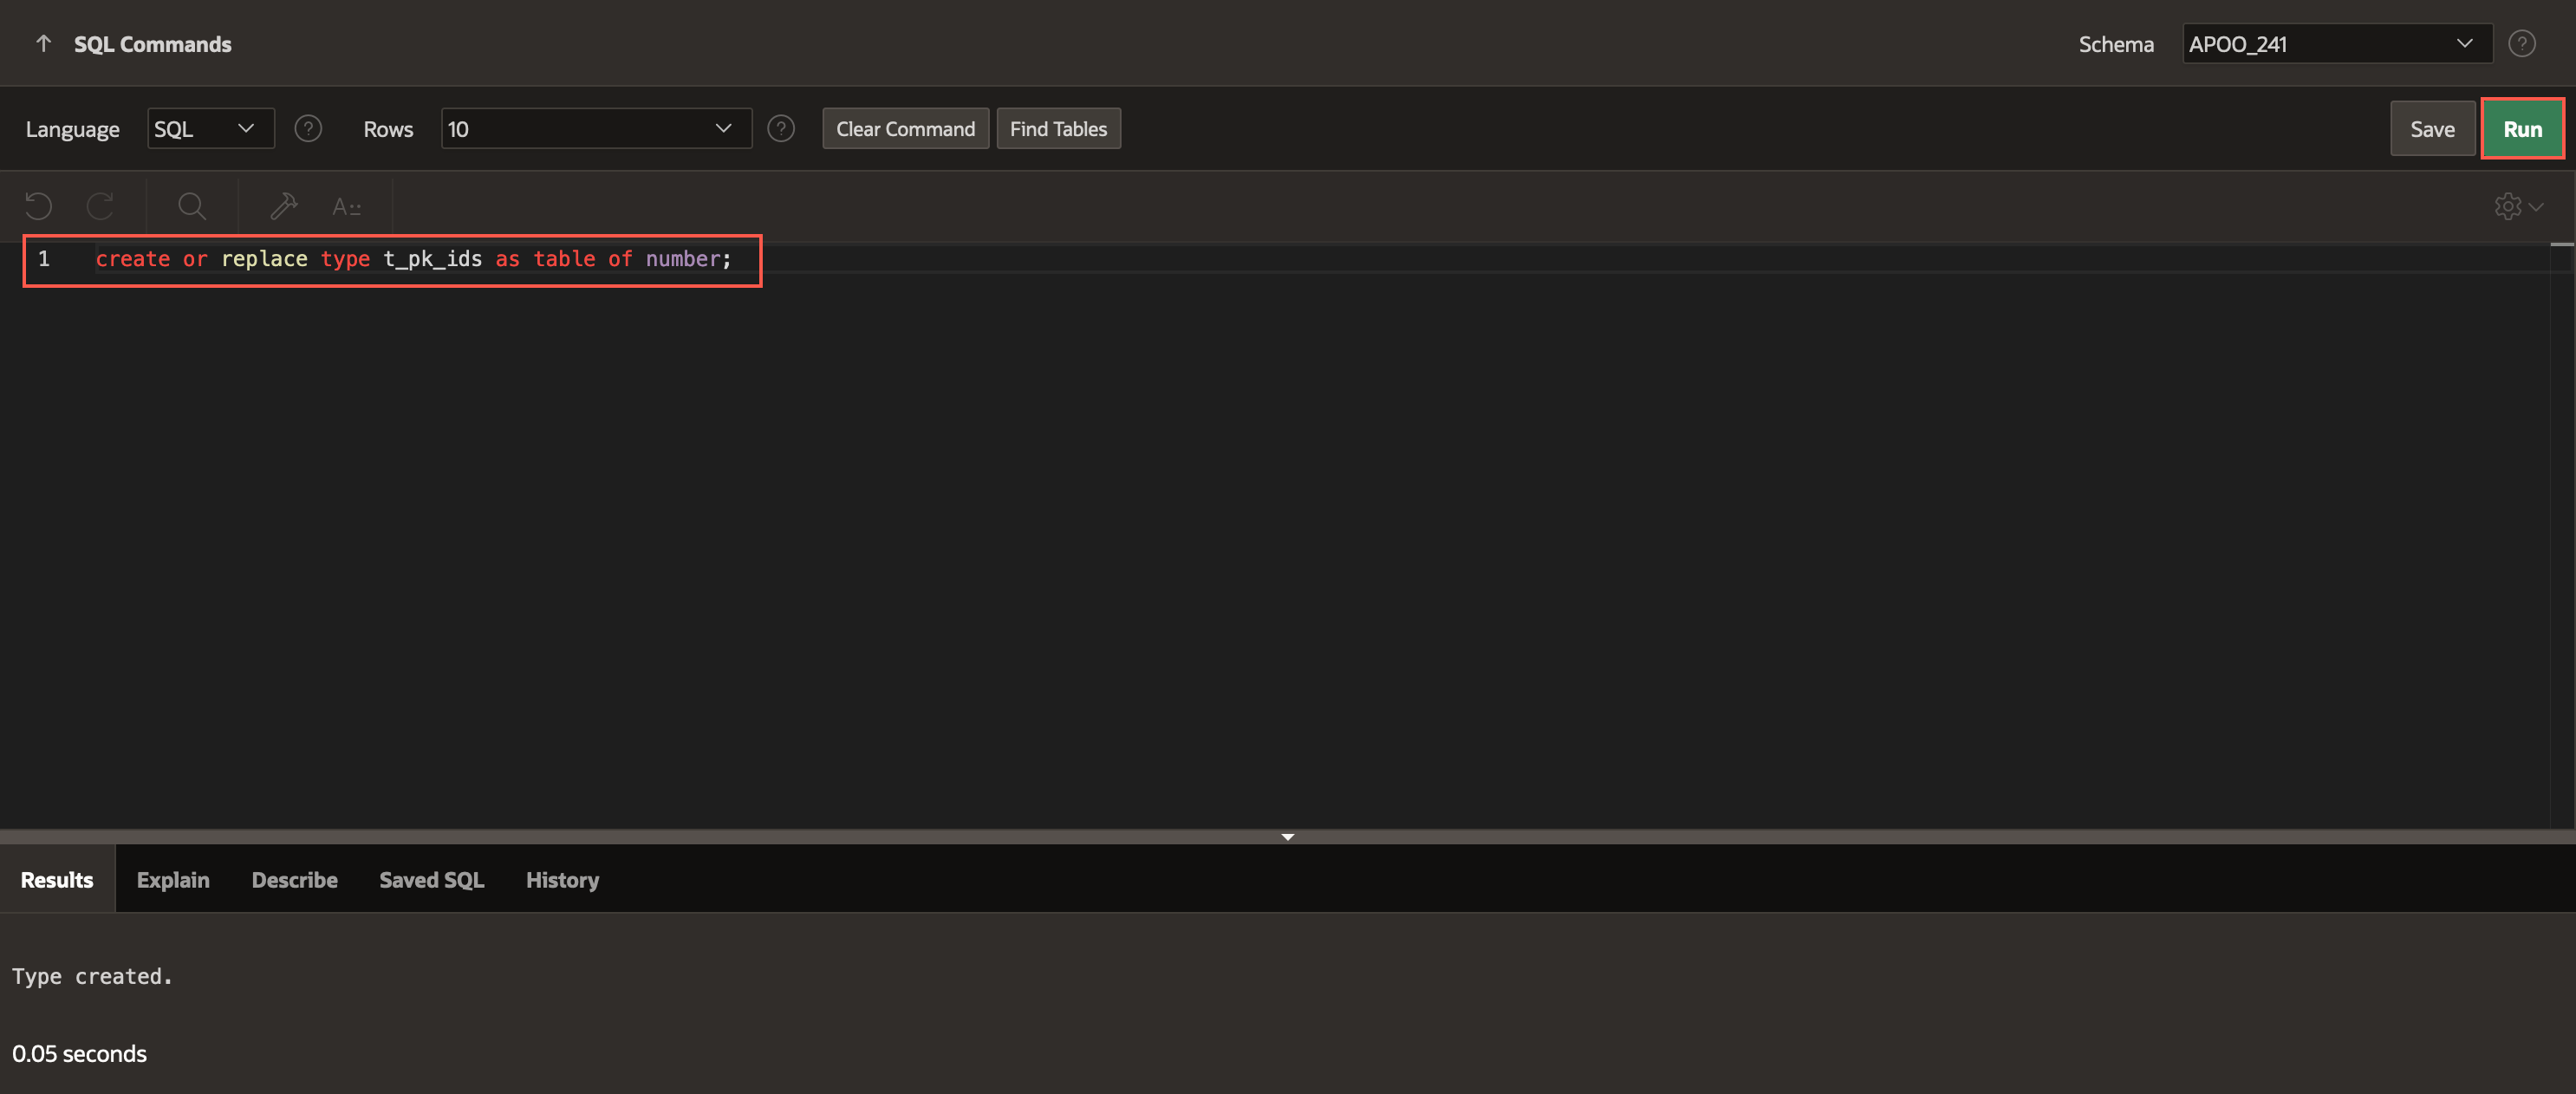
Now, copy an paste the below PL/SQL code in the editor and click Run.
create or replace function get_search_results_pk_ids( p_page_id in number, p_region_static_id in varchar2, p_pk_column_name in varchar2 ) return t_pk_ids pipelined is l_region_id number; l_context apex_exec.t_context; begin -- 1. get the region ID of the Faceted Search region select region_id into l_region_id from apex_application_page_regions where application_id = v('APP_ID') and page_id = p_page_id and static_id = p_region_static_id; -- 2. Get a cursor (apex_exec.t_context) for the current region data l_context := apex_region.open_query_context( p_page_id => p_page_id, p_region_id => l_region_id ); while apex_exec.next_row( p_context => l_context ) loop pipe row( apex_exec.get_varchar2( p_context => l_context, p_column_idx => apex_exec.get_column_position( p_context => l_context, p_column_name => p_pk_column_name ) ) ); end loop; apex_exec.close( l_context ); return; exception when no_data_needed then apex_exec.close( l_context ); return; when others then apex_exec.close( l_context ); raise; end get_search_results_pk_ids;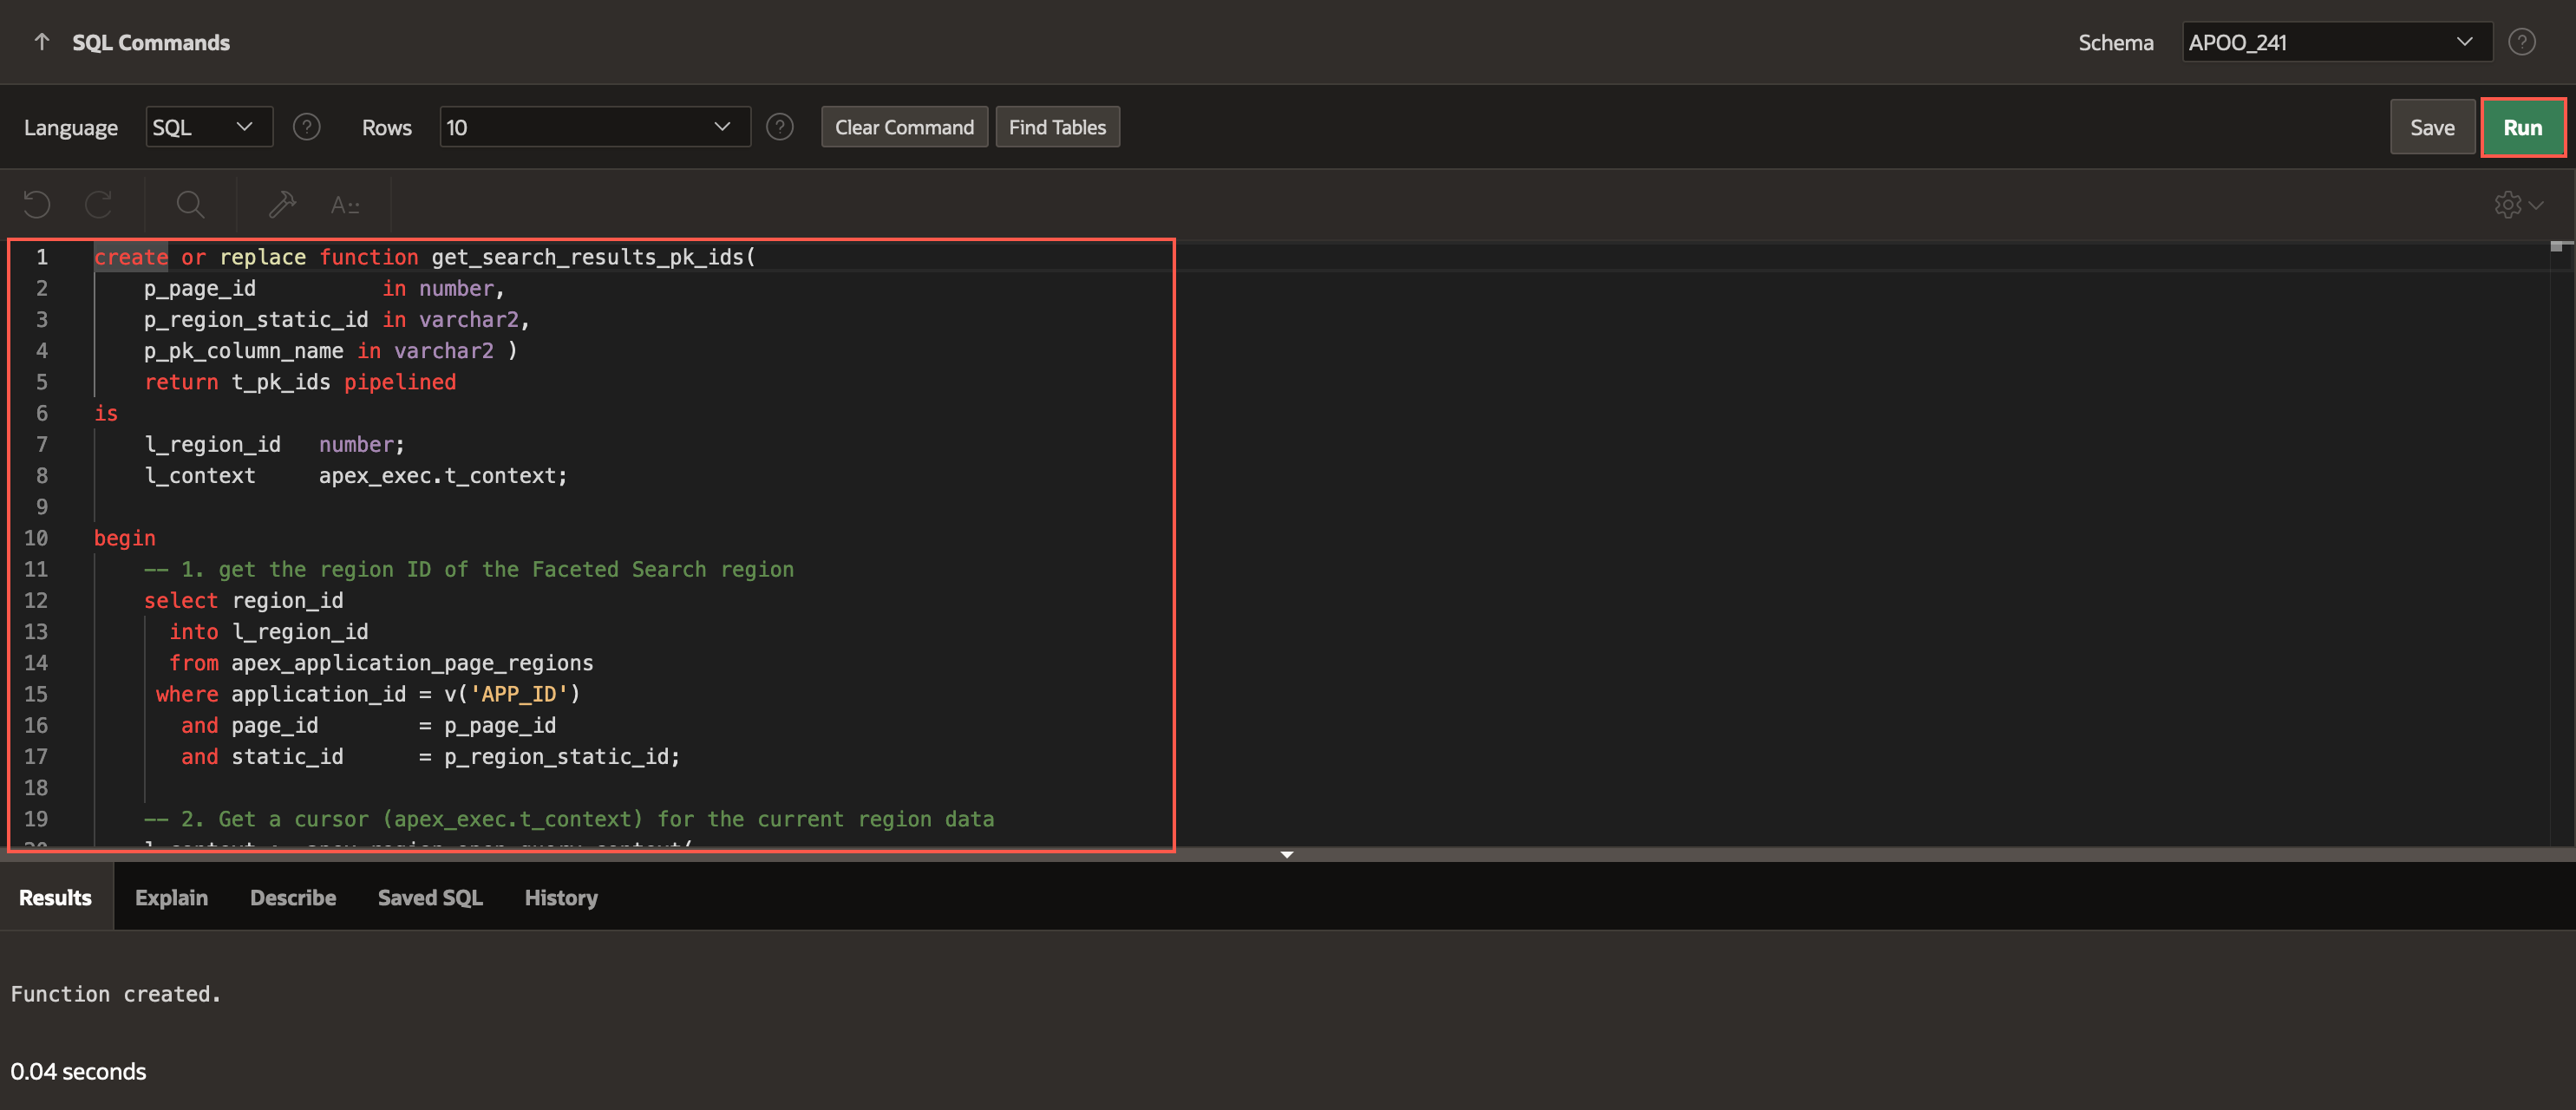
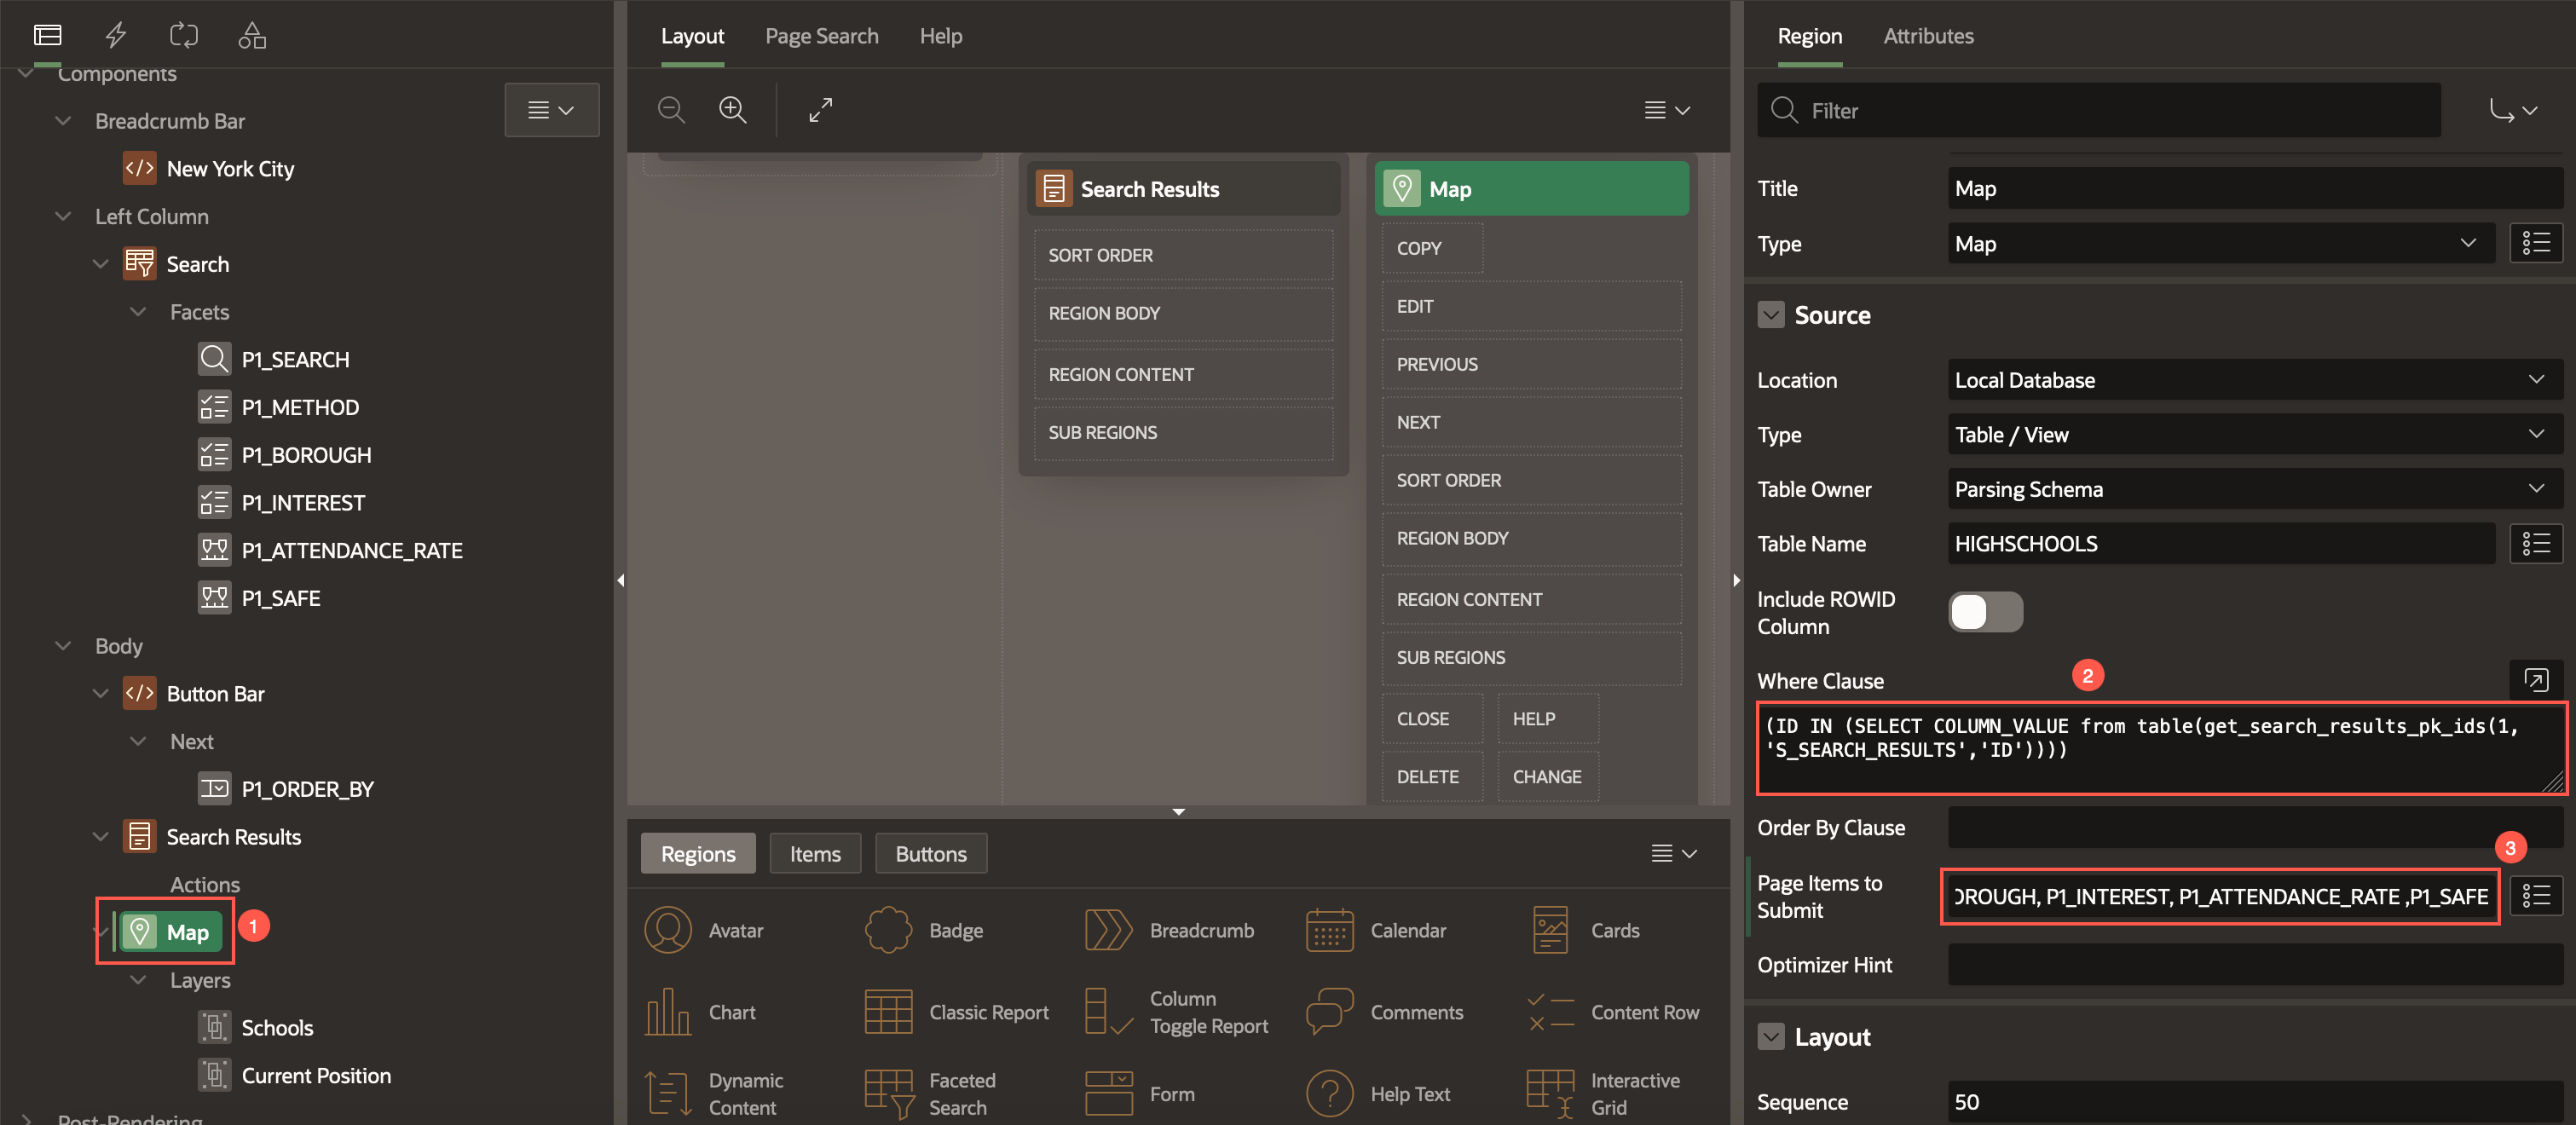
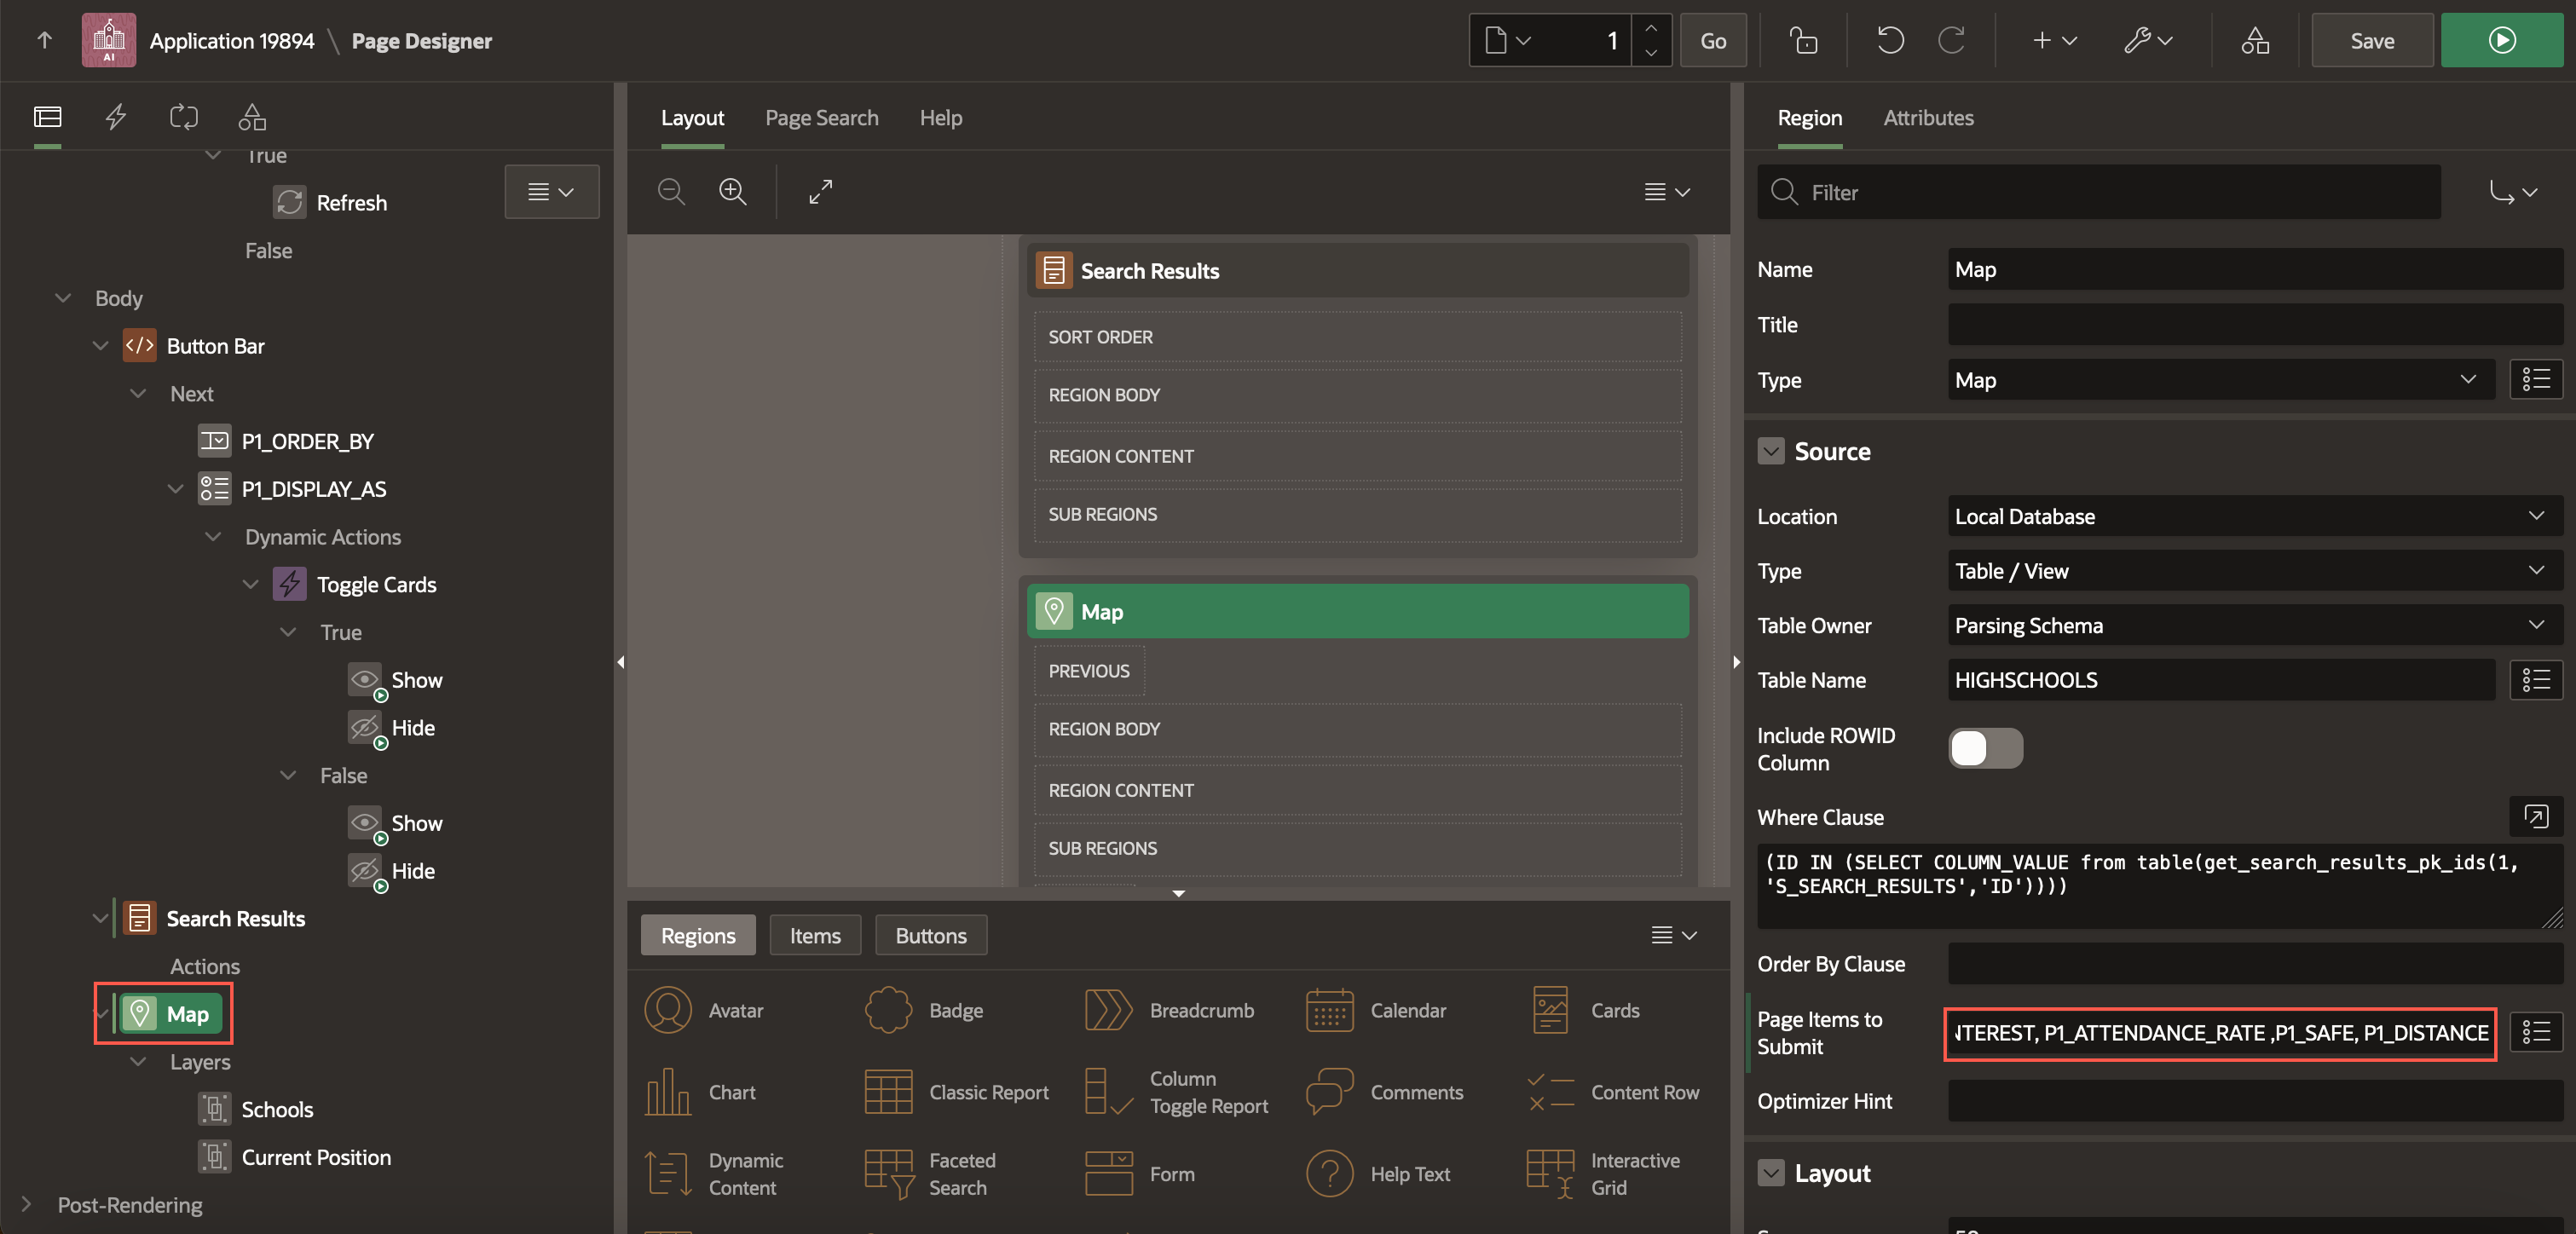
Navigate to App Builder > Highschools > Search and Apply. In the rendering tree, select the Map region. In the property editor, enter the following:
Source > Where Clause:
(ID IN (SELECT COLUMN_VALUE from table(get_search_results_pk_ids(1, 'S_SEARCH_RESULTS','ID'))))Page Items to Submit: P1_SEARCH, P1_METHOD, P1_BOROUGH, P1_INTEREST, P1_ATTENDANCE_RATE ,P1_SAFE
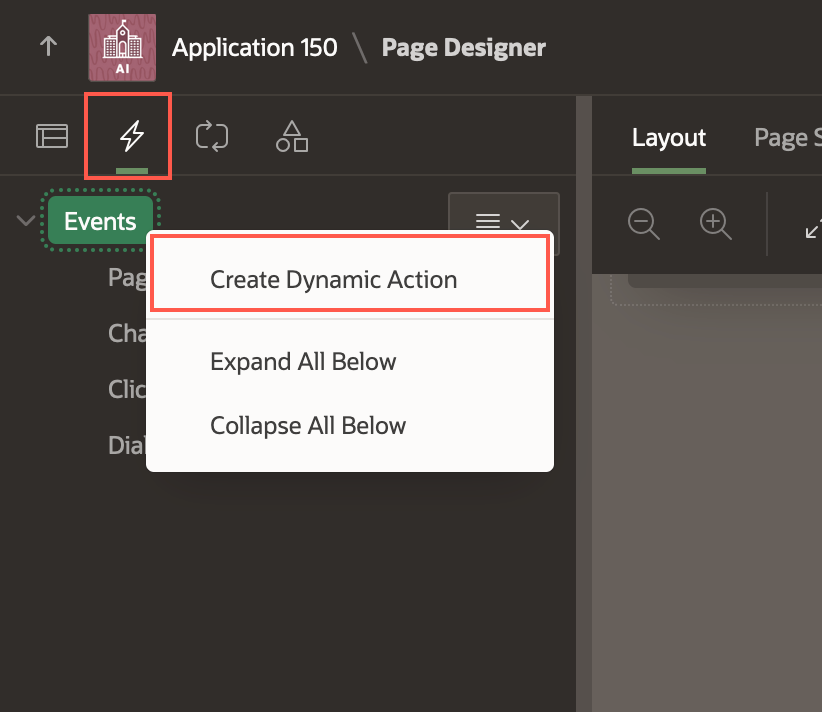
In the rendering tree, navigate to the Dynamic Actions tab. Right-click on Events, and select Create Dynamic Action.
In the property editor, enter/select the following:
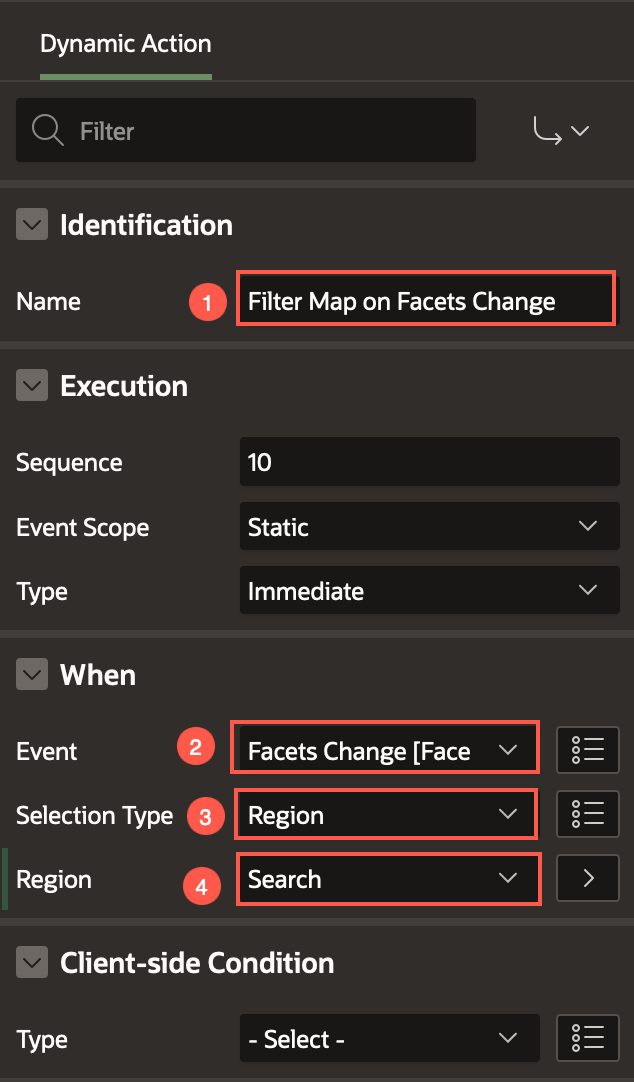
Identification > Name: Filter Map on Facets Change
Under When:
- Event: Facets Change [Faceted Search]
- Selection Type: Region
- Region: Search
Now, select Show under Filter Map on Facets Change > True. In the property editor, enter/select the following:
- Action: Refresh
- Selection Type: Region
- Region: Map

Click Save.
Task 3: Display Cards and Maps as Radio Group
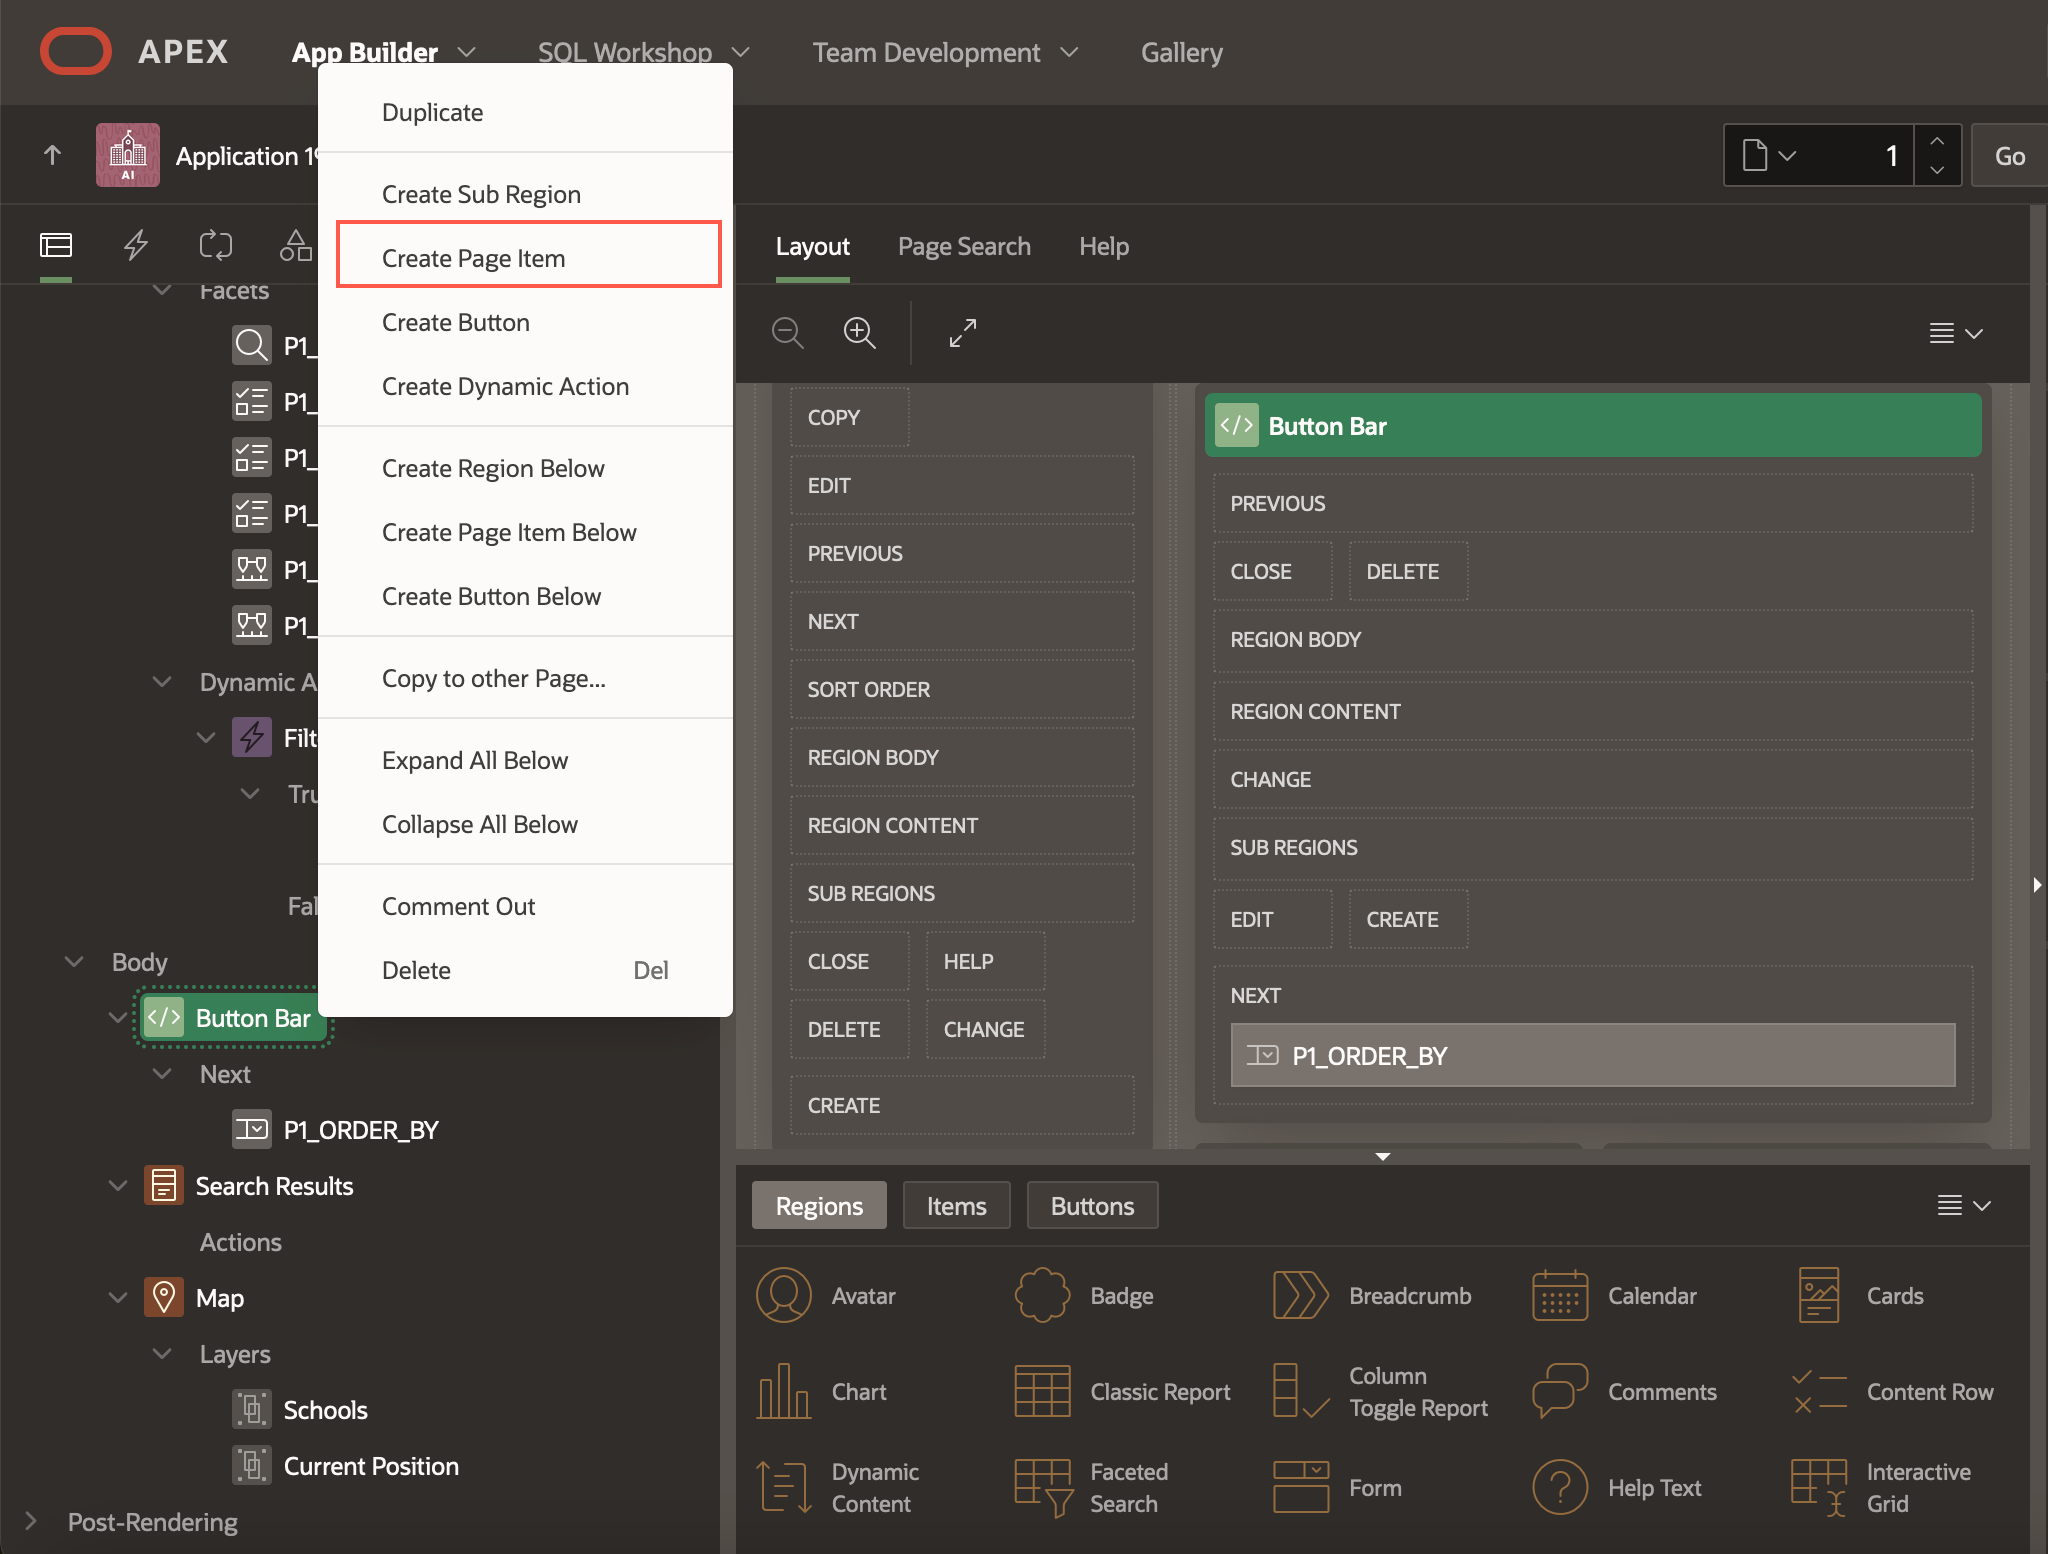
In the Rendering Tree, right-click Button Bar and select Create Page Item.
Enter/select the following in the property editor:
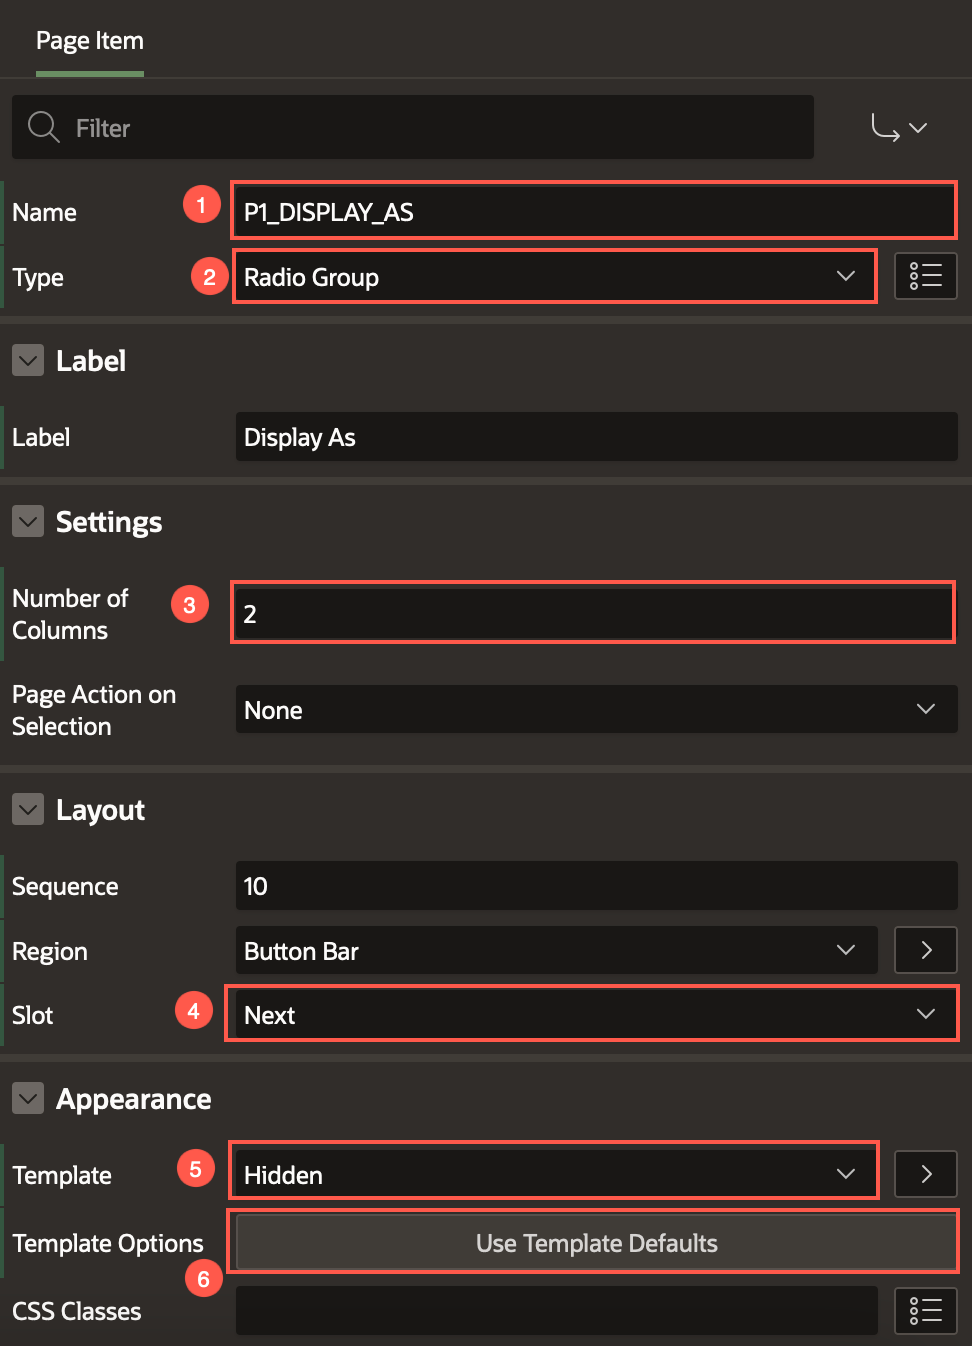
Under Identification:
- Name: P1_DISPLAY_AS
- Type: Radio Group
Settings > Number of Columns: 2
Layout > Slot: Next
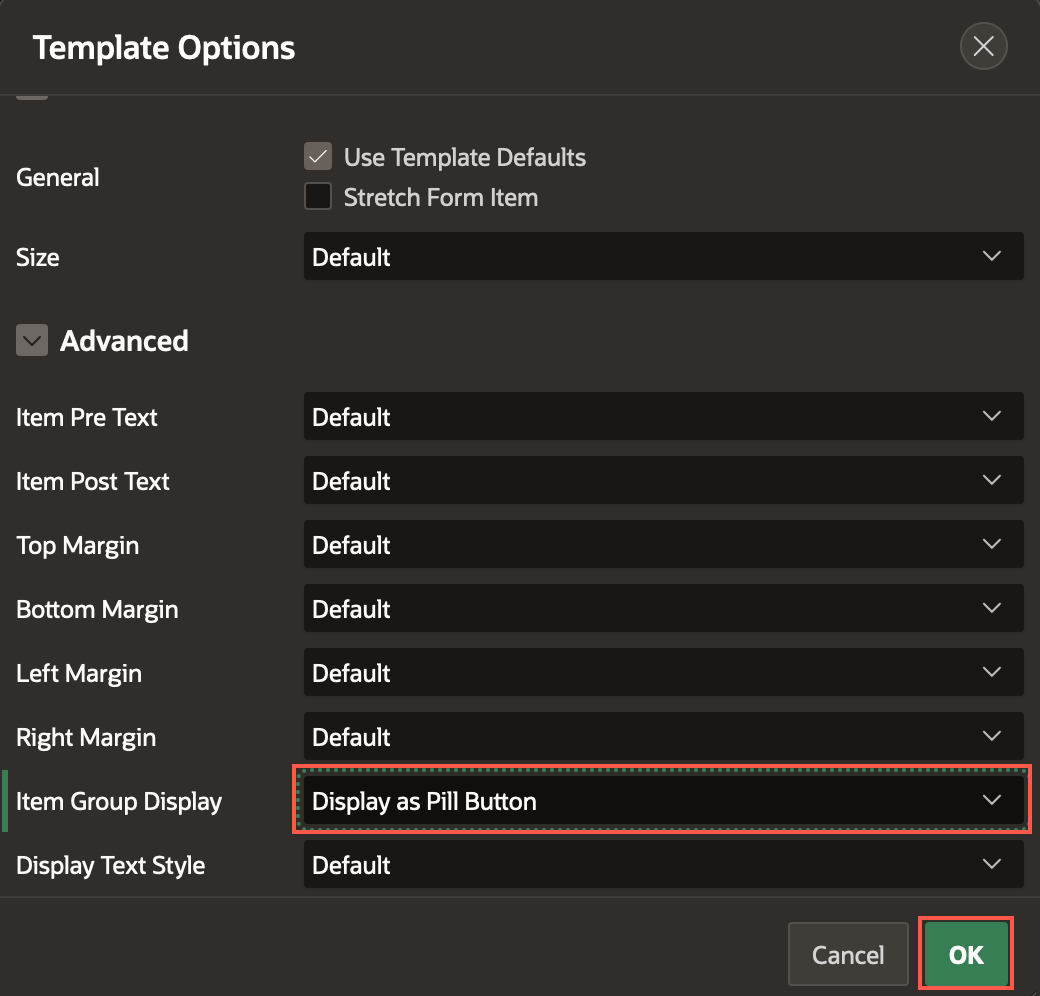
Under Appearance:
- Template: Hidden
- Template Options > Item Group Display: Display as Pill Button
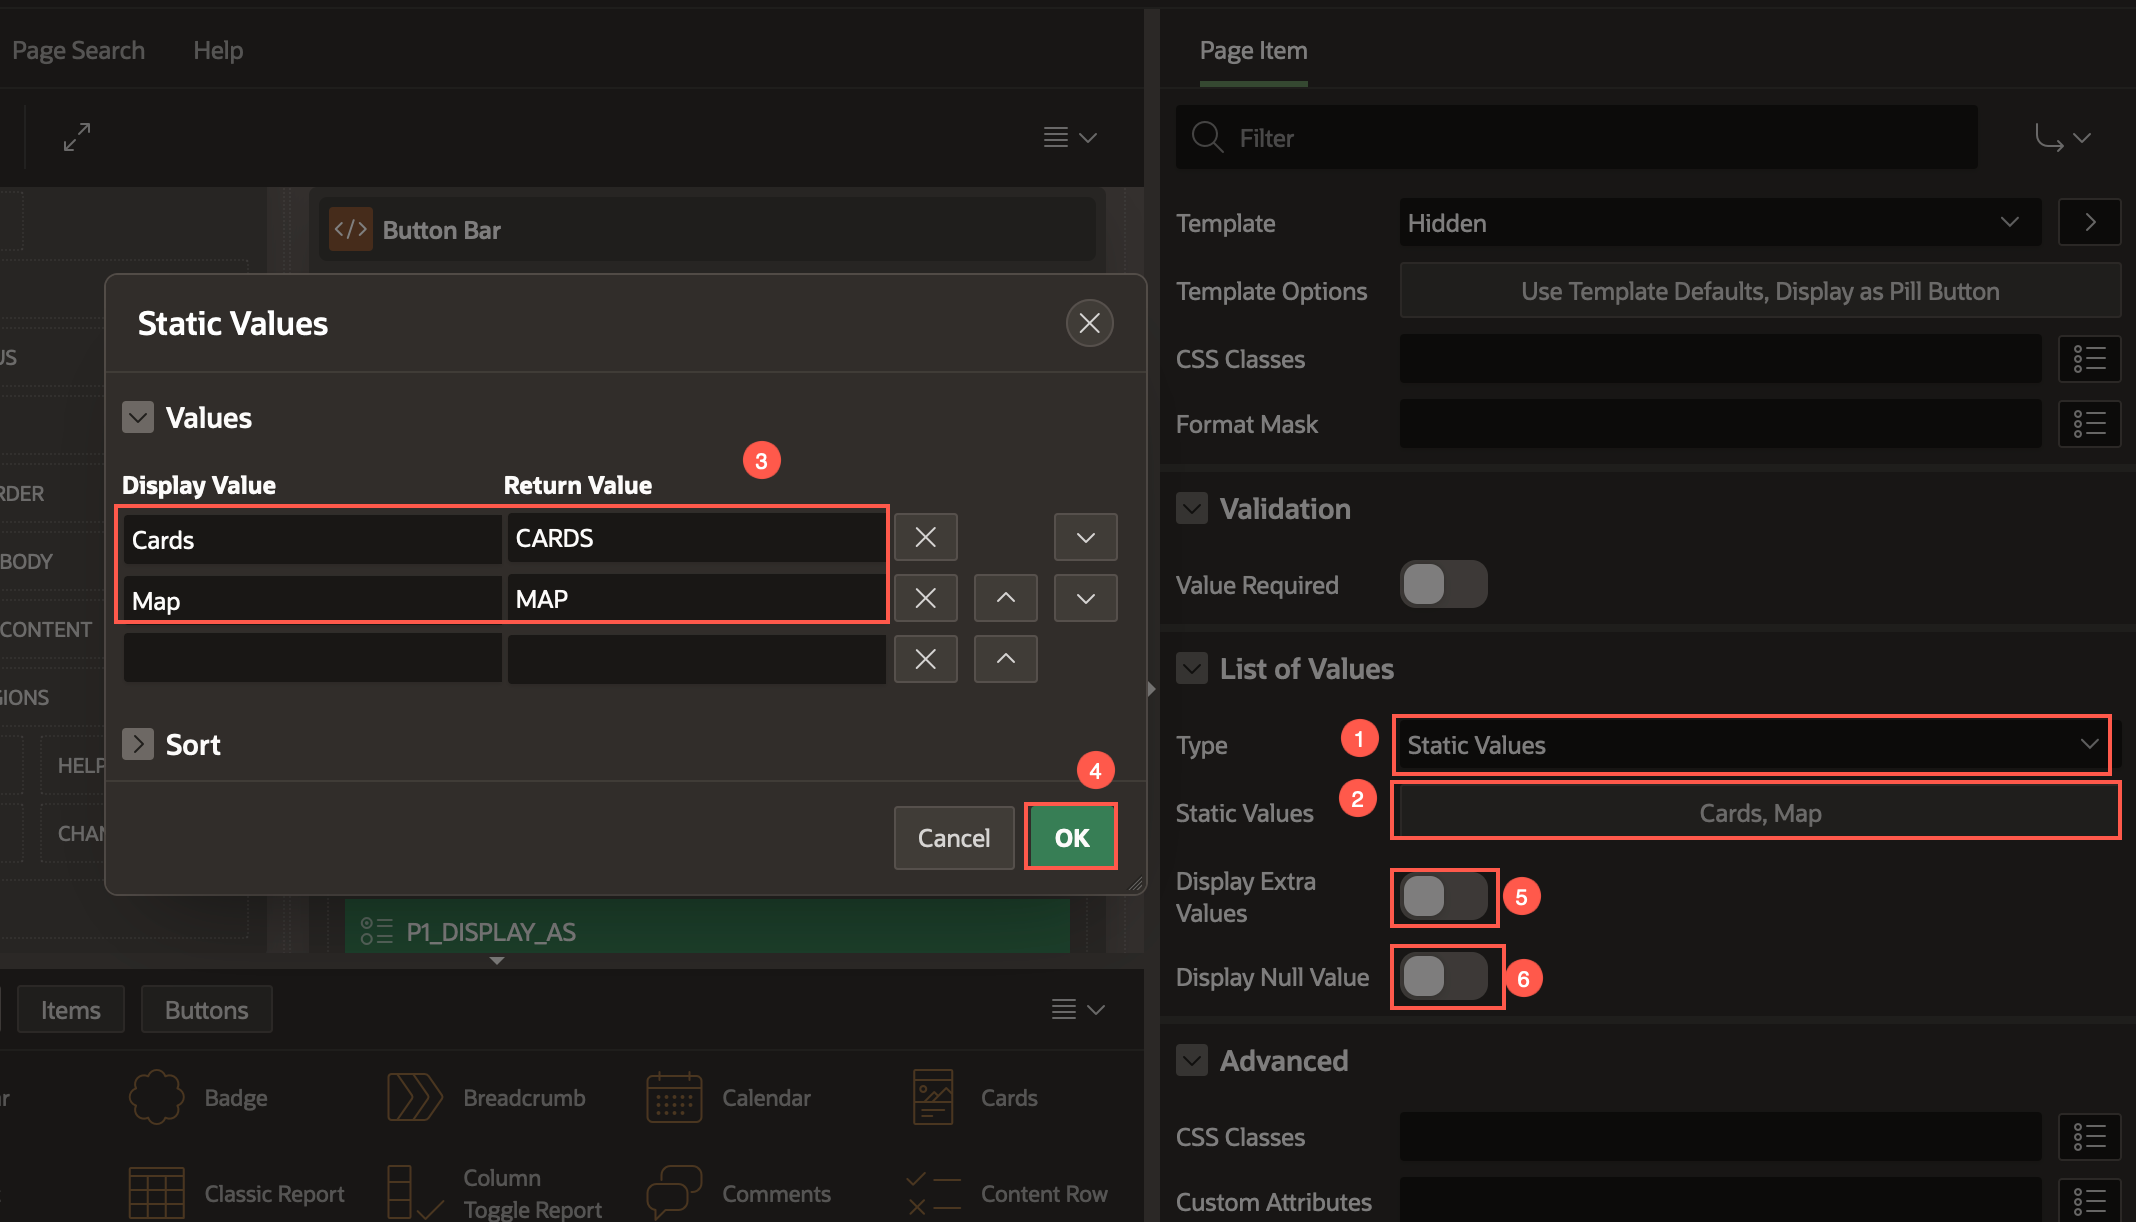
Under List of Values:
Type: Static Values
Static Values: click Display1, Display 2 to edit the Static Values.
Table 1: Static Values Display Value Return Value Cards CARDS Map MAP Display Extra Values: Toggle the button to turn it OFF.
Display Null Values: Toggle the button to turn it OFF.
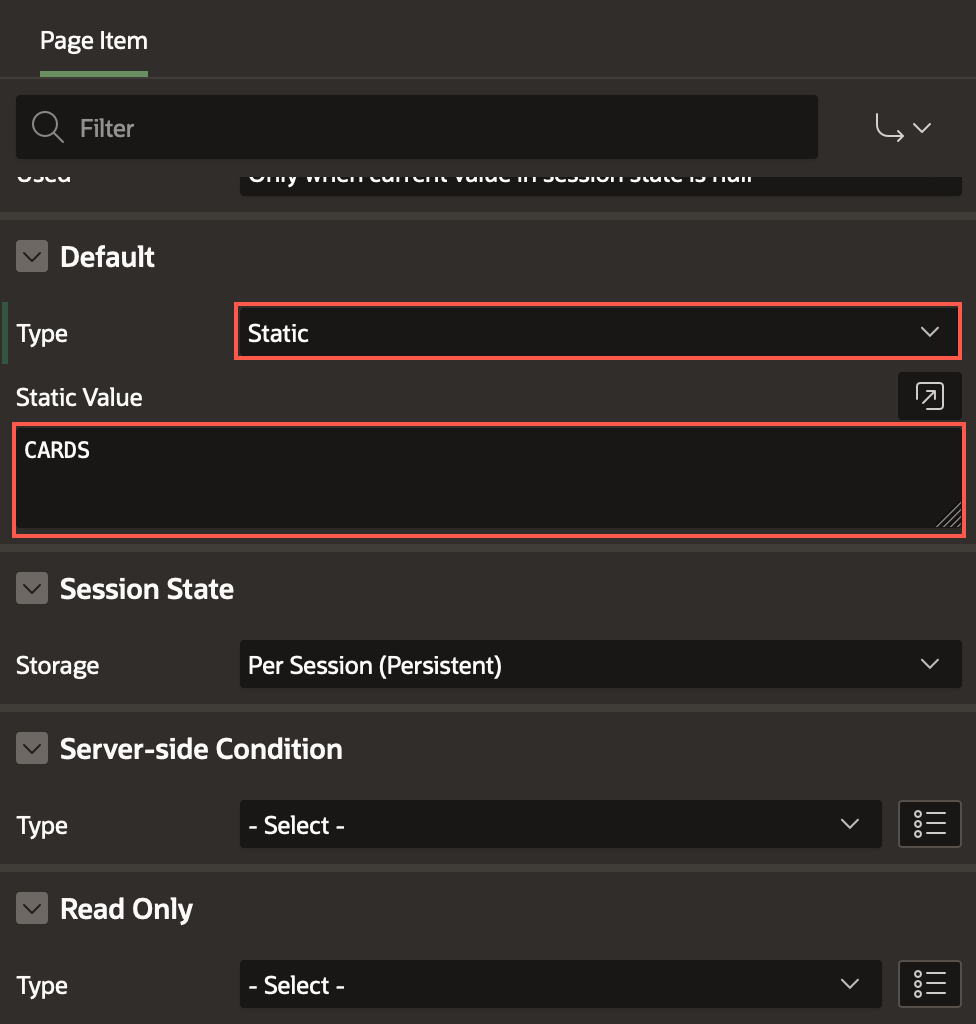
Under Default:
Type: Static
Static Value: CARDS
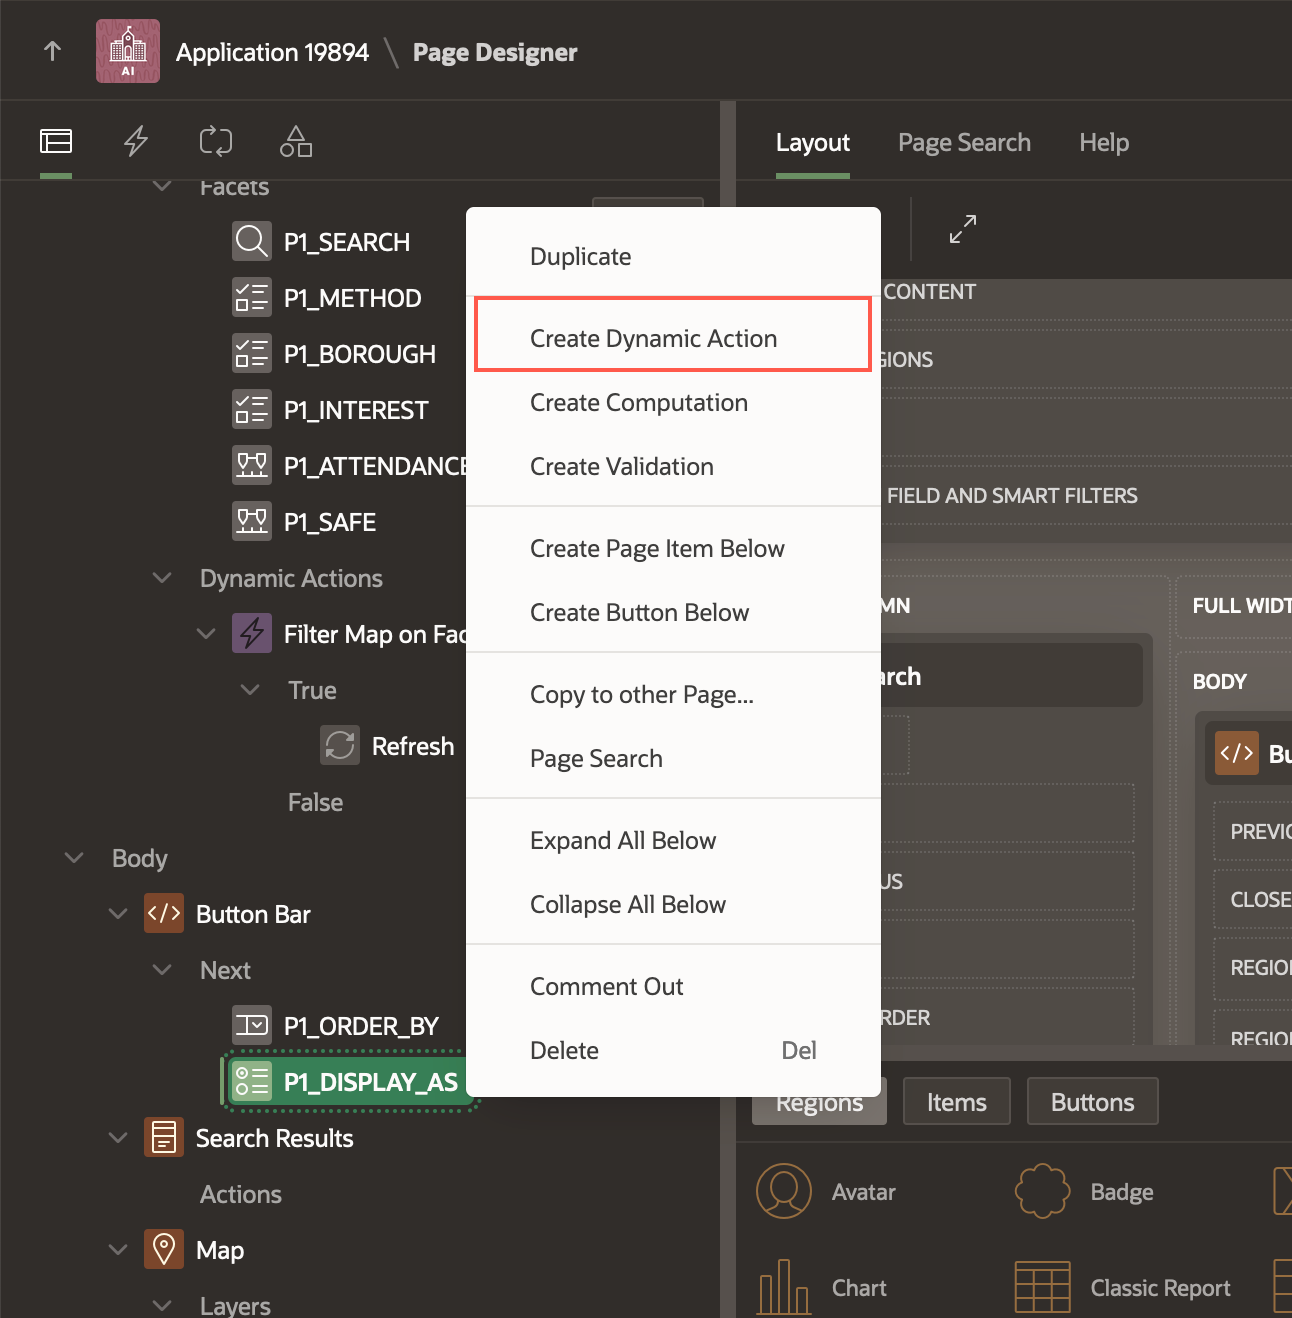
Drag and drop the P1_DISPLAY_AS page item below P1_ORDER_BY.

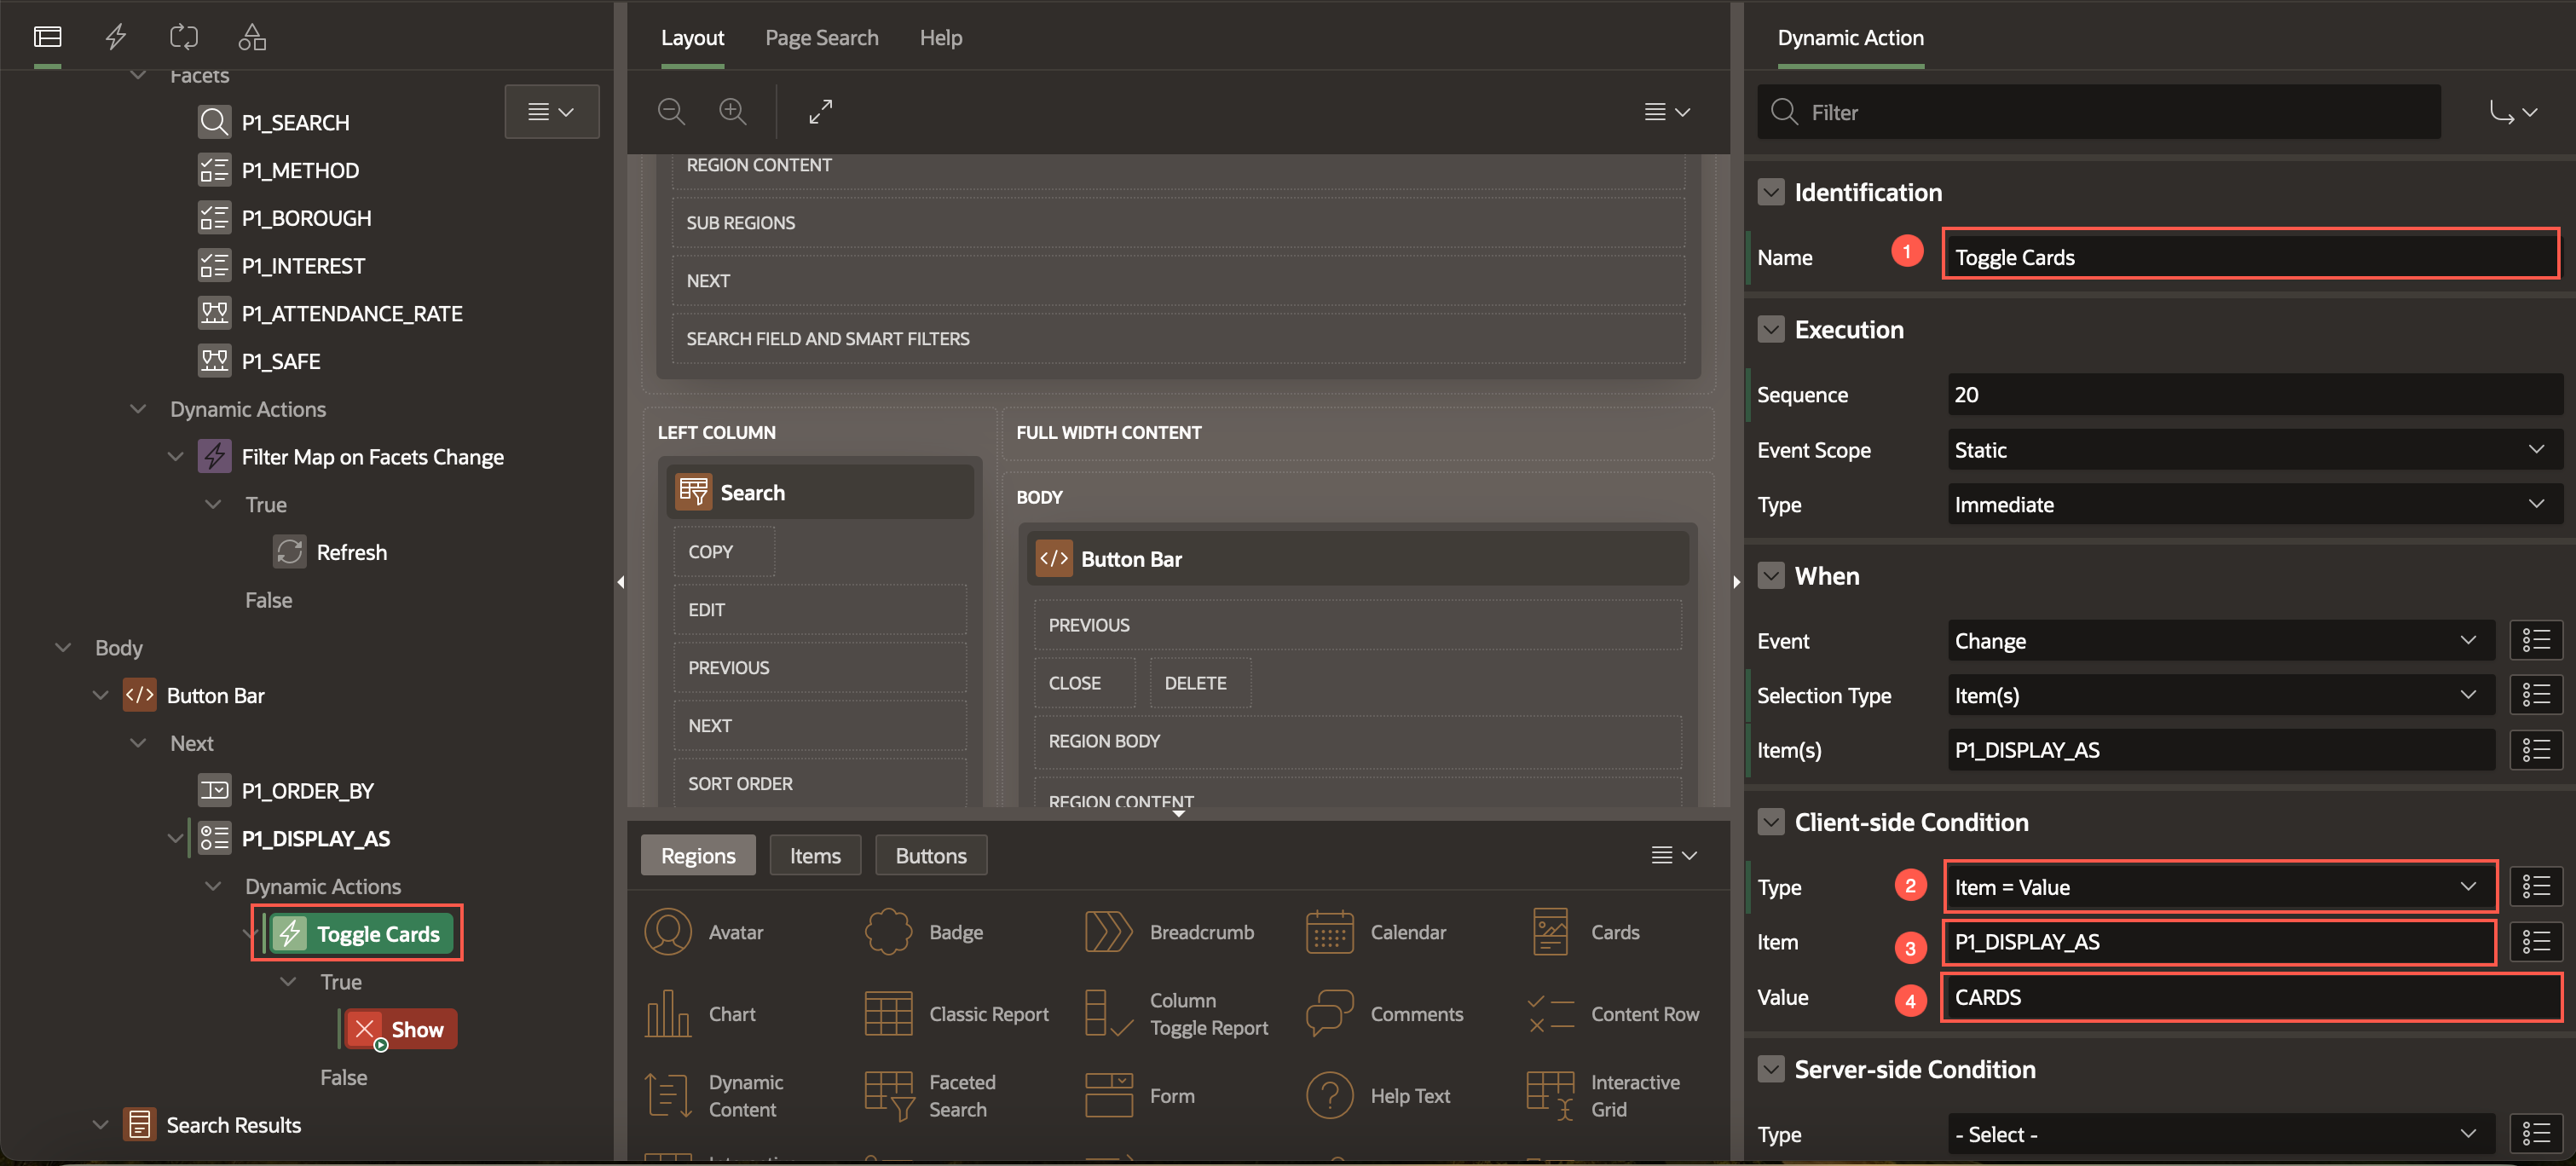
Right-click P1_DISPLAY_AS and select Create Dynamic Action.
Enter/select the following in the property editor:
Identification > Name: Toggle Cards
Under Client-side condition:
- Type: Item = Value
- Item: P1_DISPLAY_AS
- Value: CARDS
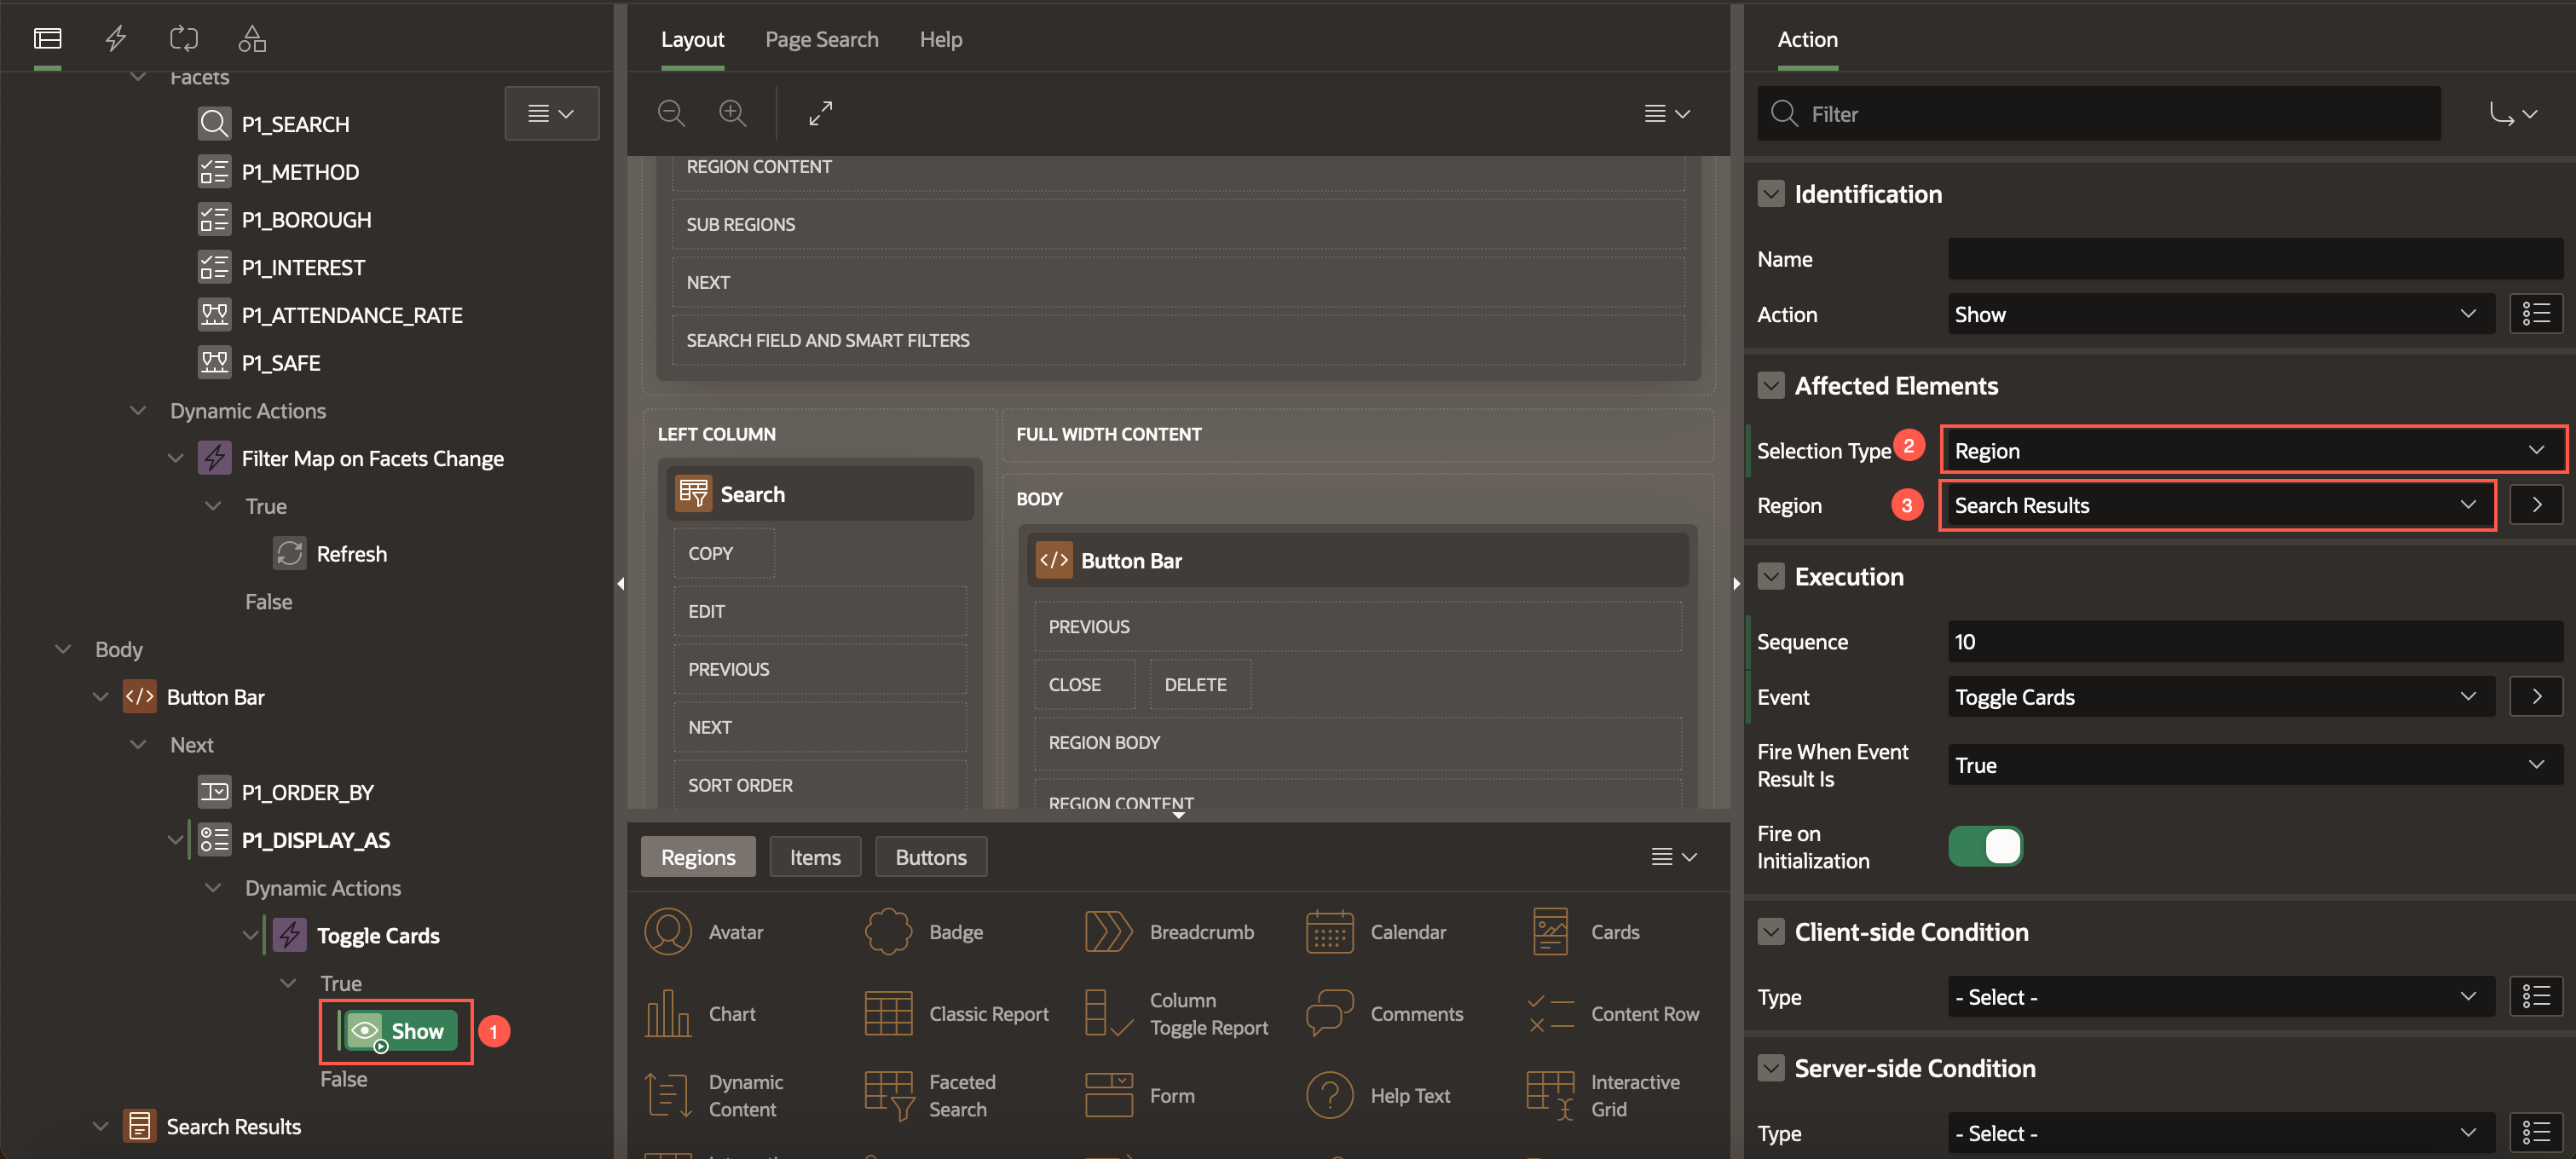
In the Rendering Tree, select True Action , enter/select the following in the property editor:
Under Affected Elements:
- Selection Type: Region
- Region: Search Results
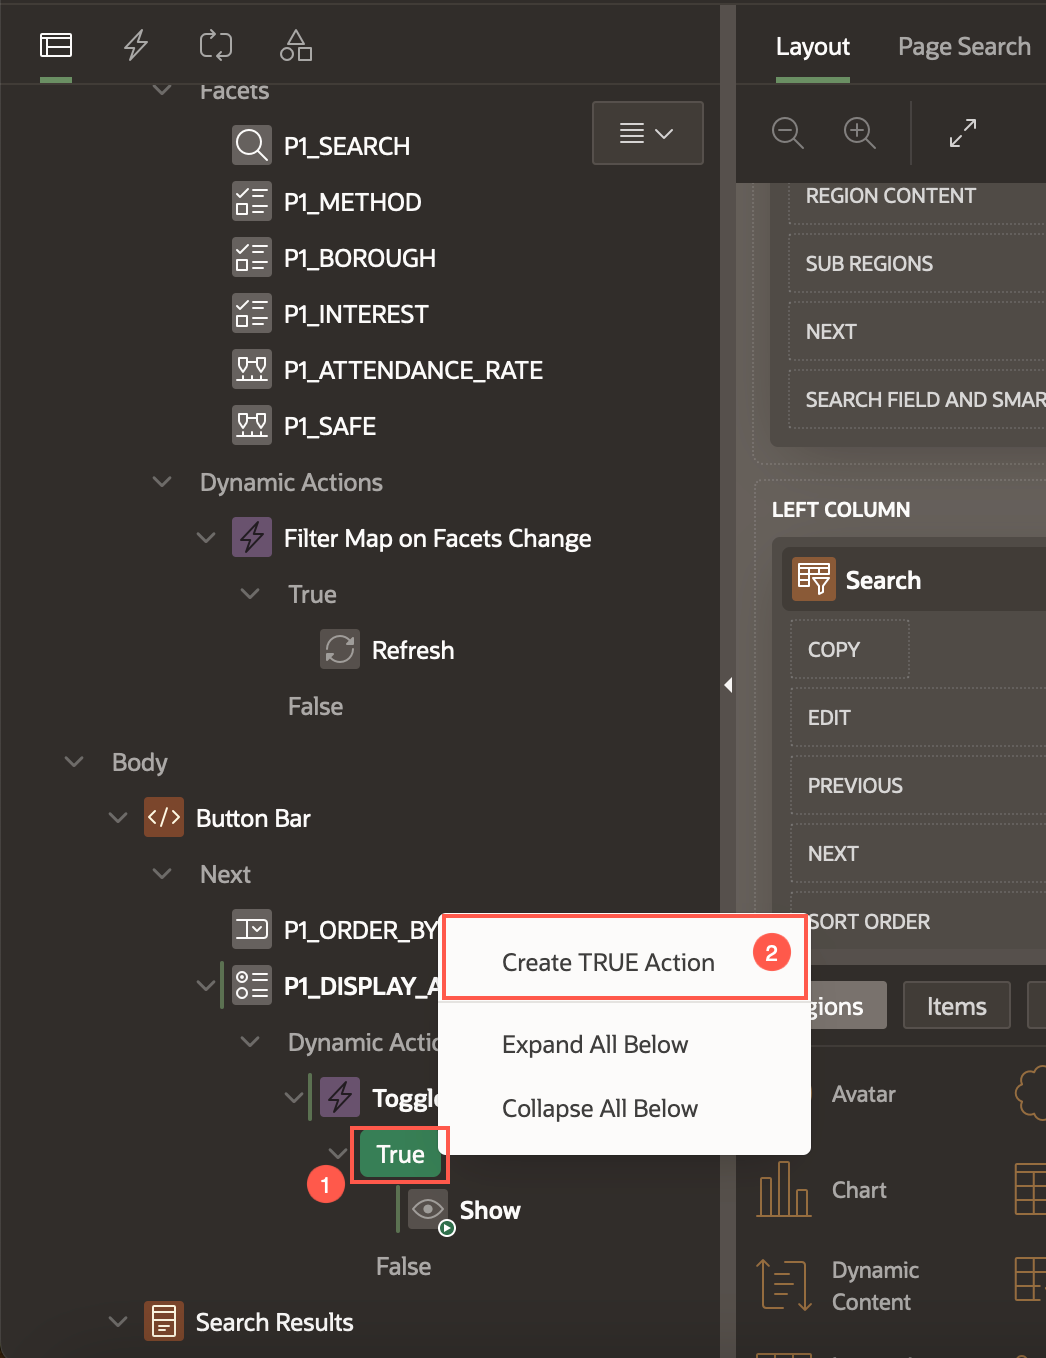
Create another TRUE action. Right-click True and select Create TRUE Action.
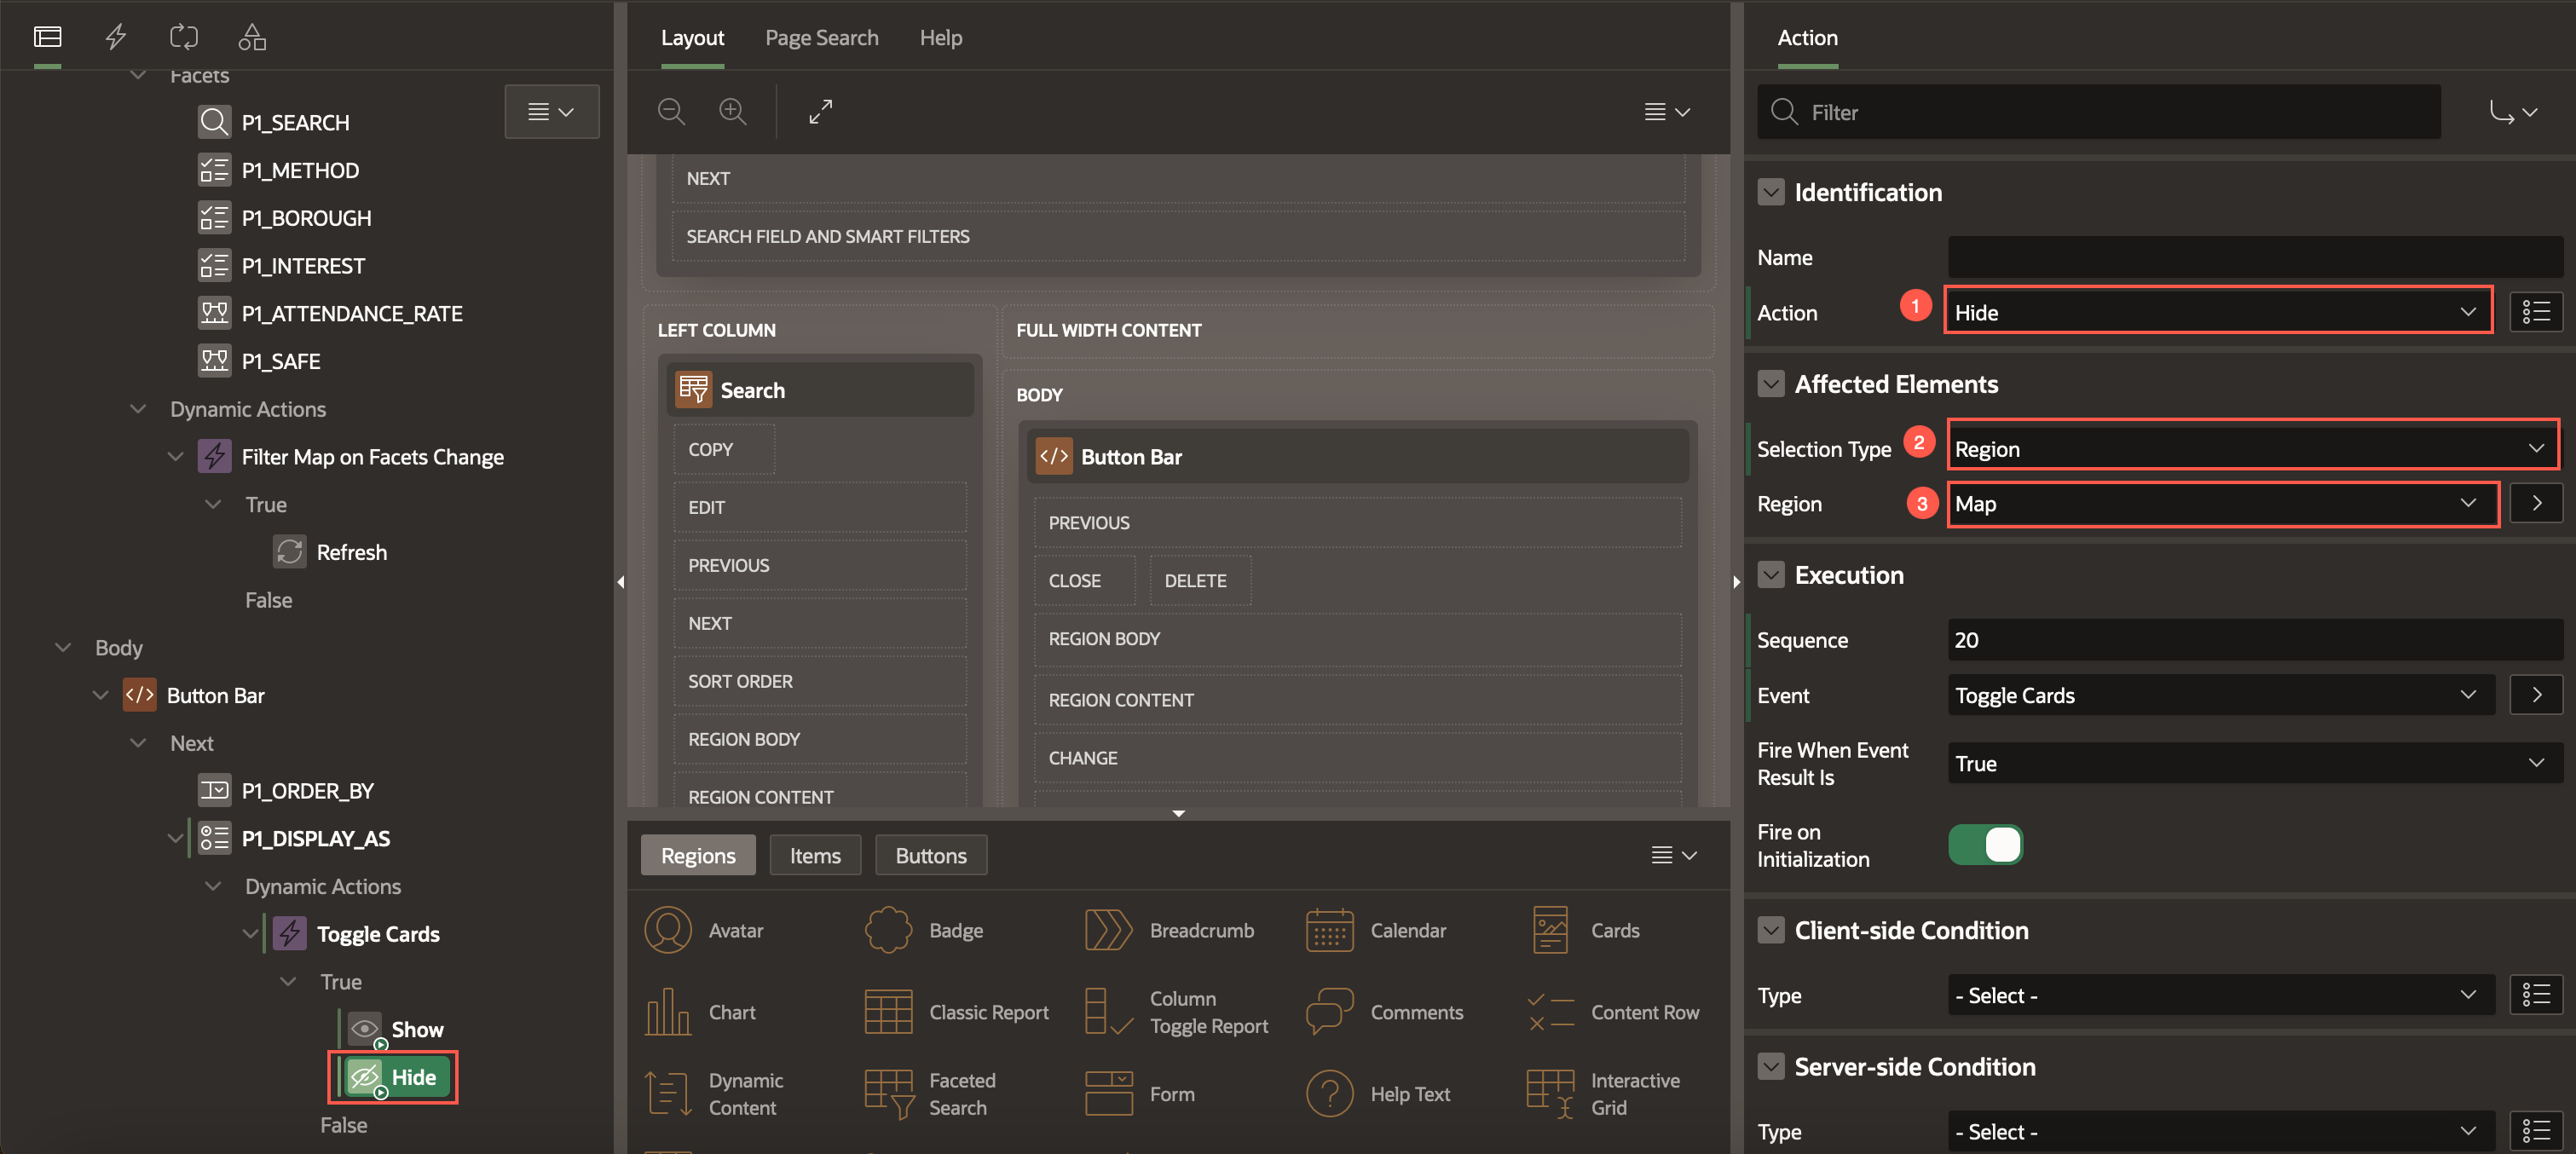
Enter/select the following:
- Identification > Action: Hide
- Under Affected Elements:
- Selection Type: Region
- Region: Map
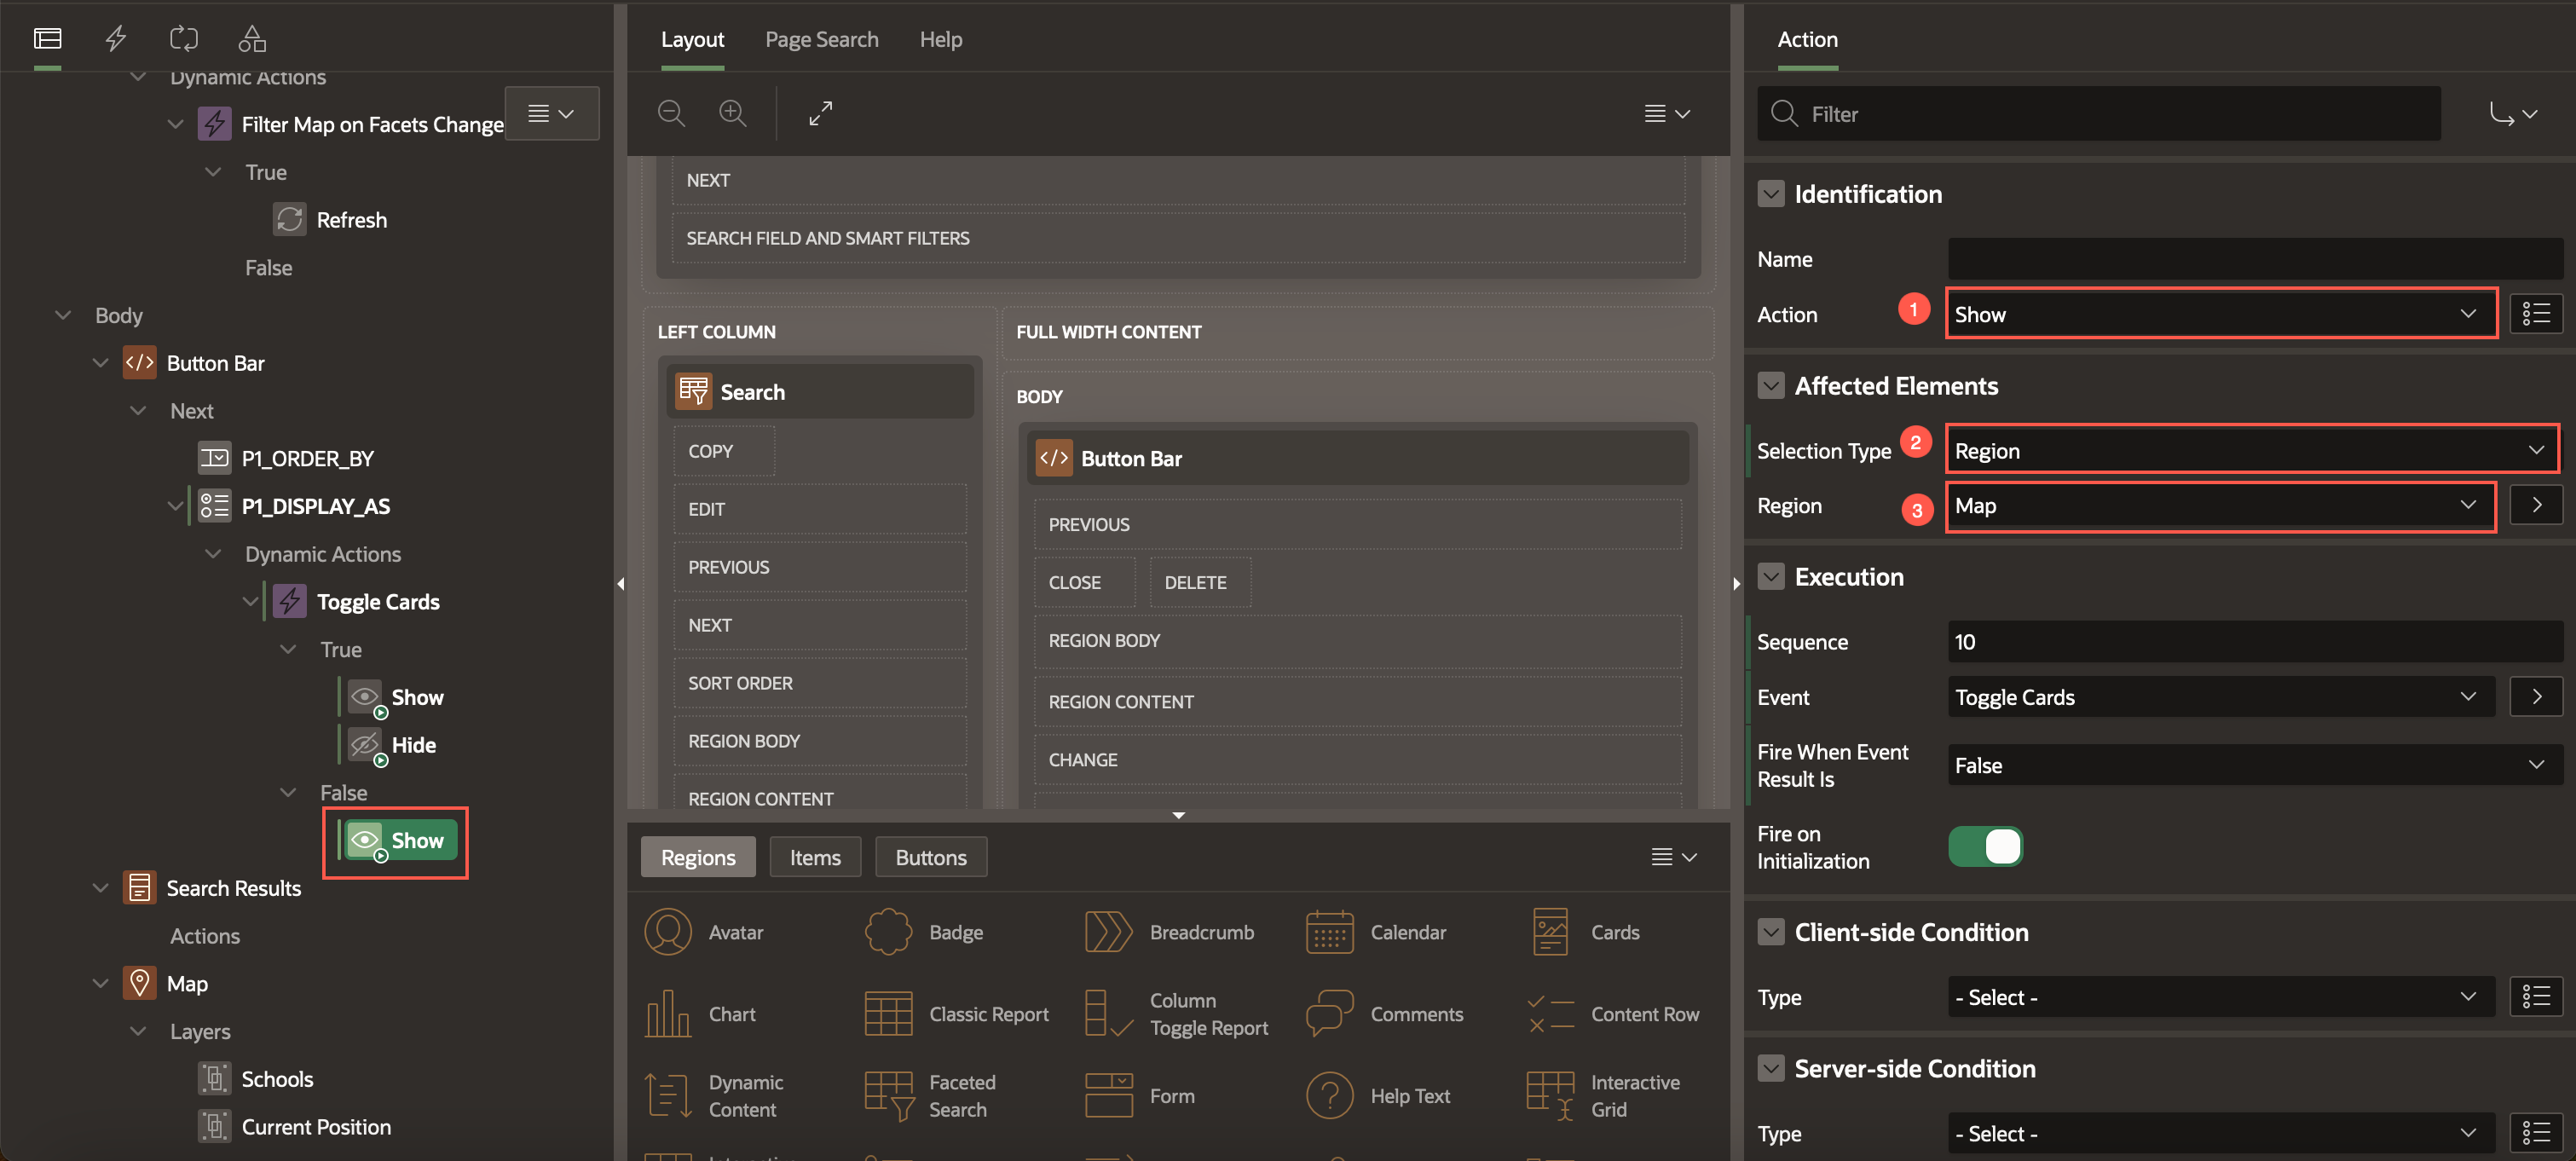
Right-click False and select Create FALSE Action.

Enter/select the following:
Identification > Action: Show
Under Affected Elements:
- Selection Type: Region
- Region: Map
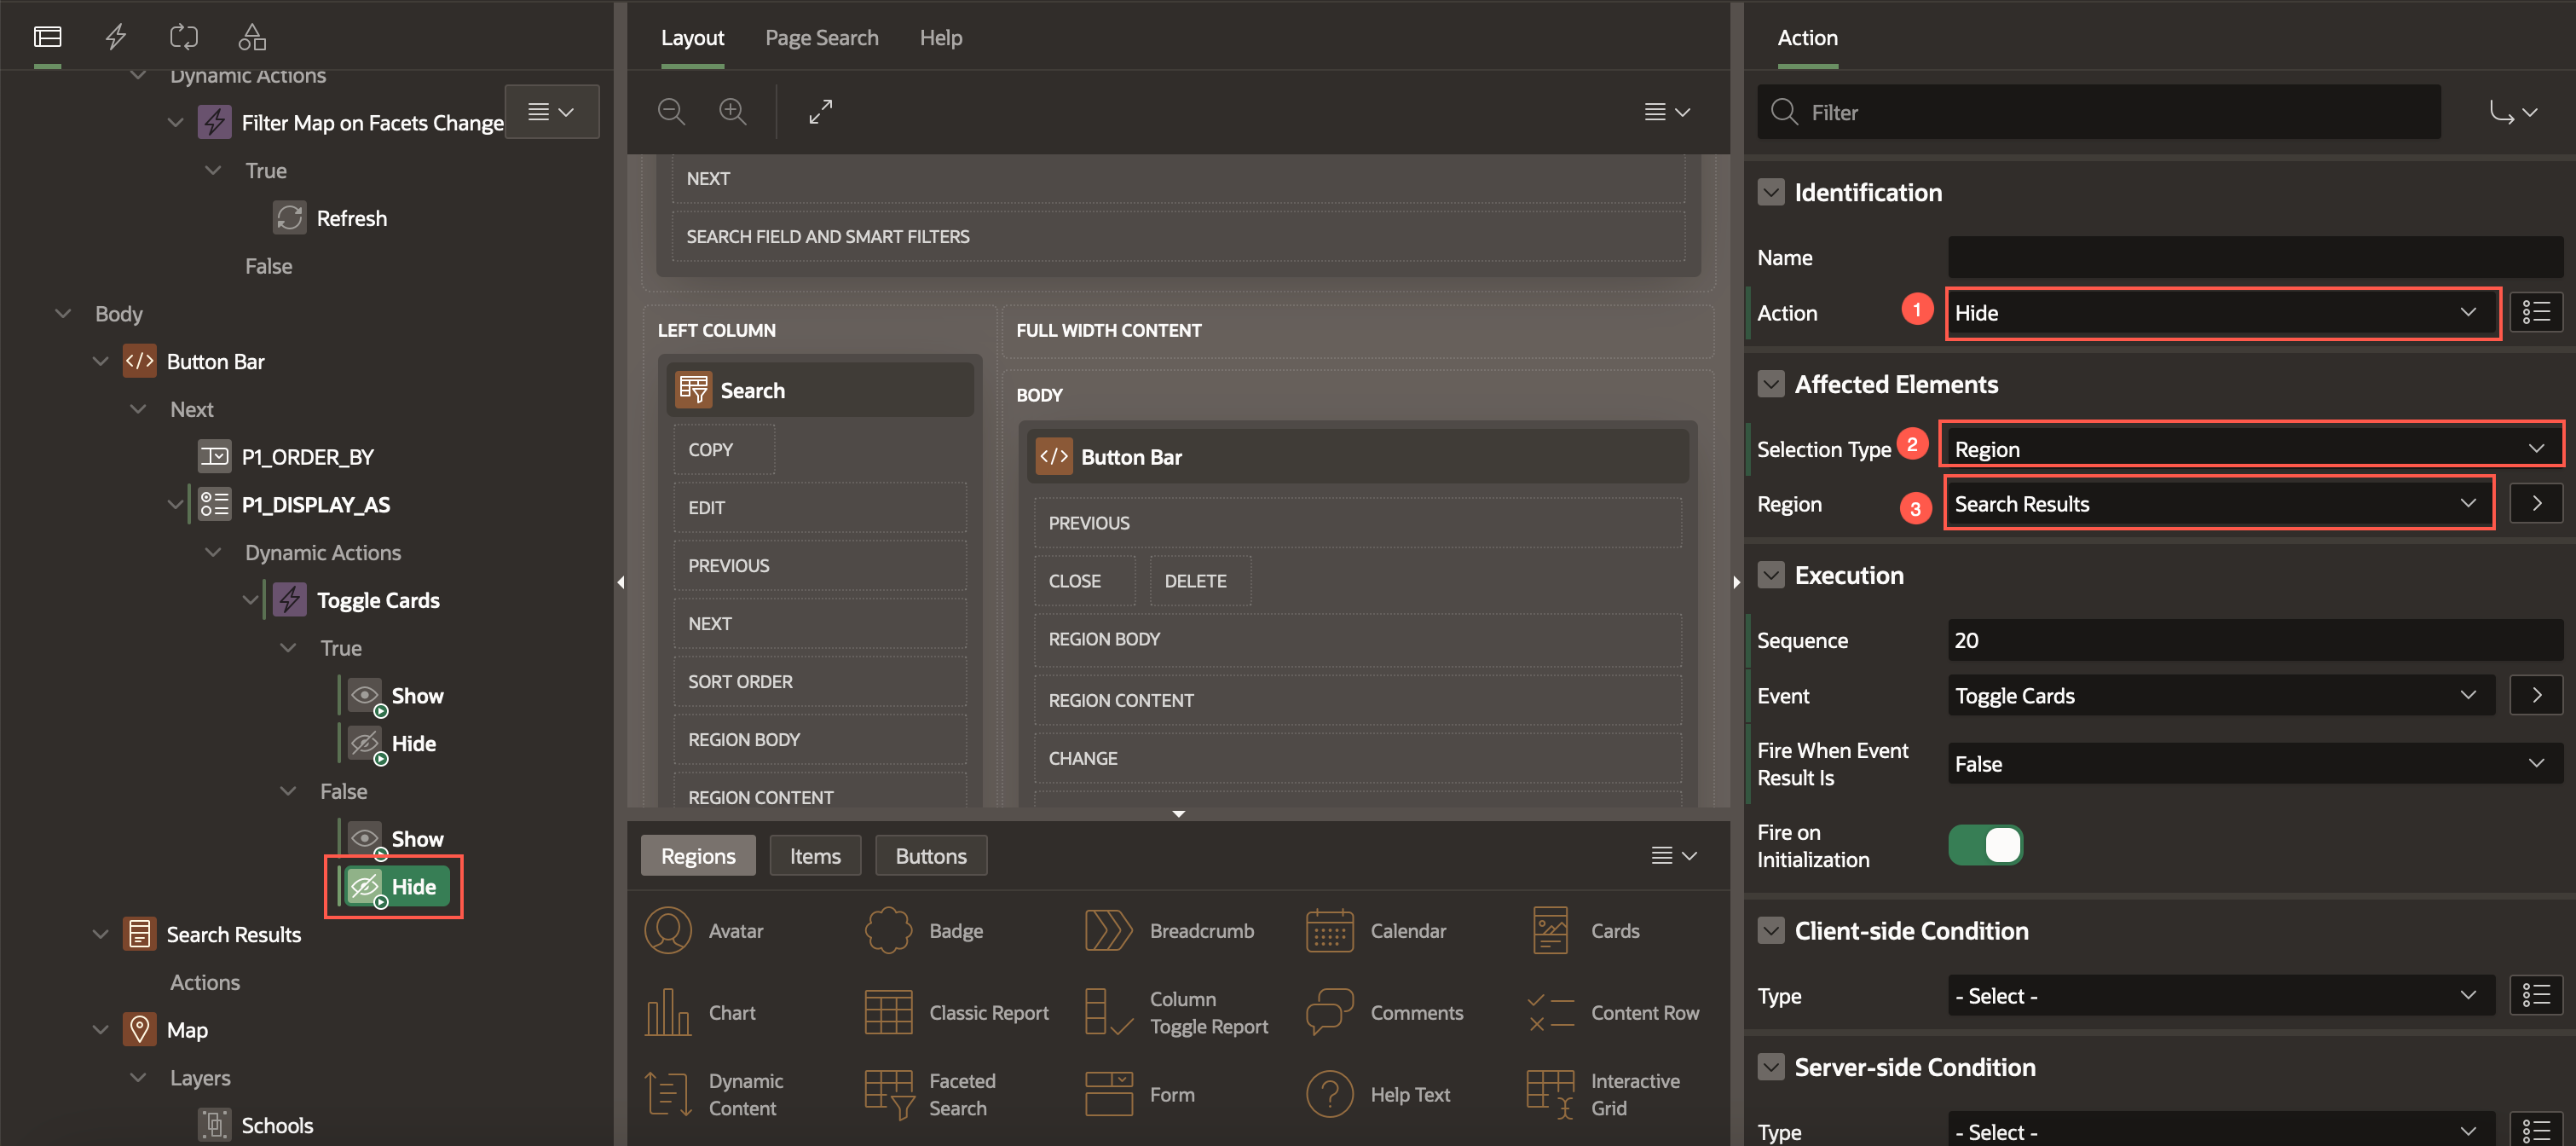
Similarly, create another FALSE action. Right-click False and select Create FALSE Action.
Enter/select the following:
Identification > Action: Hide
Under Affected Elements:
- Selection Type: Region
- Region: Search Results
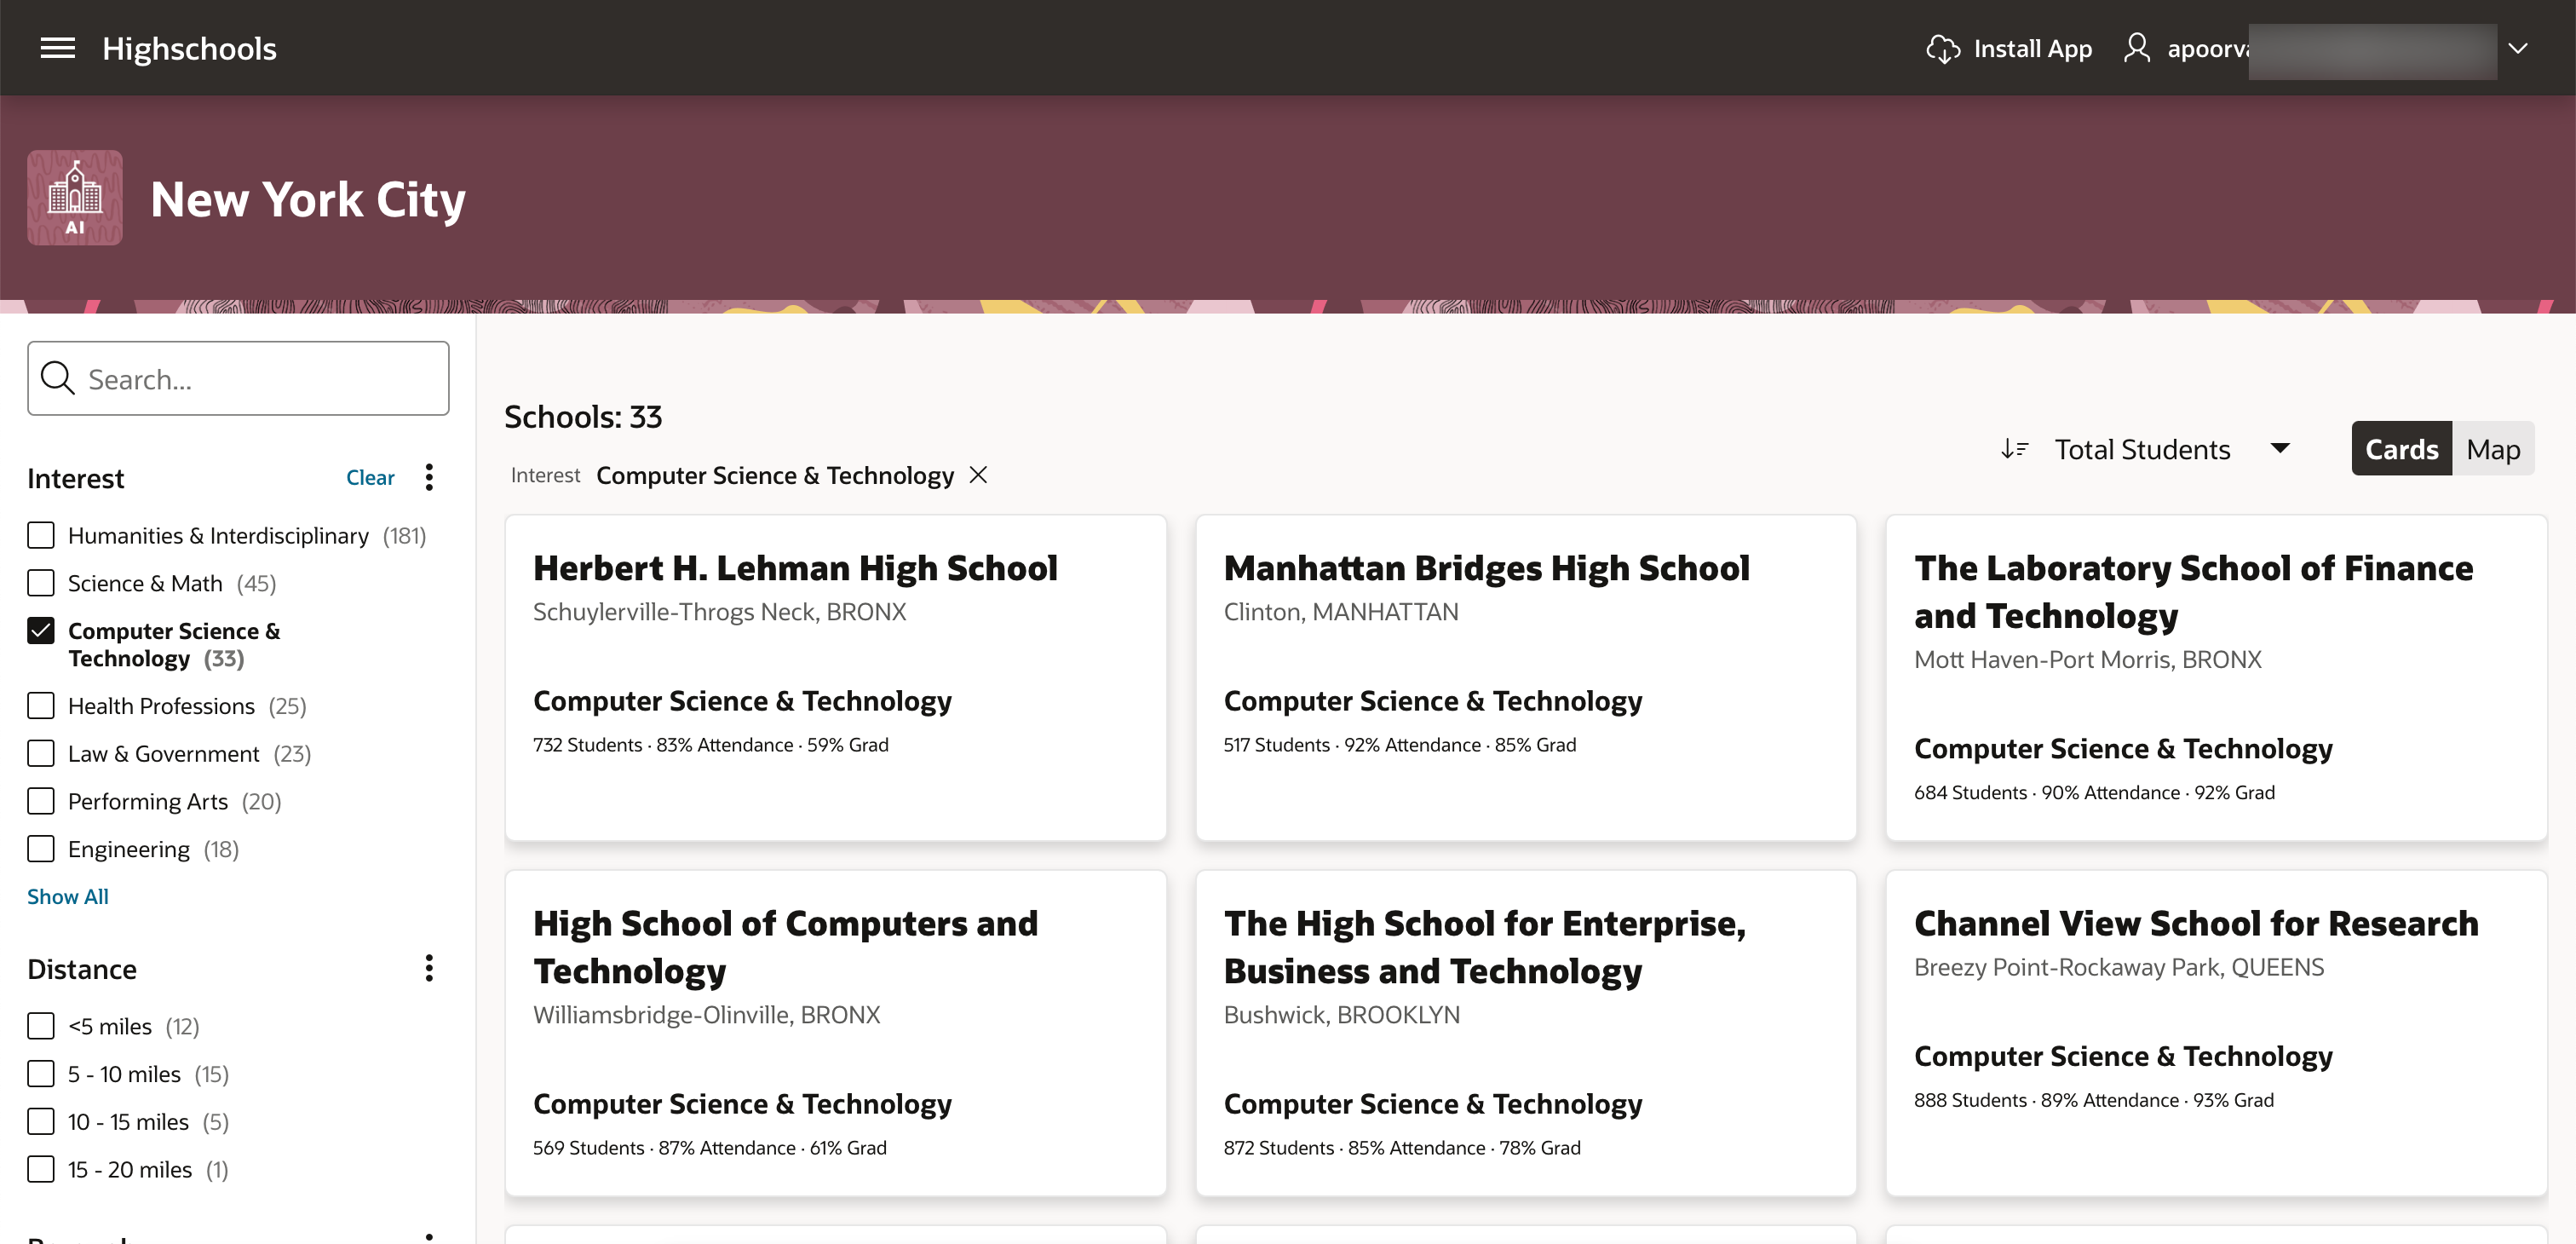
Task 4: Add Distance Facet
In this task, you add a new Distance facet to filter schools based on Spatial distance.
In the rendering tree, select the Search Results region.
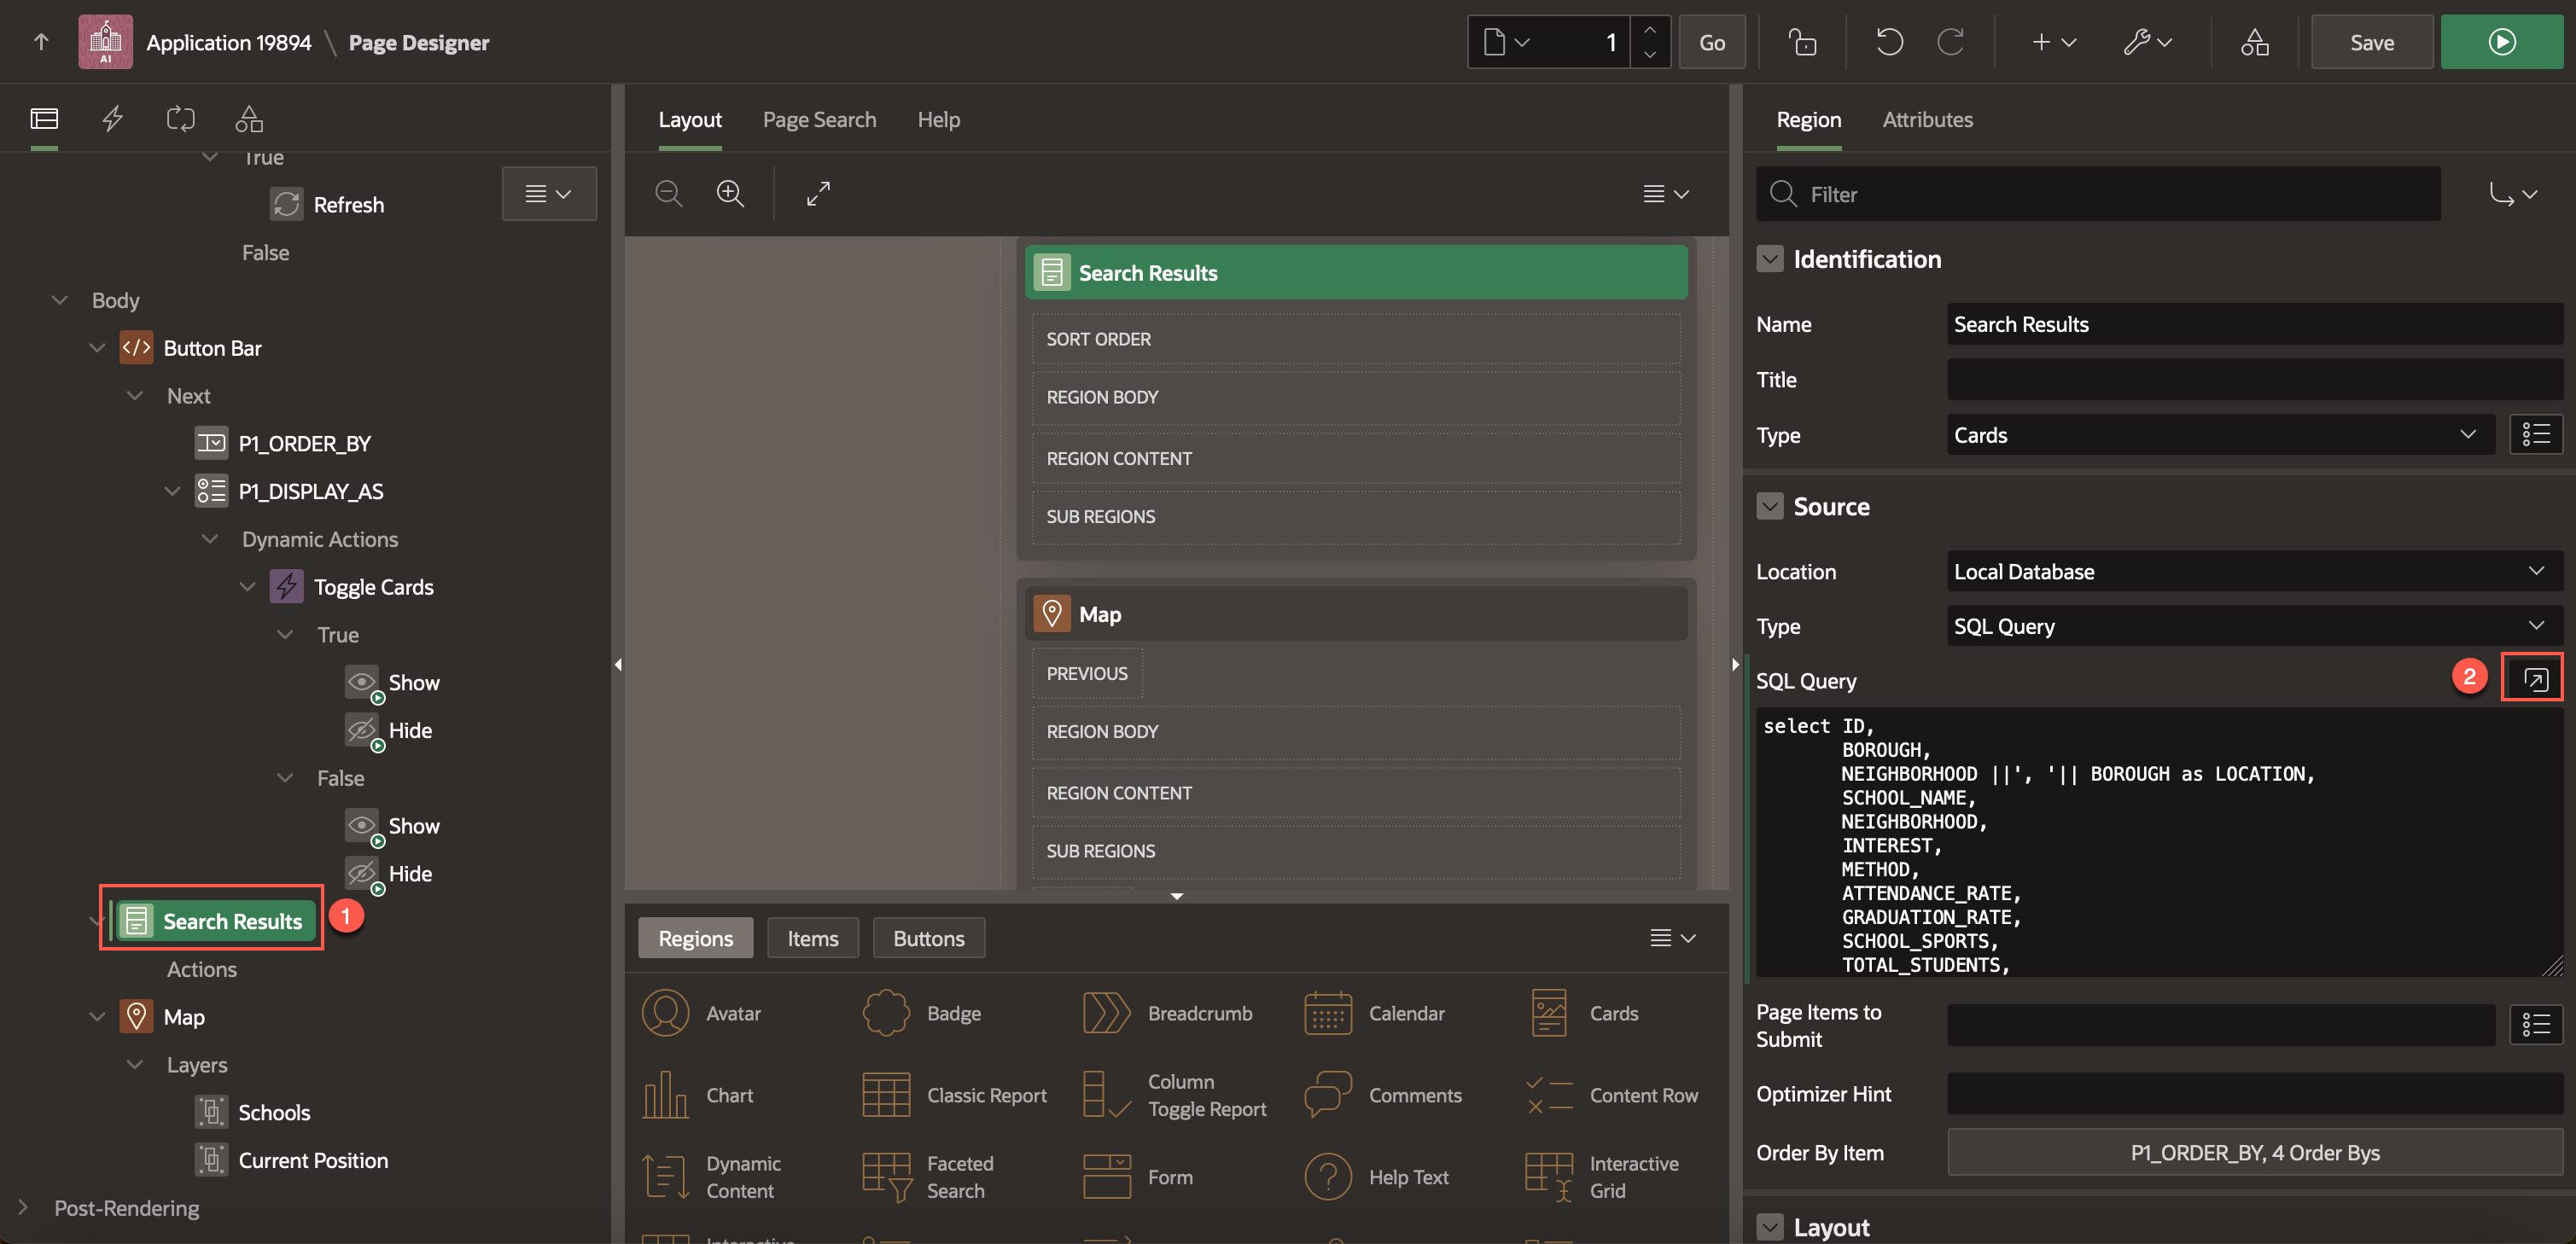
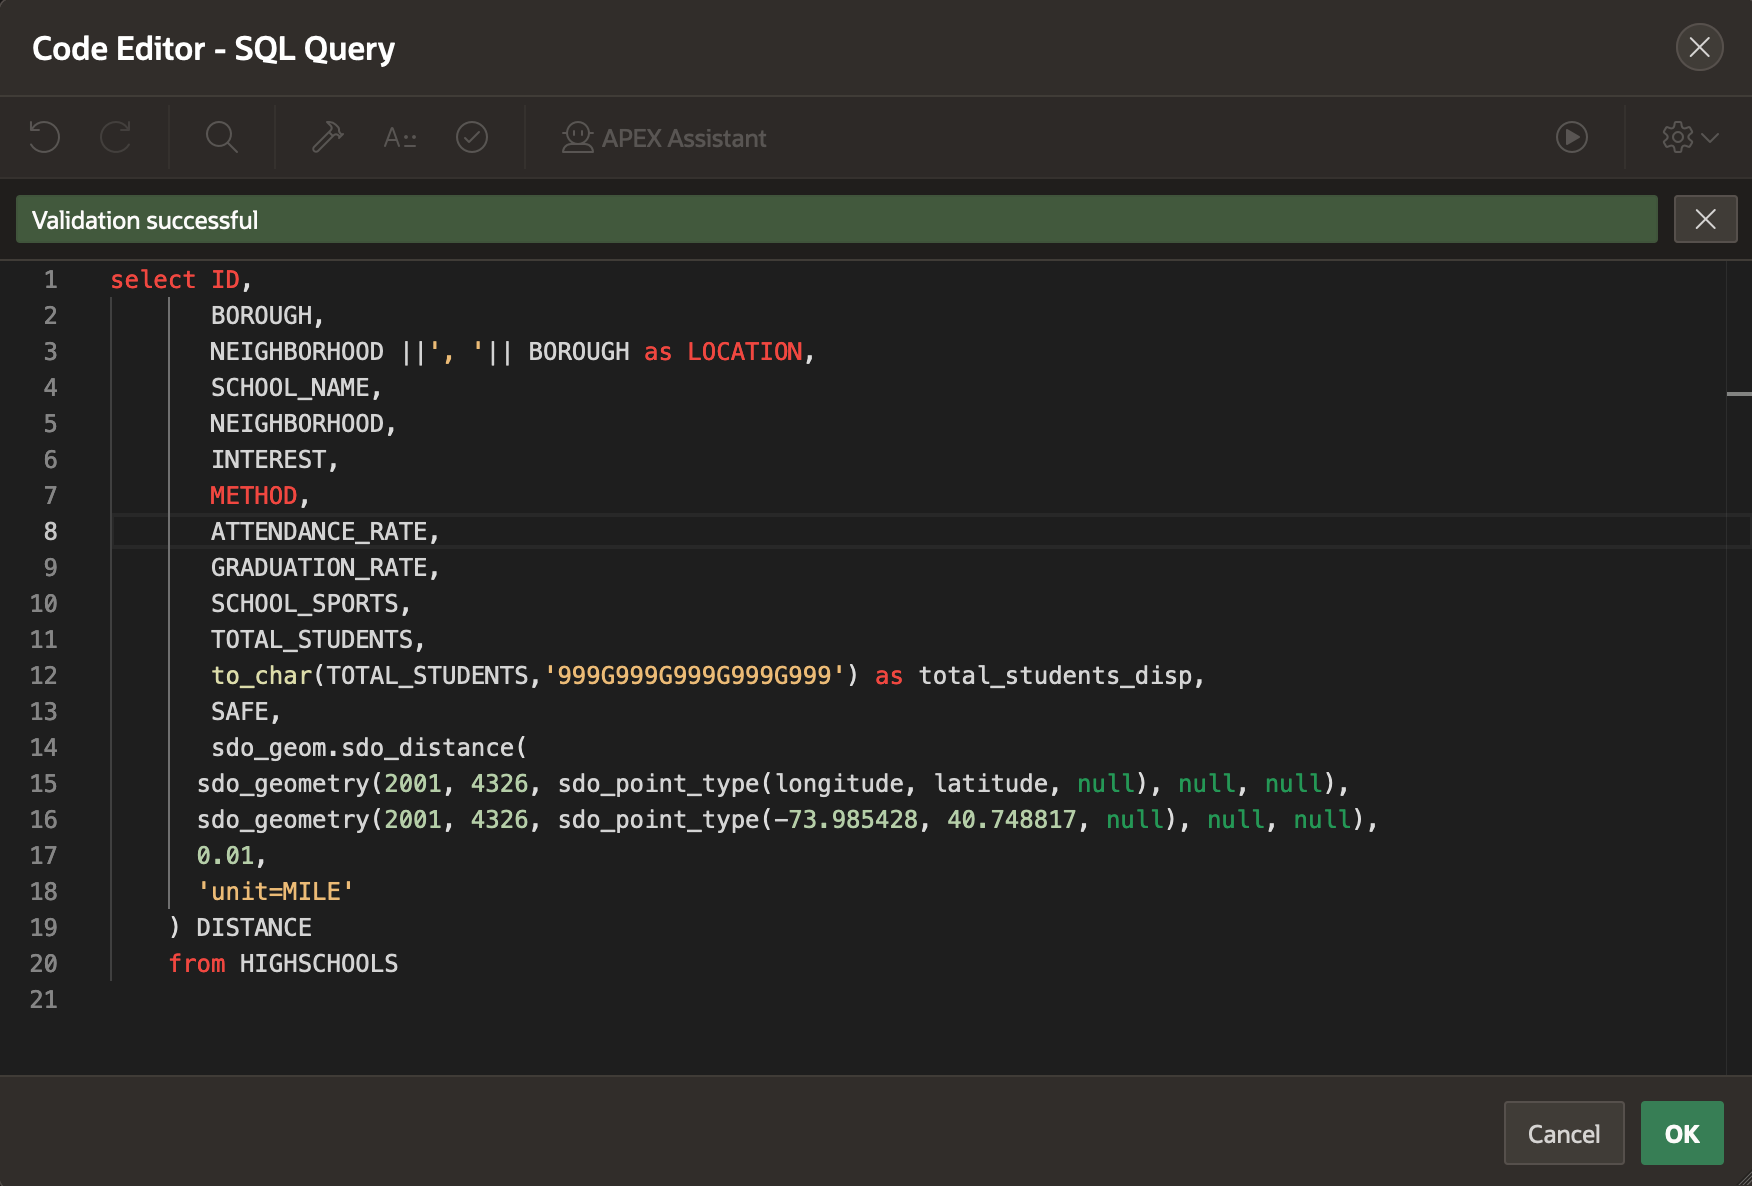
In the property editor, under Source > SQL Query, replace the code by copying and pasting the following SQL query:
select ID, BOROUGH, NEIGHBORHOOD ||', '|| BOROUGH as LOCATION, SCHOOL_NAME, NEIGHBORHOOD, INTEREST, METHOD, ATTENDANCE_RATE, GRADUATION_RATE, SCHOOL_SPORTS, TOTAL_STUDENTS, to_char(TOTAL_STUDENTS,'999G999G999G999G999') as total_students_disp, SAFE, sdo_geom.sdo_distance( sdo_geometry(2001, 4326, sdo_point_type(longitude, latitude, null), null, null), sdo_geometry(2001, 4326, sdo_point_type(-73.985428, 40.748817, null), null, null), 0.01, 'unit=MILE' ) DISTANCE from HIGHSCHOOLSClick OK.
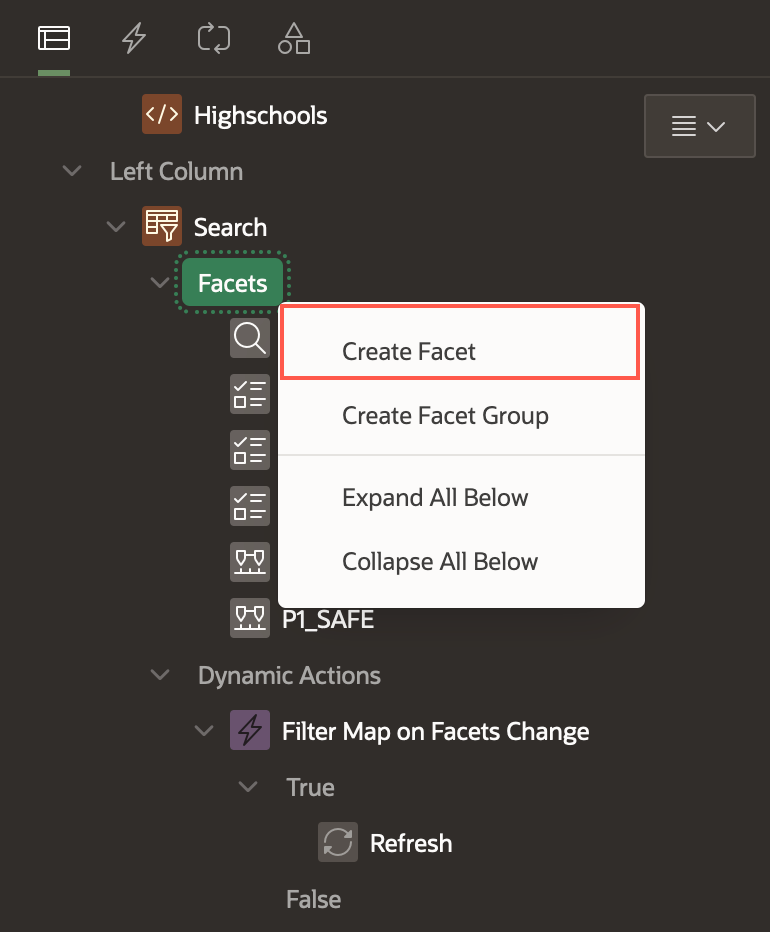
In the rendering tree, under Search, right-click Facets and select Create Facet.
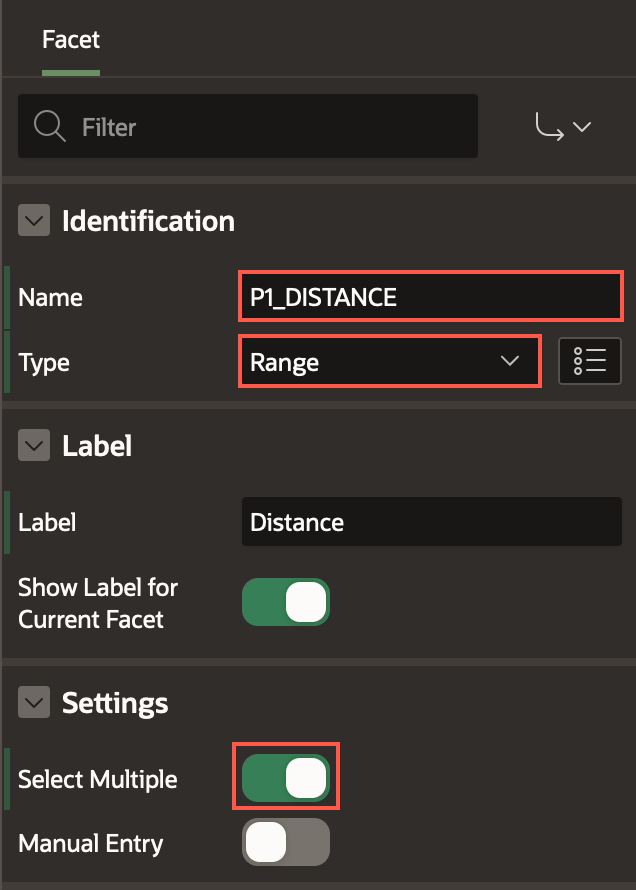
In the property editor, enter/select the following:
- Under Identification:
- Name: P1_DISTANCE
- Type: Range
- Settings > Select Multiple: Toggle the button to turn it ON.
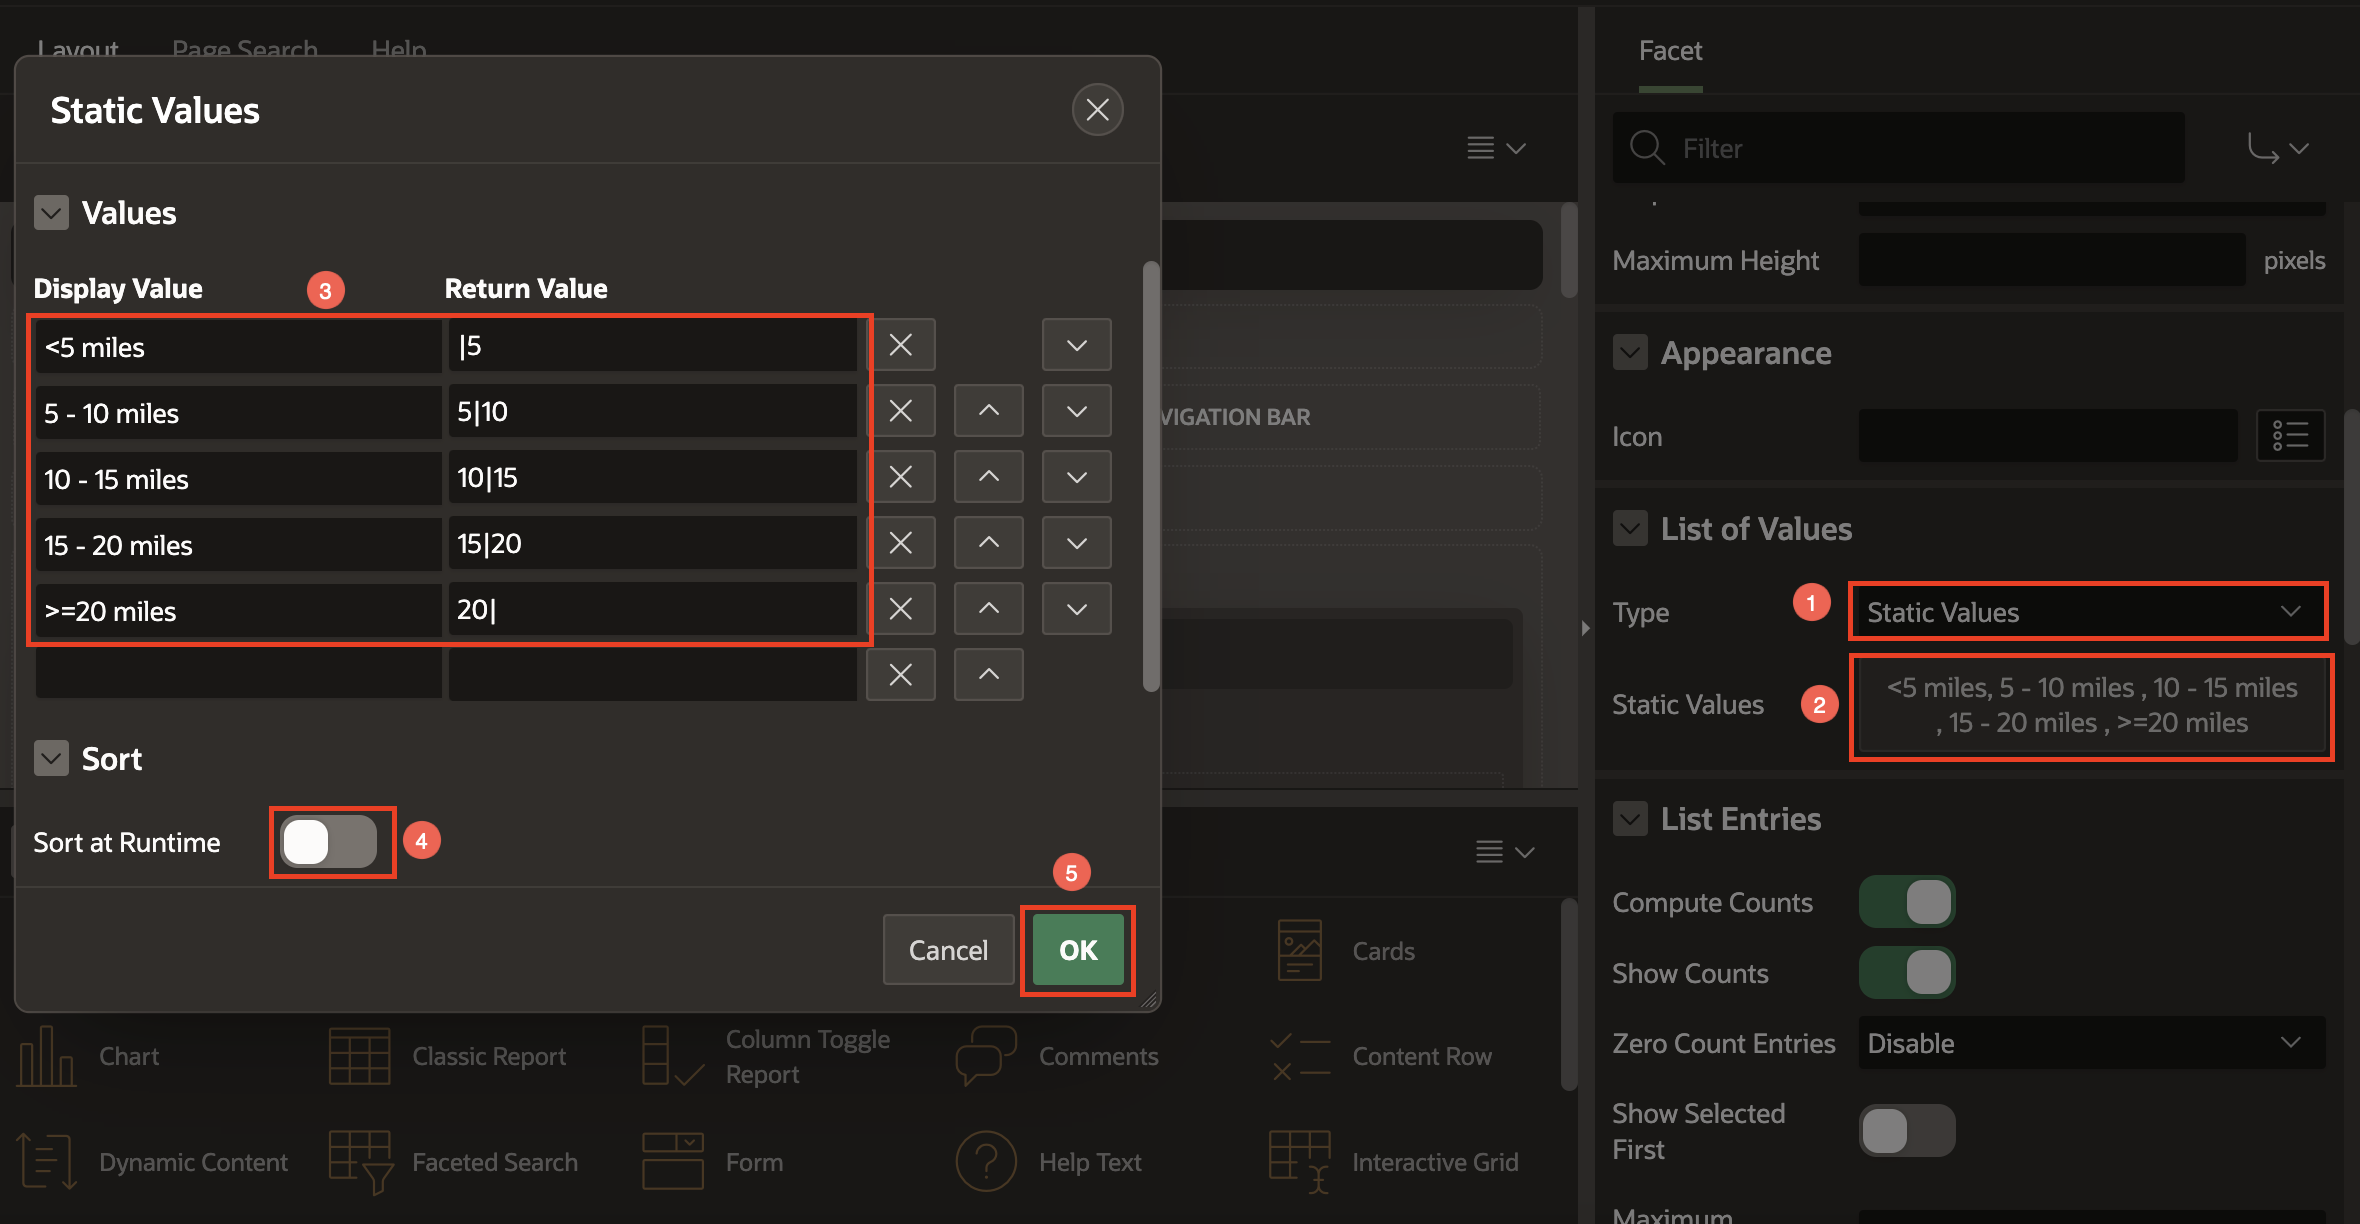
Under List of Values:
Type: Static Values
Static Values:
Table 2: Values for the Distance facet Display Value Return Value <5 miles |5 5 - 10 miles 5|10 10 - 15 miles 10|15 15 - 20 miles 15|20 >=20 miles 20| - Sort > Sort at Runtime: Toggle the button to turn it OFF.
Click OK.
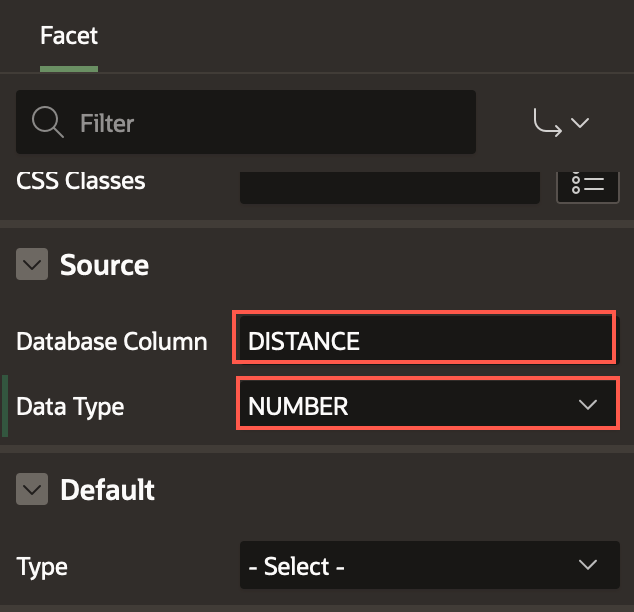
Under Source:
- Database Column: DISTANCE
- Data Type: Number
- Under Identification:
Next, we need to update the Page Items to Submit property of the Map Region to include the P1_DISTANCE facet. Select Map in the rendering tree, and in the property editor, enter/update the following:
Source > Page Items to Submit: P1_SEARCH, P1_METHOD, P1_BOROUGH, P1_INTEREST, P1_ATTENDANCE_RATE ,P1_SAFE, P1_DISTANCE
Layout > Start New Row: Toggle the button to turn it ON.
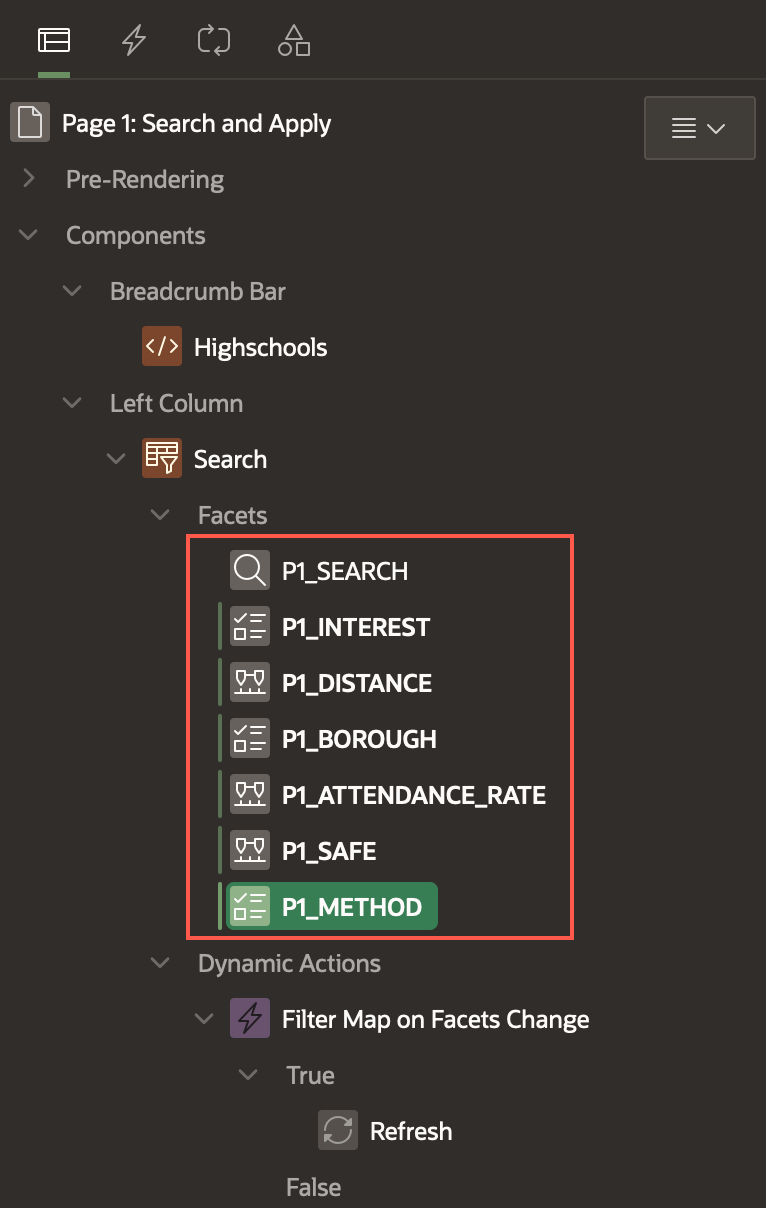
Rearrange the facets in the rendering tree by dragging and dropping, so that the facets are in the sequence as follows:
- P1_SEARCH
- P1_INTEREST
- P1_DISTANCE
- P1_BOROUGH
- P1_ATTENDANCE_RATE
- P1_SAFE
- P1_METHOD
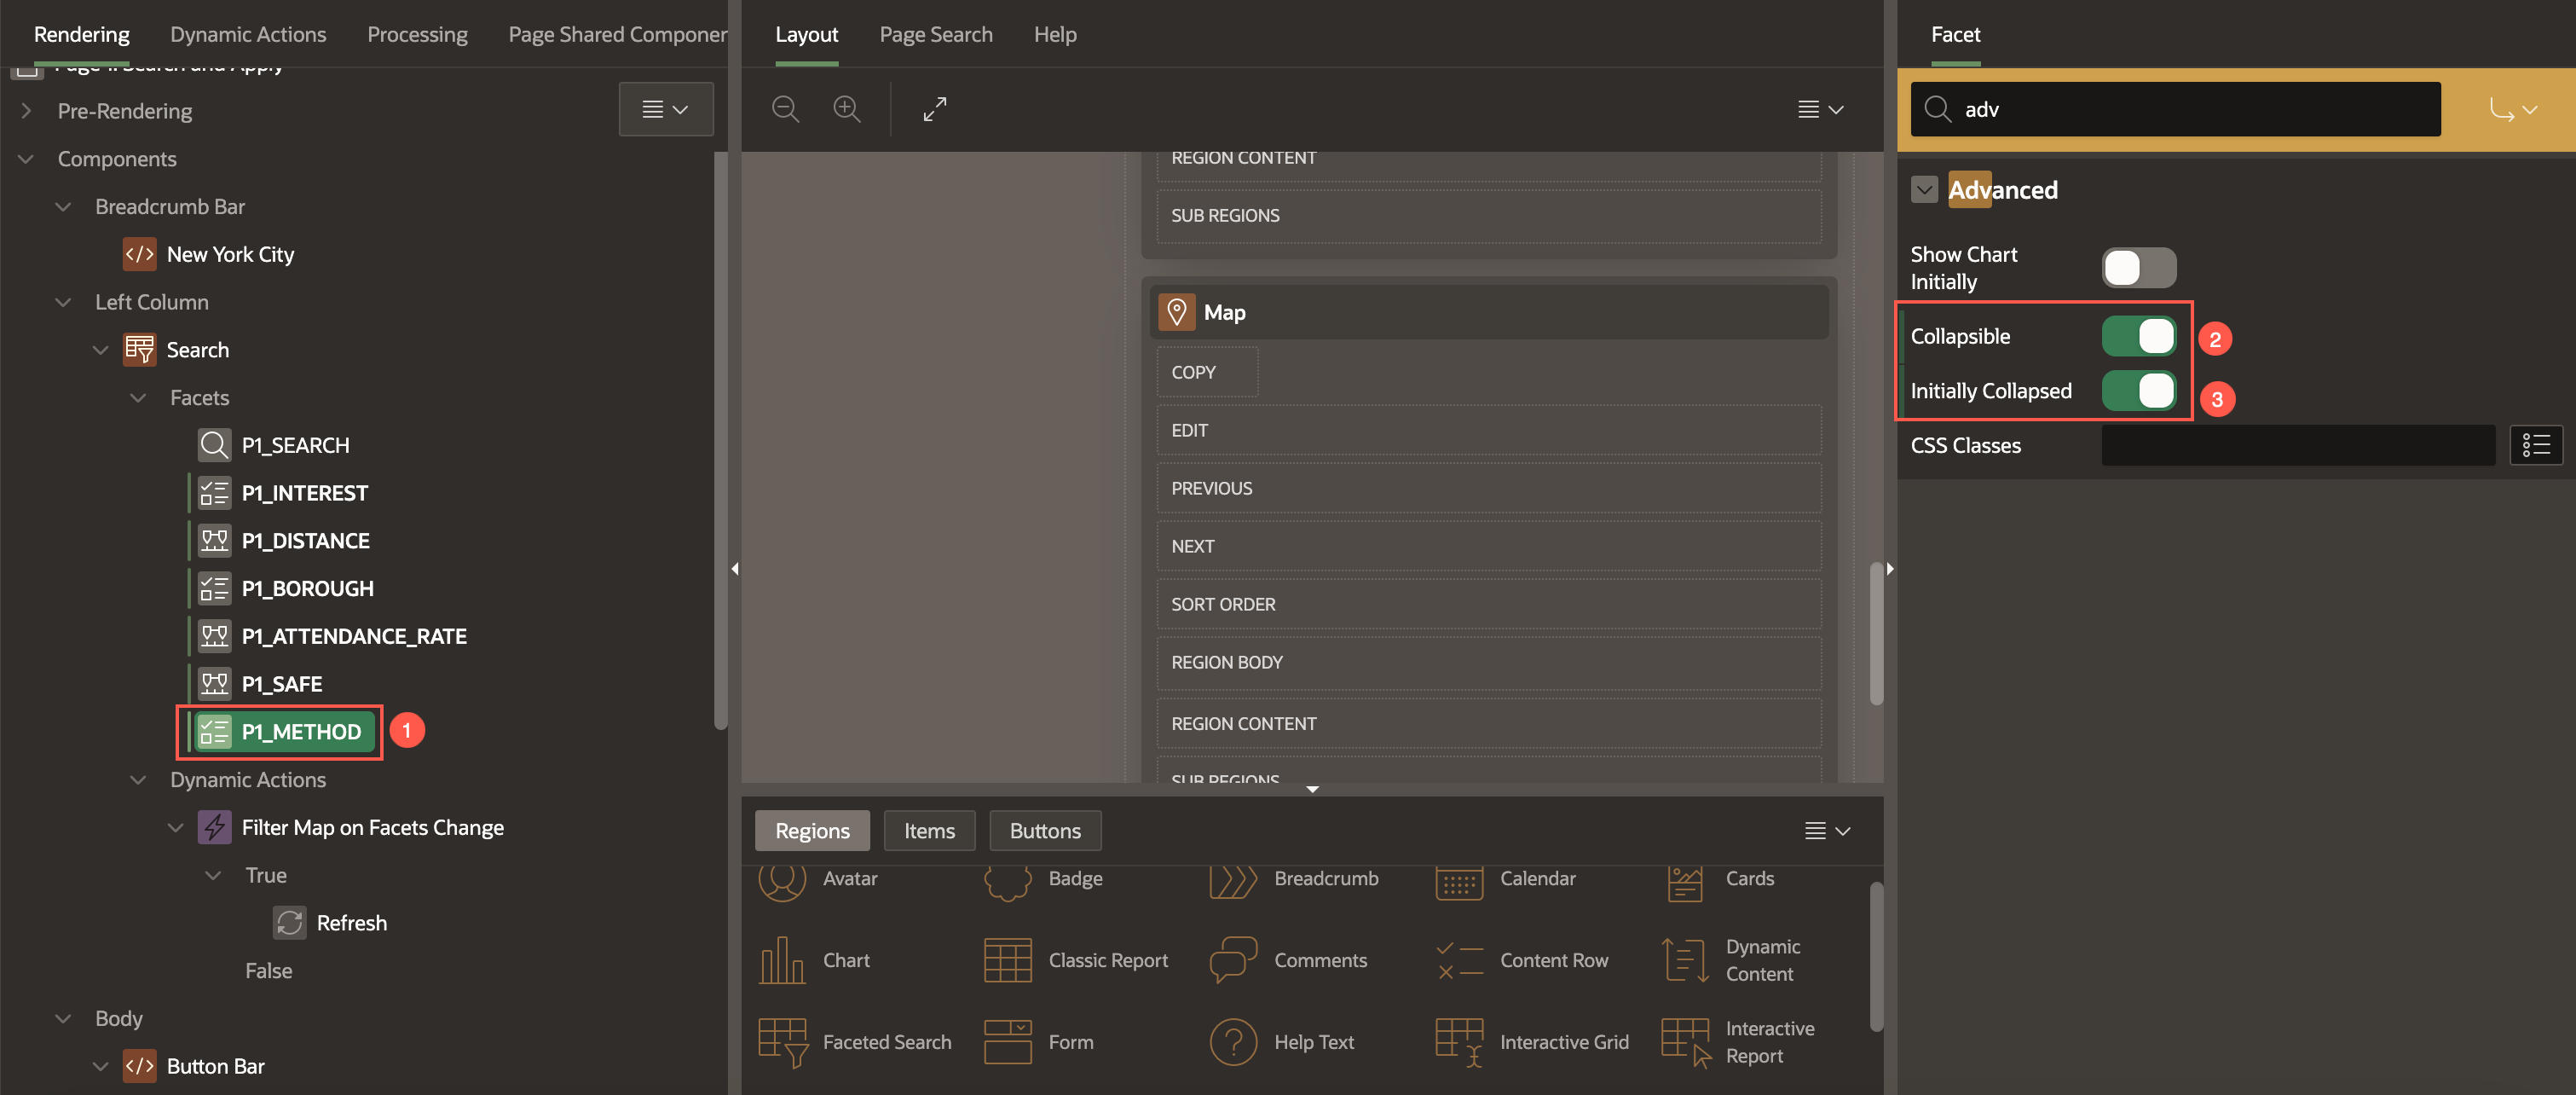
Select the Method facet, and in the property editor, edit the following:
- Under Advanced:
- Collapsible: Toggle the button to turn it ON.
- Initially Collapsed: Toggle the button to turn it ON.
- Under Advanced:
Click Save and Run page to see how the app looks.
Summary
You now know how to map a Faceted Search to a Map region. You also learned to filter the schools based on spatial distance.
You may now proceed to the next lab.
Acknowledgments
- Authors - Toufiq Mohammed, Senior Product Manager; Apoorva Srinivas, Senior Product Manager
- Contributing Author - Pankaj Goyal, Member Technical Staff
- Last Updated By/Date - Apoorva Srinivas, Senior Product Manager, February 2025